'분류 전체보기'에 해당되는 글 122건
- 2008.07.20 Chapter 5. Unix Basic Commands _ 파일관리
- 2008.07.20 Chapter 5. Unix Basic Commands _ mkdir , rm dir
- 2008.07.20 Chapter 5. Unix Basic Commands_ls CMD
- 2008.07.19 Chapter 5. Unix Basic Commands
- 2008.07.19 Chapter 4. Solaris 9 Installation
- 2008.07.19 Chapter 3. Solaris Introducing
- 2008.07.19 Chapter 2. OS Overview
- 2008.07.19 Chapter 1. UNIX History
- 2008.07.19 solaris 알림
- 2008.07.18 linux -snort , oinkmaster , 자동룰 업데이트
- 2008.07.18 linux - snort , DB 연동 , apache . webserver 연동
- 2008.07.17 linux - snort , DB 연동
- 2008.07.17 DO YOU KNOW?
- 2008.07.16 linux - snort , NIDS , 침입탐지모드
- 2008.07.15 solaris 설치-2
- 2008.07.15 solaris 설치
- 2008.07.10 linux - snort , NIDS
- 2008.07.10 linux - IDS
- 2008.07.08 linux - 침입차단 , portsentry , IDS
- 2008.07.08 linux - 침입차단 , 하이브리드(hybrid)
- 2008.07.08 linux - 침입차단 시스템
- 2008.07.06 linux - AIDE ( 호스트 기반의 침입탐지 시스템)
- 2008.07.06 오가는길에 만난..
- 2008.07.01 웃겨따!
- 2008.06.30 linux - 공개키에 의한 인증
- 2008.06.30 linux - 해시함수
- 2008.06.29 linux - 암호학 , 해시 함수
- 2008.06.29 linux - 함호학 , 공개키
- 2008.06.29 linux - 암호학 , 대칭키
- 2008.06.29 file 속성 명령어 , chattr , lsattr
파일 관리
■ touch CMD 파일 생성
■ cp CMD 파일 복사
■ mv CMD 파일 이동
■ rm CMD 파일 삭제
touch CMD
________________
touch, settime - change file access and modification times
The touch utility sets the access and modification times of
each file. The file operand is created if it does not
already exist.
빈 파일을 만들때 사용
- if file1 existed
- if file1 not existed
(명령어 형식)
# touch file1
# touch file1 file2
[참고] touch 명령어
만약 ex1.txt 파일이 존재하는 경우 "# touch ex1.txt" 사용하였다면 ex1.txt 파일의
mtime을 현재 시간으로 변경한다.
[참고] 해커(Cracker)들의 touch 명령어 사용
# ls -l file3 > file.txt
# cat file.txt
# vi file3
# touch -t 12061223 file3 (12월 6일 12:23, 파일의 mtime을 원래대로 돌린다.)
cp CMD
________________
copy files
(명령어 형식)
# cp file1 file2
# cp file1 dir1
# cp -r dir1 dir2 (if dir2 exist - dir2/dir1 생성) 기존 dir2가 있다면 dir2/dir1생성
(if dir2 not exist - dir2 생성) 기존 dir2이 없다면 생성
// mkdir –p와 비슷
# cp -i file1 file2 // -i : interactive (대화모드)
OPTIONS
-i Interactive. cp will prompt for confirmation whenever
the copy would overwrite an existing target. A y
answer means that the copy should proceed. Any other
answer prevents cp from overwriting target.
-r Recursive. cp will copy the directory and all its
files, including any subdirectories and their files to
target.
[참고] "cp -i" alias 설정
# vi ~/.kshrc(ksh인 경우)
......
alias cp='cp -i'
......
[EX] cp 명령어 실습
(실습 준비)
# cd /test
# rm -r *
# cp /etc/passwd file1
(cp file1 file2 형식 실습)
# cp file1 file2
(cp file1 dir1 형식 실습)
# mkdir dir1
# cp file1 dir1
# ls dir1
(cp -r dir1 dir2 형식 실습)
# cp -r dir1 dir2
# cp -r dir1 dir2
# ls -R
[EX] 큰 로그 파일 삭제 방법
# cp /dev/null server.log
[EX] cp 명령어에 대한 inode 변화 과정 // 원본 파일이 지워지지 않고 생기기때문
# cd /test
# touch file1
# ls -li file1 (Inode : 109326)
# cp file1 file2
# ls -li file1 file2 (file1 Inode : 109326, file2 Inode : 109341)
mv CMD
_________________
move files (rename)
(명령어 형식)
# mv file1 file2
# mv file1 dir1
# mv dir1 dir2 (if dir2 exist - dir1을 dir2로 move)
(if dir2 not exist - dir1을 dir2/dir1으로 move)
# mv -i file1 file2
[참고] mv => rename
[EX1] mv 명령어 실습
(실습 준비)
# cd /test
# rm -r *
# touch file1
# mkdir dir1
# touch dir1/file2
(mv file1 file2 형식 실습)
# mv file1 file3
(mv file1 dir1 형식 실습)
# mv file3 dir1
(mv dir1 dir2 형식 실습)
# mv dir1 dir2
# cp -r dir2 dir1
# mv dir1 dir2
[EX2] mv 명령어에 대한 inode 변화 과정 // 원본 데이터의 이름만 바뀜
# cd /test
# touch file1
# ls -li file1 (Inode : 109326)
# mv file1 file3
# ls -li file3 (file3 Inode : 109326)
rm CMD
_________________
(명령어 형식)
# rm file1
# rm file1 file2
# rm -r dir1
# rm -i file1
[참고] rm -i & rm -f
# alias rm='rm -i'
# rm -r /test/dir1
# \rm -r /test/dir1
[EX] \rm -i 명령어 실습
(실습 준비)
# cd /test
# rm -r *
# mkdir dir1
# touch dir1/file1
# touch dir1/file2
(\rm -i 옵션 실습)
# alias rm='rm -i'
# rm -r dir1
rm: examine files in directory dir1 (yes/no)? <----- <Ctrl + C> 입력
# \rm -r dir1
[참고] 역슬래쉬(Backslash)의 사용
# echo $HOSTNAME
# echo \$HOSTNAME
# find / \( -perm -4000 -o -perm -2000 \) -type f
# find / -name core -type f -exec rm {} \;
[참고] 파일 생성 및 삭제 과정
● 파일 생성시
1) 슈퍼 블럭에서 하나의 Inode를 할당한다.
2) Inode의 내용들을 초기화한다.
3) Inode-Number와 파일시스템을 해당 상위 디렉토리에 기록한다.
4) Inode-List(Inode Table)에 있는 한 엔트리를 할당한다.
5) 사용자 영역의 파일 지시자(File Descriptor)에 한 엔트리를 할당한다.
6) 파일 지시자를 프로세스에게 반환한다.
● 파일 삭제시
1) 주어진 경로명을 Inode-List(Inode Table)의 포인터로 바꾼다.
2) 주어진 파일이 마운트되었으면 삭제 못하고 반환한다.
3) 주어진 파일이 공유된 텍스트이고 링크 수가 1이면 반환한다.
4) 파일의 링크 수를 하나 감소 시키고, 상위 디렉토리에서 그 파일의 Inode Number를
0으로 설정한다.
clear CMD
_________________
clear the terminal screen
clear clears your screen if this is possible. It looks in
the environment for the terminal type and then in the ter-
minfo database to figure out how to clear the screen.
화면의 내용을 지우고 커서를 화면의 최 상단으로 이동시킴
# clear
파일 내용 관리
■ cat CMD
■ more CMD
■ haed CMD
■ tail CMD
cat CMD
_________________
concatenate and display files
(명령어 형식)
# cat file1
# cat -n file1 (-n : Number Line)
# cat file1 file2 > file3
[EX] cat 명령어 실습
# cat /etc/passwd
# cat -n /etc/passwd
# cat /etc/passwd | grep user01
[EX] file1, file2 두개의 파일을 하나의 file3으로 합치기
Concatenates file1 and file2, and writes the result in file3
# echo 1111 > file1
# echo 2222 > file2
# cat file1 file2
# cat file1 file2 > file3
# cat file3
more CMD
_________________
browse or page through a text file
The more utility is a filter that displays the contents of a
text file on the terminal, one screenful at a time. It nor-
mally pauses after each screenful. /usr/bin/more then prints
--More-- and /usr/xpg4/bin/more then prints file at the bot-
tom of the screen. If more is reading from a file rather
than a pipe, the percentage of characters displayed so far
is also shown.
파일의 내용을 한 화면 단위로 봄.
# more file1
----------------------------------------
기능 설명
----------------------------------------
space key 한화면 앞으로
enter key 한라인 앞으로
/찾을문자열 빠른 찾기
q more 화면에서 빠져나옴
----------------------------------------
[EX] more 명령어 실습
# CMD | more
# cat /etc/inetd.conf | more
# more /etc/inetd.conf
haed CMD
__________________
display first few lines of files
The head utility copies the first number of lines of each
filename to the standard output. If no filename is given,
head copies lines from the standard input. The default value
of number is 10 lines.
# head /etc/passwd
# head -5 /etc/passwd
[EX] head 명령어의 활용 예
# ps -ef // -e : every , -f : full list
# ps -ef | more
# ps -ef | grep inetd
# ps -ef | head -1
UID PID PPID C STIME TTY TIME CMD
# ps -ef | head -1 ; ps -ef | grep inetd
UID PID PPID C STIME TTY TIME CMD
root 185 1 0 10:25:16 ? 0:00 /usr/sbin/inetd -s
# alias pps='ps -ef | head -1 ; ps -ef | grep $1'
# pps inetd
tail CMD
__________________
deliver the last part of a file
The tail utility copies the named file to the standard out-
put beginning at a designated place. If no file is named,
the standard input is used.
Copying begins at a point in the file indicated by the
-cnumber, -nnumber, or +number options (if +number is speci-
fied, begins at distance number from the beginning; if
-number is specified, from the end of the input; if number
is NULL, the value 10 is assumed). number is counted in
units of lines or byte according to the -c or -n options,
or lines, blocks, or bytes, according to the appended option
l, b, or c. When no units are specified, counting is by
lines.
# tail /etc/passwd // default view -10 line
# tail -5 /etc/passwd
# tail -f /var/adm/sulog // -f : file moniter view option
< Q & A >
[질문] 파일이 30 라인으로 되어져 있는데 파일 중간의 10라인만 프린터로 출력해 볼수
있나요?
[답변] 다음과 같은 명령어를 통해 가능합니다.
# head -20 filename | tail -10 | lp
[EX1] tail -1
# useradd -m -d /export/home/user02 -s /bin/ksh user02
# passwd user02
# tail -1 /etc/passwd
or
# cat /etc/passwd | grep user02
[EX2] 로그 모니터링
[TERM1] 관리자 윈도우
# tail -f /var/adm/sulog
[TERM2] 사용자 윈도우
# su - user01
$
디렉토리 관리
■ mkdir CMD
■ rmdir CMD
mkdir CMD
________________
make directories
The mkdir command creates the named directories in mode 777
(possibly altered by the file mode creation mask umask(1)).
Standard entries in a directory (for instance, the files
".", for the directory itself, and "..", for its parent) are
made automatically. mkdir cannot create these entries by
name. Creation of a directory requires write permission in
the parent directory.
The owner-ID and group-ID of the new directories are set to
the process's effective user-ID and group-ID, respectively.
mkdir calls the mkdir(2) system call.
빈 디렉토리 생성
(명령어 형식)
# mkdir dir1
# mkdir dir1 dir2
# mkdir -p dir1/dir2/dir3 // -p : 기존에 폴더가 있으면 만들지 않고 없으면 만든다.
# man mkdir
.....
OPTIONS
-p With this option, mkdir creates dir by creating
all the non-existing parent directories first.
The mode given to intermediate directories will
be the difference between 777 and the bits set in
the file mode creation mask. The difference, how-
ever, must be at least 300 (write and execute
permission for the user).
.....
[EX] mkdir -p 명령어 실습
# cd /test
# rm -r *
# mkdir dir1
# mkdir -p dir1/dir2/dir3
# ls -lR
rmdir CMD
________________
remove directory entries
The rm utility removes the directory entry specified by each
file argument. If a file has no write permission and the
standard input is a terminal, the full set of permissions
(in octal) for the file are printed followed by a question
mark. This is a prompt for confirm!ation. If the answer
begins with y (for yes), the file is deleted, otherwise the
file remains.
빈 디렉토리 삭제
(명령어 형식)
# rmdir dir1
# rmdir dir1 dir2
OPTIONS
-p Allows users to remove the directory dirname and its
parent directories which become empty. A message is
printed to standard error if all or part of the path
could not be removed.
[참고] 비어있지 않은 디렉토리 삭제시
# rm -r dir2 (recusive) // 비어있지 않을경우 파일 삭제후 폴더 삭제 !!! recusive!
출처 : http://cafe.daum.net/bscsolaris
ls CMD
_____________
list contents of directory
For each file that is a directory, ls lists the contents of
the directory. For each file that is an ordinary file, ls
repeats its name and any other information requested. The
output is sorted alphabetically by default. When no argument
is given, the current directory is listed. When several
arguments are given, the arguments are first sorted
appropriately, but file arguments appear before directories
and their contents.
(기본 사용 방법)
# ls -l
# ls -l dirname
# ls -ld
# ls -ld dirname // -d : direct 정보 -l : list
(옵션 사용 방법)
# ls
# ls -l
# ls -al
# ls -alF | more
# ls -ld /work
# ls -lR /work
# ls -li file1
# ls –altr // -t : sort by time stamp -r : reverse alphabetic
OPTIONS
-d If an argument is a directory, lists only its name
(not its contents). Often used with -l to get the
status of a directory.
-F Marks directories with a trailing slash (/), doors
with a trailing greater-than sign (>), executable
files with a trailing asterisk (*), FIFOs with a
trailing vertical bar (|), symbolic links with a
trailing 'at' sign (@), and AF_UNIX address family
sockets with a trailing equals sign (=).
-i For each file, prints the i-node number in the first
column of the report.
-l Lists in long format, giving mode, ACL indication,
number of links, owner, group, size in bytes, and time
of last modification for each file (see above). If the
file is a special file, the size field instead con-
tains the major and minor device numbers. If the time
of last modification is greater than six months ago,
it is shown in the format `month date year' for the
POSIX locale. When the LC_TIME locale category is not
set to the POSIX locale, a different format of the
time field may be used. Files modified within six
months show `month date time'. If the file is a sym-
bolic link, the filename is printed followed by "->"
and the path name of the referenced file.
-r Reverses the order of sort to get reverse alphabetic
or oldest first as appropriate.
-t Sorts by time stamp (latest first) instead of by name.
The default is the last modification time. (See -u and
-c.)
[참고] ls -l filename 명령어로 보여지는 출력화면 해석
# ls -l file1
-rw-r--r-- 1 user01 staff 432 시간 file1
- : d(directory), - (Regular File), s(Socket File), p(Pipe File),
l(Link File), b(block device file), c(character device file)
rw- : user01 사용자가 file1에 대한 퍼미션 설정(read, write)
r-- : staff이라는 그룹에 속한 사용자들이 file1에 대한 퍼미션 설정(read)
r-- : user01도 아니고 staff이라는 그룹에도 속하지 못한 사용자들이 file1에
대한 퍼미션(read)
1 : Hard Link Count
user01 : file1에 대한 소유권(Ownership)
staff : file2에 대한 그룹권(Groupship)
432 : 파일의 크기(File Size, bytes)
시간 : 파일이 수정되었거나 생성된 시간(mtime, Modify Time)
(mtime: Modify Time, ctime: Change Time, atime: Access Time) // ctim : 속성정보
file1 : 파일의 이름(Filename)
[참고] 파일 또는 디렉토리만 출력
# alias lsf='ls -l | grep "^-"'
# alias lsd='ls -l | grep "^d"'
# lsf
# lsd
[EX] lsf, lsd 실습
# alias lsf
# alias lsd
# cd /etc
# lsf
# lsd
[참고] 변환된 파일 사이즈 출력
alias ls='ls -hF' (-h : human) // -F 읽기 편한 형태로 변형
ls -l /etc/passwd
[참고] ls alias 선언
alias ls='ls -hF'
alias ll='ls -ailF | more'
alias lsf='ls -l | grep "^-"' // 일반 파일만 검색 할시 ls 정보에서 – 으로 시작하는경우
alias lsd='ls -l | grep "^d"' // directory 만 보고 싶을경우 ls 정보에서 d 로 시작하는경우
[참고] DOS / UNIX 명령어 비교
_________________________________________________________________
DOS UNIX
_________________________________________________________________
display list of files dir/w dir ls
dir ls -l
display contents of file type cat
display file with pauses type filename | more more
copy file copy cp
find string in file find grep
fgrep
compare files comp diff
rename file rename OR ren mv
delete file erase OR del rm
delete directory rmdir OR rd rmdir
change file protection attrib chmod
create directory mkdir OR md mkdir
change working directory chdir OR cd cd
get help help man
apropos
display date and time date, time date
display free disk space chkdsk df
print file print lpr
display print queue print lpq
_________________________________________________________________
Chapter 6. Unix Basic Commands
________________________________
■ UNIX 명령어 형식
# command [option(s)] [argument(s)]
(명령어)
# ls
# cal
# uname
(명령어 + 옵션)
# uname -s
# uname -a
# ls -l
(명령어 + 인자)
# ls /var
# cal 2002
(명령어 + 옵션 + 인자)
# ls -l /var
[참고] 옵션에 대한 설명
# ls -a -l -F
# ls -al -F
# ls -alF
# ls -aFl // F : 파일 성격에 따른 / * @ 표시된다 디렉토리 실행파일 심볼릭 등등.
[참고] 옵션의 인자가 존재하는 경우의 예
# cmd -f arg1 -i (0)
# cmd -if arg1 (0)
# cmd -fi arg1 (X)
운영체제의 기본적인 정보 확인
- uname CMD
- date CMD
- cal CMD
uname CMD // 현 시스템의 정보
______________
print name of current system
The uname utility prints information about the current sys-
tem on the standard output. When options are specified, sym-
bols representing one or more system characteristics will be
written to the standard output. If no options are specified,
uname prints the current operating system's name. The
options print selected information returned by uname(2),
sysinfo(2), or both.
- 커널 패치 버전 확인(Kernel Patch Version, Kernel ID)
SunOS nara 5.9 Generic_118559-11 i86pc i386 i86pc
# uanme -s
SunOS //os
# uname -r
5.9 //release level
# uname -sr
SunOS 5.9
# uname -n //hostname
nara
# uname -i //architecture or platform
i86pc
# uname -p // process type
i386
# uname -X // 확장된 정보
System = SunOS
Node = nara
Release = 5.9
KernelID = Generic_118559-11
Machine = i86pc
BusType = <unknown>
Serial = <unknown>
Users = <unknown>
OEM# = 0
Origin# = 1
NumCPU = 2
(출력화면 해석) Solaris 9 x86 on VMWare
# uname -a
SunOS solaris254 5.9 Generic_118559-11 i86pc i386 i86pc
----------------------------------------------------------------
종류 설명
----------------------------------------------------------------
SunOS : 운영체제 종류
solaris254 : 호스트 이름
5.9 : 운영체제 릴리즈
Generic_118559-11 : 커널 아이디(커널 식별자)
i86pc : 머신아키텍쳐 (예: sun4u, sun4m, sun4c, ...)
i386 : 프로세스 종류(예: sparc, i386, i686, .....)
i86pc : 하드웨어 구현 플랫폼
----------------------------------------------------------------
(출력화면 해석) Solaris 9 Sparc (Ultra 10)
# uname -a
SunOS sun99 5.9 Generic sun4u sparc SUNW,Ultra-5_10
(출력화면 해석) Sun Enterprise 3500
# uname -a
SunOS sun02 5.9 Generic_118558-11 sun4u sparc SUNW,Ultra-Enterprise
# man uname
.....
OPTIONS
-a Prints basic information currently available from the
system.
-i Prints the name of the hardware implementation (platform).
-m Prints the machine hardware name (class). Use of this
option is discouraged; use uname -p instead. See NOTES
section below.
-n Prints the nodename (the nodename is the name by which
the system is known to a communications network).
-p Prints the current host's ISA or processor type.
-r Prints the operating system release level.
-s Prints the name of the operating system. This is the
default.
-X Prints expanded system information, one information
element per line, as expected by SCO UNIX. The
displayed information includes:
o system name, node, release, version, machine,
and number of CPUs.
o BusType, Serial, and Users (set to "unknown" in
Solaris)
o OEM# and Origin# (set to 0 and 1, respectively)
.....
[참고] 호스트 이름 변경
호스트이름은 부팅시에 /etc/rcS.d/S30network.sh 스크립트안에서 uname 명령어를 사
용하여 설정되고, 이때 /etc/nodename 파일의 내용을 호스트 이름으로 설정한다.
솔라리스 호스트 이름 변경 형식
# uname -S knitXXX (/etc/rcS.d/S30network.sh)
# hostname knitXXX
[EX] Hostname Change
# hostname
# hostname knitXXX
# uname -n
# uname -S solarisXXX
[참고] 프로세서(CPU)에 대한 정보
psrinfo
- displays information about processors
[EX] 프로세스 정보 확인
# psrinfo
# psrinfo -p // process #
# psrinfo -v // verbose
# psrinfo -pv
[참고] 서버의 운영체제 종류와 버전 확인
# cat /etc/release (Intel Platform on VMWare)
Solaris 9 9/05 s9x_u8wos_05 x86
Copyright 2005 Sun Microsystems, Inc. All Rights Reserved.
Use is subject to license terms.
Assembled 01 August 2005
# cat /etc/release (E3500)
Solaris 9 9/05 s9s_u8wos_05 SPARC
Copyright 2005 Sun Microsystems, Inc. All Rights Reserved.
Use is subject to license terms.
Assembled 04 August 2005
[참고] 운영체제의 전반적인 정보를 확인
/root/docs/Reference/SolarisSystemInformation.txt
/root/docs/Reference/SystemInformationVerification.txt
dtterm CMD
______________
emulate a terminal window
The dtterm utility provides runtime support of legacy appli-
cations written for terminals conforming to ANSI X3.64-1979
and ISO 6429:1992(E), such as the DEC VT220.
# echo $TERM
dtterm
# dtterm &
[참고] 실행이 안되는 경우(PATH 변수 확인)
# /usr/dt/bin/dtterm &
or
# export PATH=$PATH:/usr/dt/bin
# dtterm &
netscape CMD
________________
start Netscape Communicator for Solaris
Netscape Communicator for Solaris is comprised of a
comprehensive set of components that integrates browsing,
email, web-based word processing, chat, and group scheduling
to allow users to easily communicate, share, and access
information.
# sun_netscape &
# netscape &
[참고] 모질라 / 파이어폭스(http://www.sunfreeware.com)
firefox - 172.16.8.254:/root/packages/firefox
mozilla - 172.16.8.254:/root/packages/mozilla
firefox, mozilla가 필요한 경우 172.16.8.254 서버에서도 다운로드 받을수 있다.
# rcp -r 172.16.8.254:/root/packages/firefox .
oclock CMD
_____________
round X clock
Oclock simply displays the current time on an analog
display.
The xclock program displays the time in analog or digital
form. The time is continuously updated at a frequency which
may be specified by the user.
# oclock & (# /usr/openwin/bin/oclock &)
# xclock & (# /usr/openwin/bin/xclock &)
[참고] oclock & xclock
date CMD
_____________
write the date and time
The date utility writes the date and time to standard output
or attempts to set the system date and time. By default, the
current date and time will be written.
Specifications of native language translations of month and
weekday names are supported. The month and weekday names
used for a language are based on the locale specified by the
environment variable LC_TIME. See environ(5).
운영체제의 시간을 확인하거나 설정할수 있다.
- root 사용자: 현재 시간을 설정 및 확인 할 수 있다.
- 일반사용자 : 현재 시간만 확인 할 수 있다.
# date
# date 08161300 (8월 16일 13:00)
[참고] 소프트웨어 클락 & 하드웨어 클락
시간의 종류(Clock Type)
- Software Clock (운영체제의 시간)
- Hardware Clock (펌웨어의 시간)
[EX] 운영체제 시간 변경 예
# date 08201300 (예: 08201300, 운영체제 시간을 root 사용자가 바꾼다.)
# rdate 172.16.8.254 (운영체제 시간을 다른 서버에 동기화 시킨다.)
or
# rdate time.bora.net(NTP-Network Time Protocol)
[참고] date 명령어의 출력 형태 변경
# date +'%m%d'
# date +'%m%d_%H%M'
[EX] 로그 파일 이름 형식(Log Filename Format)
유닉스에서의 대부분의 프로그램은 하루에 한번씩 로그 파일을 만들도록 하는 경우가 많이
존재한다. 이런 경우 date 명령어를 아래와 같이 응용하여 사용하는 경우가 많다.
로그 파일 이름 형식: file_1211.log
# touch file_`date +'%m%d'`.log
cal CMD
_____________
display a calendar
The cal utility writes a Gregorian calendar to standard out-
put. If the year operand is specified, a calendar for that
year is written. If no operands are specified, a calendar
for the current month is written.
# cal
# cal 2004
# cal 8 2004
디렉토리 이동 관련 명령어
■ pwd CMD
■ cd CMD
pwd CMD
_____________
return working directory name
Returns the path name of the current working directory.
# pwd
[참고] PS1 변수설정
pwd 명령어를 디렉토리 변경할때 마다 치는 것은 불편하다. 따라서 PS1 변수를 환경변수에
선언하여 사용하면 pwd 명령어를 궂이 사용하지 않아도 된다.
# PS1='[$PWD]# '
# export PS1
[EX] PS1 실습
# PS1='a '
# PS1='[$PWD]# '
cd CMD
_____________
Change Directory
Change the current working directory to dirName, or to the
home directory (as specified in the HOME environment vari-
able) if dirName is not given. Returns an empty string.
cd 명령어는 디렉토리를 변경하는 명령어이다. cd 명령어를 사용하여 디렉토리 경로를 변
경하는 경우 상대경로(Relative Path)나 절대경로(Absolute Path)를 사용할수 있다.
경로(PATH)
- 상대경로 (Relative Path, 현재디렉토리를 기준)
- 절대경로 (Absolute Path, / 디렉토리를 기준)
/
|
----+----------+----------+-----------+-----
| | | |
data1 export etc .......
|
home
|
user01
[EX] 상대경로 사용 예제
# pwd
# cd export
# cd ..
# cd export/home
# cd ../../
[EX] 절대경로 사용 예제
# cd /etc
# cd /export/home
# cd /usr
[참고] /export/home/user01
A A A
| | |
(a) (b) (c)
(a) => /(root) 디렉토리
(b),(c) => 디렉토리의 구분자
[참고] user01 사용자의 홈디렉토리로 이동하는 방법
root 사용자의 홈디렉토리 : /(root)
일반 사용자의 홈디렉토리 : /export/home/user01
Home Directory Changing for user01
$ ksh
$ cd
$ cd ~
$ cd ~user01 ($ cd ~/user01)
$ cd $HOME ($ echo $HOME)
$ cd /export/home/user01
[참고] 편리한 기능(Tip)
# cd -
# cd ../dir2
[EX]
"cd - " 사용한 이전 디렉토리로 이동
(시나리오) 사용자가 /etc 디렉토리에서 작업을 하다가 /export/home/user01 디렉토리로
이동하는 경우 상대경로나 절대경로를 사용하는 경우는 불편하게 된다. 이런 경우 이전
디렉토리로 바로 이동하기 위해서 "cd - " 명령어를 사용한다.
/etc <------> /export/home/user01
# cd /etc
작업
# cd /export/home/user01
작업
# cd /etc
작업
# cd -
# cd -
# cd -
/
|
------------+------+-------+--------+------
.... | ..... export etc
test
|
---+----+----+-------
| | .....
dir1 dir2
현재 디렉토리 : dir2
목적 디렉토리 : dir1
# cd ..
# cd dir1
# cd ../dir1
[EX] ../dir1 활용 예
# cd /
# cd /export
# cd ../etc
파일의 종류(File Types)
------------------------
■ 일반 파일(Regular File)
■ 디렉토리 파일(Directory File)
■ 링크 파일(Link File : Hard Link File, Symbolic Link File)
■ 디바이스 파일(Device File : Block Device File, Charater Device File)
[참고] 기타 파일의 종류(Other File Types)
- Pipe, Socket, Door
+-------------------+
filename ====> | Inode |
+-------------------+
| |
| Data Block |
| |
+-------------------+
[그림] 파일의 기본 구조
(1). 일반 파일(Regular File)
+-------------------+
file1 ====> | inode(450) |
+-------------------+
| |
| Data Block |
| |
+-------------------+
Data : Text, Binary data, Images, Application data, Databases
Creation Methods : Text editors, Compilers, Application programs,
Database programs, Command(EX: touch, cat, vi)
(2). 디렉토리 파일(Directory File)
+-------------------+
dir1 ====> | inode(451) |
+-------------------+
| .(451) |
| ..(440) |
| file1(452) |
| dir2(453) |
| ..... |
| |
+-------------------+
Data : Directory information
Creation Methods : mkdir dirname
(3). 링크 파일(Link File)
"ln CMD" 참고
(4). 디바이스 파일(Device File)
+-------------------+
dad@0,0:a ====> | inode(451) |
+-------------------+
| |
| 136, 0 |
| |
+-------------------+
Data : Major/Minor device number
Creation Methods : mknod, drvconfig, devfsadm
주 디바이스 번호(Major Device Number) : 136 (/etc/name_to_major)
부 디바이스 번호(Minor Device Number) : 0 (Slice Number) //?
[EX] Intel Platform(VMWare)
# grep cmdk /etc/name_to_major
cmdk 102
# ls -l /devices/pci@0,0/pci-ide@7,1/ide@0/cmdk@0,0:a
brw-r----- 1 root sys 102,0 1월 7 12:22 /devices/pci@0,0/pci-ide@7,1/ide@0/cmdk@0,0:a
[EX] Sparc Platform(Ultra 10)
# grep dad /etc/name_to_major
dad 136
# ls -l /devices/pci@1f,0/pci@1,1/ide@3/dad@0,0:a
brw-r----- 1 root sys 136, 0 2월 2 16:05 /devices/pci@1f,0/pci@1,1/ide@3/dad@0,0:a
<Disk Structure> <Operating System>
| DISK Device | <=== Device Driver ===> dad@0,0:a | kernel |
| - Sector | Device File | |
| - Track | | |
| - Cylinder | | |
디스크 디바이스 파일(Disk Device File, Special Device File)
- Charater Device File : I/O : 512bytes
= Raw Device File
- Block Device File : I/O : 8Kbytes (512 * 16)
| DISK Device | <=== Device ===> Block Device File | OS(kernel) |
| - Sector | Driver Charater Device File | |
| - Track | | |
| - Cylinder | | |
[EX] 블럭디바이스 사용예제
# mount /dev/dsk/c0t0d0s7 /export/home
[EX] 캐릭터디바이스 사용예제
# newfs /dev/rdsk/c0t0d0s7
# fsck /dev/rdsk/c0t0d0s7
[EX] 블럭 / 캐릭터디바이스 사용예제
# prtvtoc /dev/rdsk/c0t0d0s2
# prtvtoc /dev/dsk/c0t0d0s2
// 저수준의 whole 작업인경우에 쓰인다 예로 filesystem create or check
파일/디렉토리 이름 규칙(Filename Convention)
____________________________________________
Filename / Directory Name Length : 1-255 char(s)
(1). 파일의 이름에 "-"(Dash), "_"(Underbar), "."(Dot) 사용가능
# touch file1_1202.log
# touch dir-file.sh
(2). 파일이름에 공백, 점(Dot)는 되도록 사용하지 말자.
이런 파일 이름들은 주로 해커들에 의해 악의적으로 사용되는 경우가 많다.
# touch " "
# touch ". "
# touch /dev/rdsk/c0t0e0s0
(3). 파일이름에 대문자와 소문자는 구별한다.(Case Sensitive)
# touch file1
# touch FILE1
(4). 파일이름에 앞에 .(Dot)으로 시작하는 파일은 환경파일이다.
# touch .filename
# ls -l /.profile
# ls -l /.kshrc
Wild Card(Special Character) // 하나의 문자가 여러개의 문자를 포함하는 문자.
______________________________
(1) . (Dot, Period) // 현재의~ 디렉토리
Current Directory
# ./ENV.sh
# vi ./file.txt
(2) .. (Dot Dot) // 상위의 디렉토리
# cd ../
# cd ../dir2
(3) ~ (tilde) // 계정의 HOME 디렉토리
# cd ~user01
(4) * (0 or more) // 하나의 문자 이상의 모든 캐릭터
# mkdir /test
# cd /test
# touch file1 file2 file3
# ls -l file*
# touch file
# ls -l file*
(5) ? (Question Mark) //한글자의 모든? 캐릭터 ,
# ls -l file?
(6) [ ] (Square Bracket) // 선택적인 한글자
# ls -l file[123] // 1,2,3 중하나
# ls -l file[1-3] // "
■ man CMD
■ passwd CMD
man CMD
_____________
find and display reference manual pages
The man command displays information from the reference
manuals. It displays complete manual pages that you select
by name, or one-line summaries selected either by keyword
(-k), or by the name of an associated file (-f). If no
manual page is located, man prints an error message.
# man ls
# man -k calendar // keyword 에 의한 ~찾기
# man -l passwd // list 에 의한 찾기 , 메뉴얼 페이지의 리스트 보기
# man -s section_number CMD //section 정보로 찾기
[EX] man ls 형식 실습
# man ls
------------------------man ls 출력 결과-----------------------------
User Commands ls(1)
NAME
ls - list contents of directory
SYNOPSIS
/usr/bin/ls [-aAbcCdfFghilLmnopqrRstux1@] [file...]
/usr/xpg4/bin/ls [-aAbcCdfFghilLmnopqrRstux1@] [file...]
DESCRIPTION
For each file that is a directory, ls lists the contents of
the directory. For each file that is an ordinary file, ls
repeats its name and any other information requested. The
output is sorted alphabetically by default. When no argument
--More--(4%)
------------------------man ls 출력 결과-----------------------------
Enter -> 한개의 라인씩 이동
Space -> 한페이지 단위로 이동
/문자열 -> /-a
/OPTIONS
/EXAMPLE
h -> help
q -> 매뉴얼 종료
[EX] man -k calendar 형식 실습
(시나리오) 사용자가 cal 명령어를 모르는 상태에서 명령어나 파일을 검색하기 위해서 사용
windex (/usr/share/man/windex) - Table of contents and keyword database
# man -k calendar
/usr/share/man/windex: No such file or directory
/usr/man/windex: No such file or directory
/usr/openwin/share/man/windex: No such file or directory
// 처음 keyword에 대한 DB화 되어 있지 않아 검색에러가 난다.
# catman -w //DB 목록화
# man -k calendar
cal cal (1) - display a calendar
calendar calendar (1) - reminder service
difftime difftime (3c) - computes the difference between two calendar times
mktime mktime (3c) - converts a tm structure to a calendar time
cal cal (1) - display a calendar
calendar calendar (1) - reminder service
difftime difftime (3c) - computes the difference between two calendar times
mktime mktime (3c) - converts a tm structure to a calendar time
[EX] man -l passwd 형식 실습
# man -l passwd
passwd (1) -M /usr/share/man
passwd (4) -M /usr/share/man
passwd (1) -M /usr/man
passwd (4) -M /usr/man
매뉴얼 섹션 참고 사항
위의 예에서 passwd의 매뉴얼이 (1) 섹션과 (4) 섹션에 존재 한다는 것을 확인 할 수 있 다. man 명령어는 -s 옵션이 없다면 여러개의 섹션에 매뉴얼이 존재하는 경우 가장 먼저 검색이 되는 매뉴얼 페이지를 출력하게 된다. (1) 섹션의 passwd 명령어의 매뉴얼지가 아닌 (4) 섹션의 /etc/passwd 파일의 매뉴얼을 확인 하기 위해서는
-s 옵션이 필요하다
# man passwd
# man -l passwd
# man -s 1 passwd (/usr/bin/passwd)
# man -s 4 passwd (/etc/passwd)
[EX] man -s 1M passwd 형식 실습
# man find
..... (중략) .....
/SEE ALSO // 연관된 ~ 더 찾아보기
.....
SEE ALSO
chmod(1), cpio(1), ls(1B), sh(1), test(1), stat(2),
umask(2), attributes(5), environ(5), fsattr(5), large-
file(5), standards(5)
.....
# man -s 1B ls
# man -s 5 environ
[참고] man 명령어안에서의 하위(Sub) 명령어
Keys to Ctrl Scrolling in Man Pages.
_________________________________________________________________________________
Spacebar Displays the next screen of a man page.
Return Displays the next line of a man page.
b Moves back one full screen. // 전 페이지
f Moves forward one full screen. // 다음 페이지
:f Print current filename and line number.
/pattern Searches forward for a pattern.
n Finds the next occurrence of a pattern after you have used //다음 패턴
/pattern
h Provides a description of all scrolling capabilities. //도움말
q Quits the man command. //종료
_________________________________________________________________________________
# man man
.....
OPTIONS
.....
-k keyword ...
Prints out one-line summaries from the windex database
(table of contents) that contain any of the given key-
words. The windex database is created using
catman(1M).
-l Lists all manual pages found matching name within the
search path.
-s section ...
Specifies sections of the manual for man to search.
The directories searched for name are limited to those
specified by section. section can be a numerical
digit, perhaps followed by one or more letters to
match the desired section of the manual, for example,
"3libucb". Also, section can be a word, for example,
local, new, old, public. section can also be a letter.
To specify multiple sections, separate each section
with a comma. This option overrides the MANPATH
environment variable and the man.cf file. See Search
Path below for an explanation of how man conducts its
search.
# cd /usr/share/man
# ls
Unix Manual Section
________________________________________________
Section 1 Command
Section 2 Library for System Programming
Section 3 Library for C Programming
Section 4 System Configuration File Format
Section 5 Standard, Macro etc
Section 6 Games, Demo etc
Section 7 Device File
Sun 9 Reference Manual Collection
____________________________________
section 1: User Commands
section 1M: System Administration Commands //관리자용 명령어
section 2: System Calls
section 3: Library Interfaces and Headers
section 3: Basic Library Functions
section 3: Networking Library Functions
section 3: Threads and Realtime Library Functions
section 3: Extended Library Functions
section 3: Curses Library Functions
section 4: File Formats
section 5: Standards, Environments, and Macros
section 6: Demos
section 7: Device and Network Interfaces
section 9: DDI and DKI Driver Entry Points
section 9: DDI and DKI Kernel Functions
section 9: DDI and DKI Properties and Data Structures
[참고] DDI / DKI
DDI(Device Driver Interface)
DKI(Driver-Kernel Interface)
Section 1, 4 -> 관리자
Section 2, 3 -> 시스템 프로그램머
Section 7, 9 -> Device Driver 개발자
[참고] Manual Information Structure
- NAME
- SYNOPSIS
- DESCRITPION
- OPTIONS
- OPERANDS
- OUTPUT
- RETURN VALUES
- ERRORS
- USAGE
- EXAMPLES
- ENVIRONMENT VARIABLES
- EXIT STATUS
- FILES
- ATTRIBUTES
- SEE ALSO
- DIAGNOSTICS
- WARNINGS
- NOTES
- BUGS
[EX] Manual Information Structure 사용 예
# man ls
/문자열
-> /OPTIONS
-> /EXAMPLES
-> /SEE ALSO
[참고] 매뉴얼 페이지를 텍스트 파일로 변환
매뉴얼 페이지를 텍스트 파일로 저장하는 경우 다음과 같은 명령어를 사용하면 된다.
Manual.TXT File
# man find | col -b > find.txt
# man col
.....
reverse line-feeds filter // 하나의 문자에 두가지 이상의 문자가 표현 되었을때 제거하는것
.....
-b Assume that the output device in use is not capable of
backspacing. In this case, if two or more characters
are to appear in the same place, only the last one
read will be output.
.....
passwd CMD
_____________
change login password and password attributes
사용자 패스워드을 변경하거나 패스워드의 속성 정보를 변경하는 명령어이다.
The passwd command computes the hash of a password typed at
run-time or the hash of each password in a list. The
password list is taken from the named file for option -in
file, from stdin for option -stdin, or from the command
line, or from the terminal otherwise. The Unix standard
algorithm crypt and the MD5-based BSD password algorithm 1
and its Apache variant apr1 are available.
root 사용자가 일반사용자의 암호를 변경하는 경우 사용자의 암호를 물어 보지 않고
바로 변경이 가능하다. 하지만 일반사용자가 자신의 암호를 변경하는 경우에는 이전
암호를 반드시 맞추어야만 새로운 암호로 변경할수 있고, 이때 사용자 암호 변경 규
칙이 적용된다.
- root 사용자 : 모든 사용자의 암호를 변경가능
- 일반 사용자 : 자신의 암호만 변경 가능
root># passwd
root># passwd username
user01># passwd
user01># passwd user01
[EX] 사용자 암호 변경 실습
(root 사용자 암호 변경 실습)
# passwd
passwd: Changing password for root
New Password: <----- 새로운 암호 입력(암호: 123user)
Re-enter new Password: <----- 암호 재 입력(암호: 123user)
passwd: password successfully changed for root
# passwd root
New Password: <----- 새로운 암호 입력(암호: knit)
Re-enter new Password: <----- 암호 재 입력(암호: knit)
passwd: password successfully changed for root
(일반 사용자 암호 변경 실습)
# passwd user01
New Password: <----- 새로운 암호 입력(암호: solaris)
Re-enter new Password: <----- 암호 재 입력(암호: solaris)
passwd: password successfully changed for user01
# telnet localhost
Trying 127.0.0.1...
Connected to localhost.
Escape character is '^]'.
SunOS 5.9
login: user01
Password: <----- 사용자 암호 입력(암호: solaris)
Last login: Thu Jan 31 12:23:33 from localhost
Sun Microsystems Inc. SunOS 5.9 Generic January 2003
$ id
uid=100(user01) gid=1(other)
$ passwd
passwd: Changing password for user01
Enter existing login password: <----- 기존의 암호 입력(암호: solaris)
New Password: <----- 새로운 암호 입력(암호: 123user)
Re-enter new Password: <----- 암호 재 입력(암호: 123user)
passwd: password successfully changed for user01
[참고] 사용자 암호 변경 규칙
# man passwd
.....
Passwords must be constructed to meet the following require-ments:
o Each password must have PASSLENGTH characters, where
PASSLENGTH is defined in /etc/default/passwd and is
set to 6. Only the first eight characters are signifi-cant.
o Each password must contain at least two alphabetic
characters and at least one numeric or special charac-ter.
In this case, "alphabetic" refers to all upper or lower case
letters.
o Each password must differ from the user's login name
and any reverse or circular shift of that login name.
corresponding lower case letter are equivalent.
o New passwords must differ from the old by at least
three characters. For comparison purposes, an upper
case letter and its corresponding lower case letter
are equivalent.
.....
암호 변경 규칙
- 암호는 2개의 문자와 한개의 숫자 또는 특수 문자가 포함 되어야 한다.
- 사용자 이름과 암호는 틀려야 한다.
- 사용자 로그인 이름과 암호는 reverse, circular shift 형태는 안된다.
- 사용자의 암호는 이전 암호와는 3글자 이상 틀려야 한다.
[EX] 암호 변경 규칙 테스트
# telnet localhost
Trying 127.0.0.1...
Connected to localhost.
Escape character is '^]'.
SunOS 5.9
login: user01
Password: <----- 사용자 암호 입력(암호: 123user)
Last login: Thu Jan 31 18:51:20 from localhost
Sun Microsystems Inc. SunOS 5.9 Generic January 2003
$ id
$ passwd
passwd: Changing password for user01
Enter existing login password: <----- 기존의 암호 입력(암호: 123user)
New Password: <----- 짧은 암호 입력(암호: end01)
passwd: Password too short - must be at least 6 characters.
Please try again
New Password: <----- 기존의 암호와 같은 암호 입력(암호: 123user)
passwd: Old and new passwords must differ by at least 3 positions.
Please try again
New Password: <----- 새로운 암호 입력(암호: solaris1)
Re-enter new Password: <----- 암호 재 입력(암호: solaris1)
passwd: password successfully changed for user01
-> user01 사용자 복원
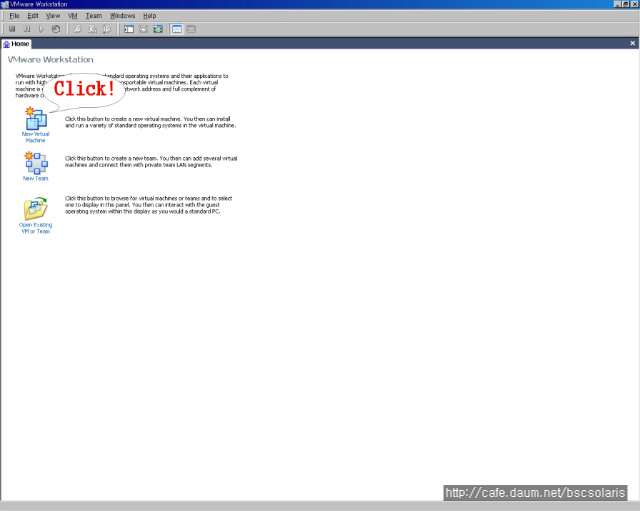
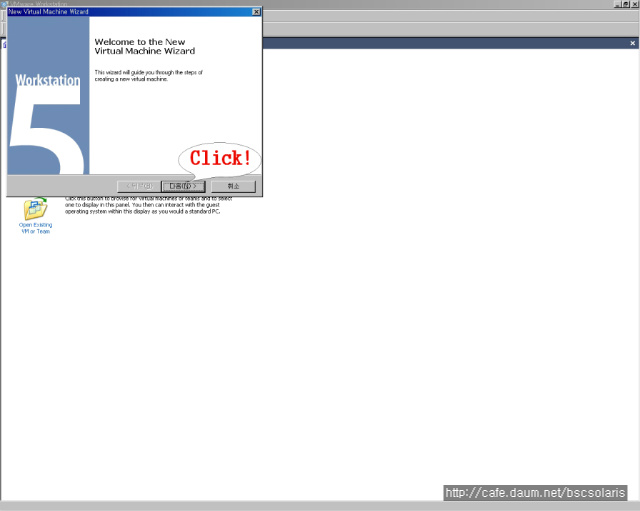
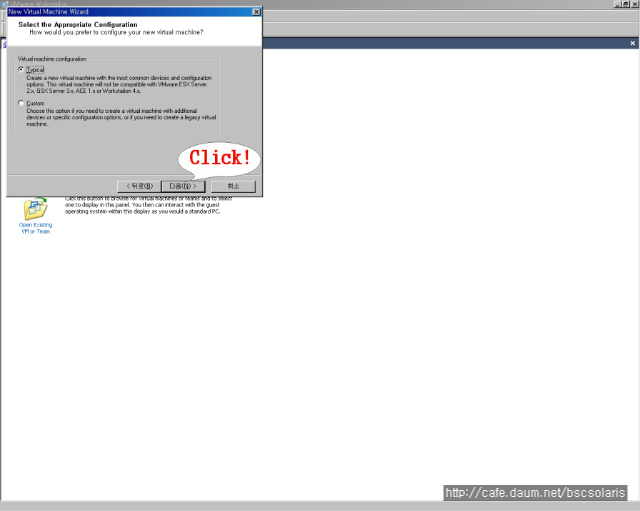
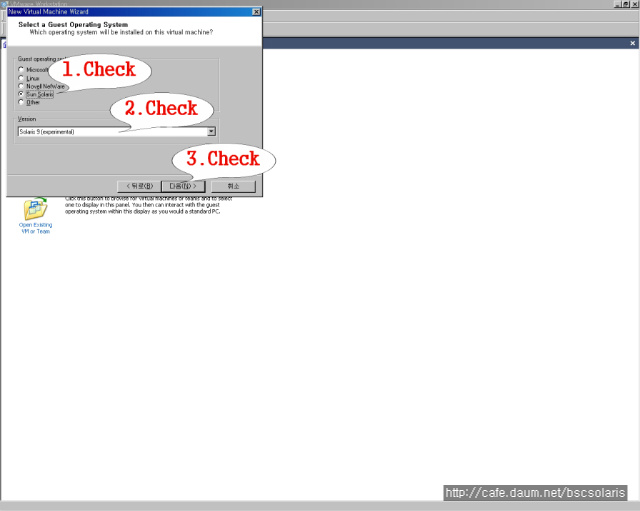
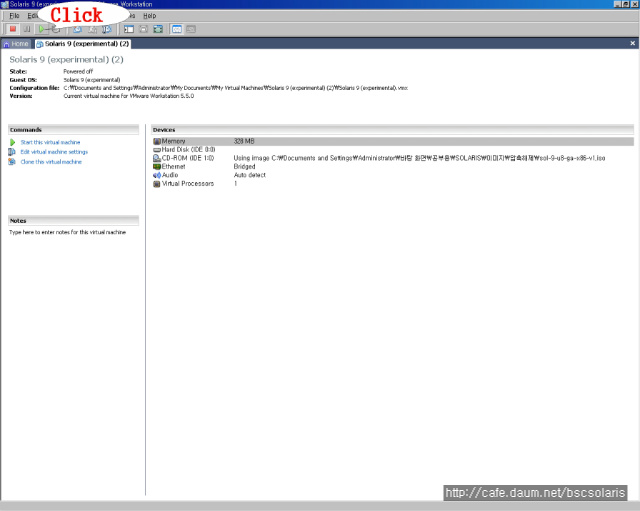
Chapter 4. Solaris 9 Installation
___________________________________
솔라리스 10버전에 대한 설치는 다음을 참고 하십시요
■ Solaris 10 설치 가이드
- 817-0544.pdf(Solaris10 Installation Guide Basic Installation)
- 817-5506.pdf(Solaris 10 Installation Guide Custom JumpStart and Advanced
Installation)
■ 솔라리스 8/9/10 버전 이미지를 다운로드는 다음사이트에서 받으시기 바랍니다.
Solaris 8/9/10 설치 이미지 제공
- http://www.vmware.com (VMWare Image)
1. 솔라리스 9 설치시 필요한 CD/DVD
- 설치 CD(Installation CD)
- 1번 CD (1 of 2 CD)
- 2번 CD (2 of 2 CD)
- 언어 CD(Language CD)
or
- DVD
[참고] 솔라리스 9 설치시 H/W 최소 사양
Hardware Requirements for Installation of the Solaris 9 OE(Operating Environment)
- A system based on an UltraSPARC/x86 processor
- 64 Mbytes of memory
- 2.3 Gbytes of disk space
- A keyboard and monitor
- CD-ROM / DVD-ROM or Installation Server
2. 솔라리스 설치 방법 종류
- Webstart Installation(Installation CD + 1 of 2 CD + 2 of 2 CD + Language CD)
- Interractive Installation(1 of 2 CD + 2 of 2 CD + Language CD)
- Custom Jumpstart Installation(Network Installation)
[참고] http://docs.sun.com Documentation
The Solaris 9 OE Installation and Upgrade Options
- Solaris suninstall Program
- Solaris Web Start Installation Software
- Custom JumpStart Procedure
- Solaris Web Start Flash Installation
- Standard Upgrade
- Solaris Live Upgrade Method
3. 솔라리스 설치 과정
솔라리스 9 설치과정을 다음과 같이 4가지 서비스로 구분한다.
솔라리스 9 설치 과정 구분(Solaris 9 Installation Process)
■ System Indentification Service // host , ip , netmask . 등등
■ System Configuration Service // filesystem layout , package 선택
■ Installation Servie
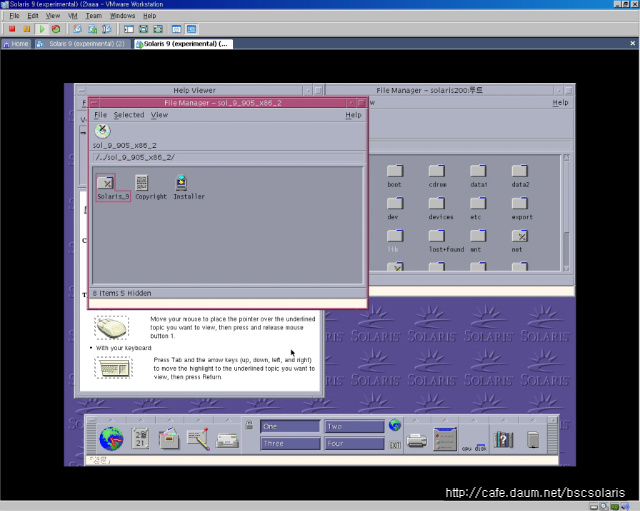
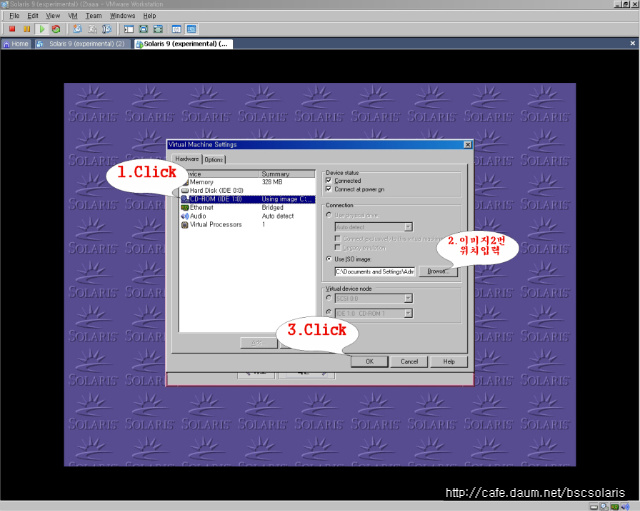
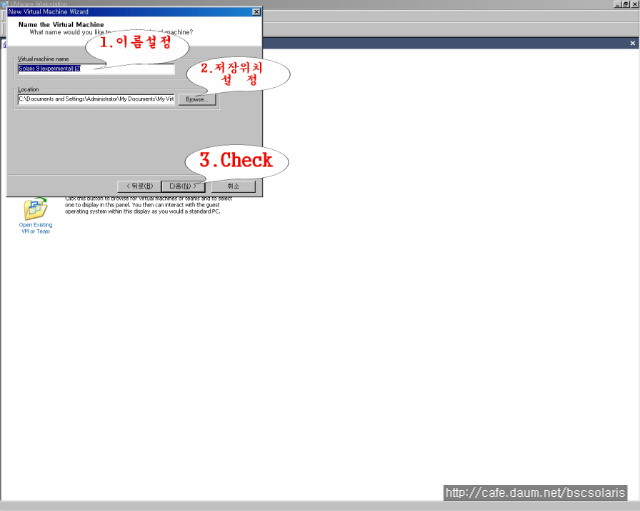
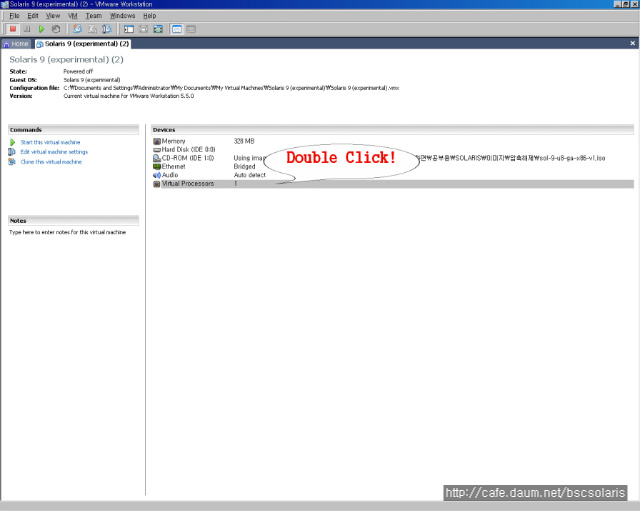
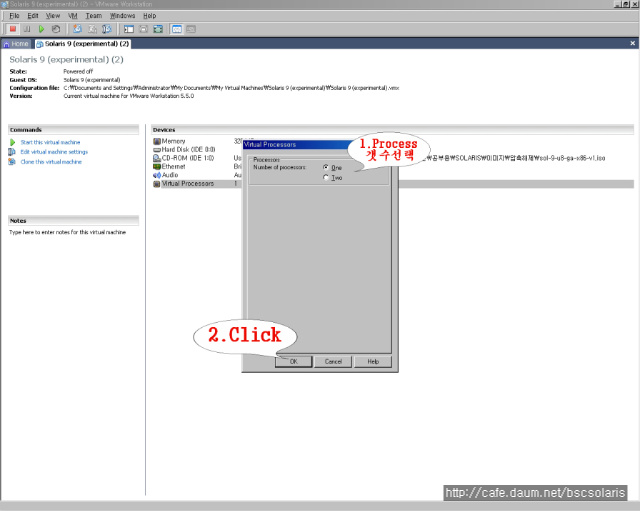
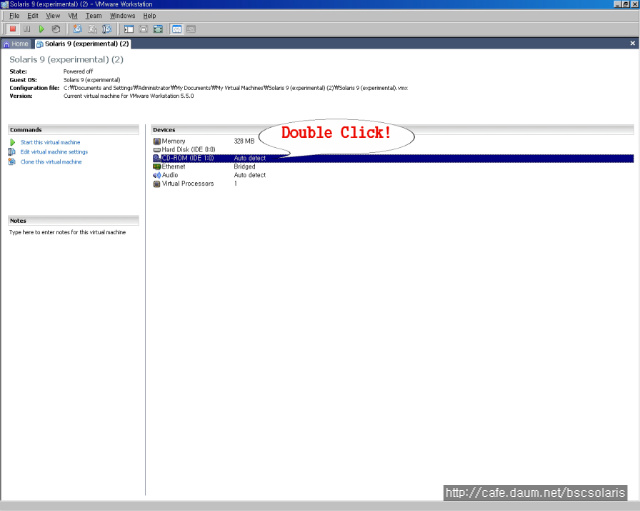
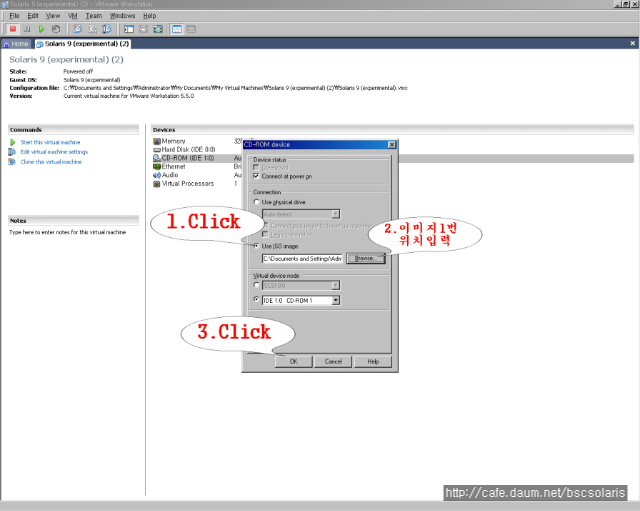
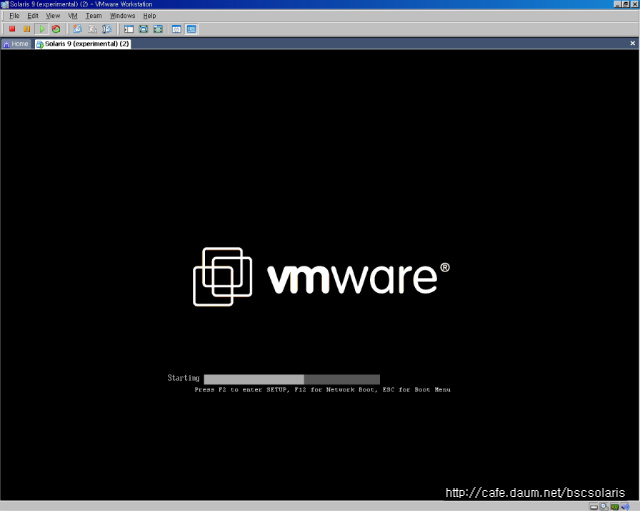
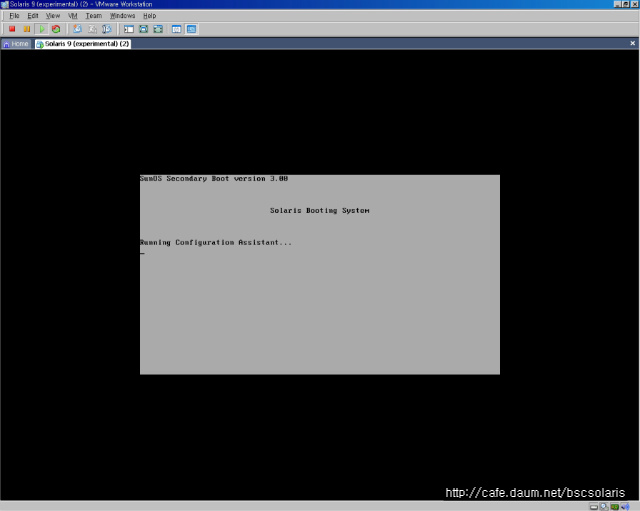
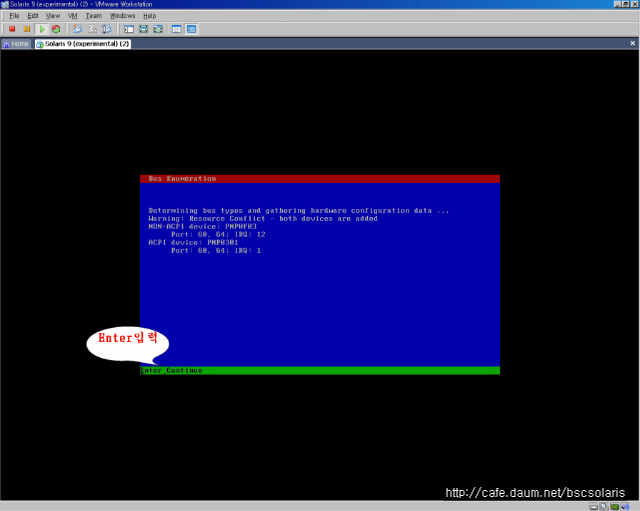
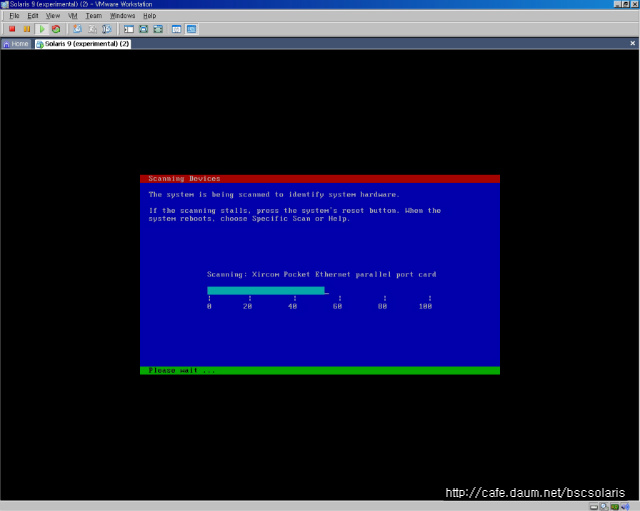
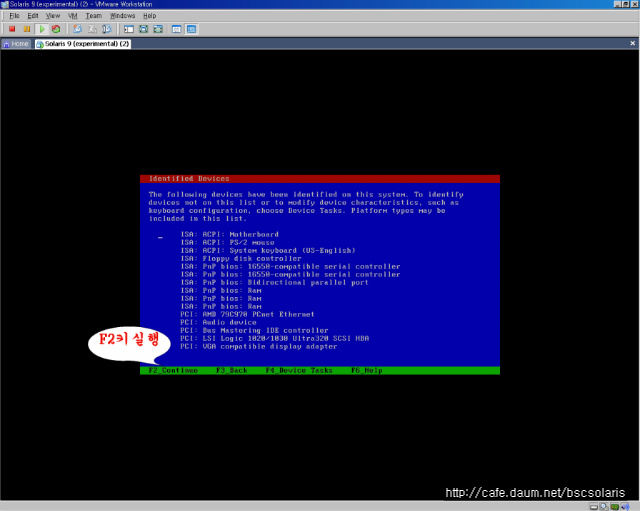
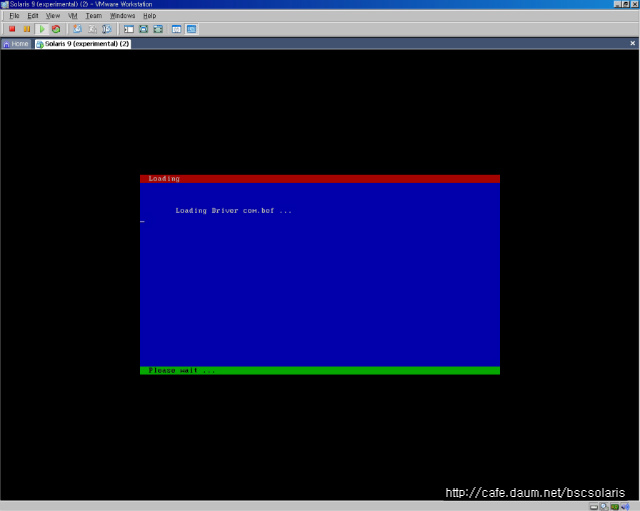
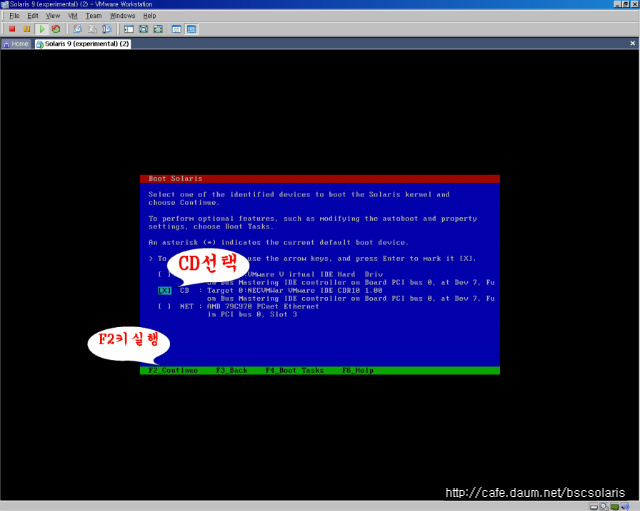
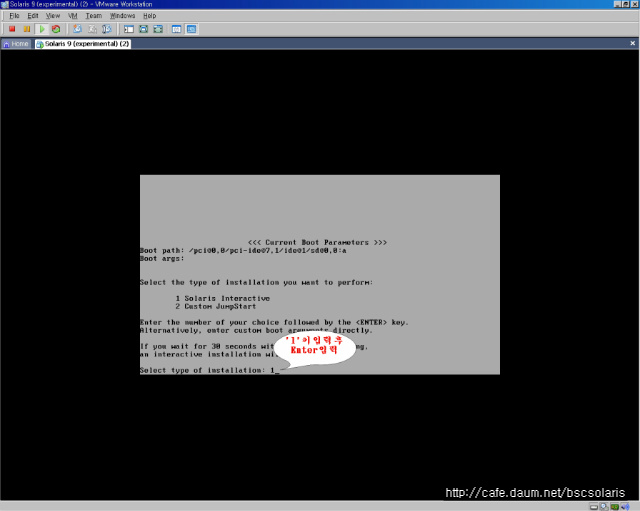
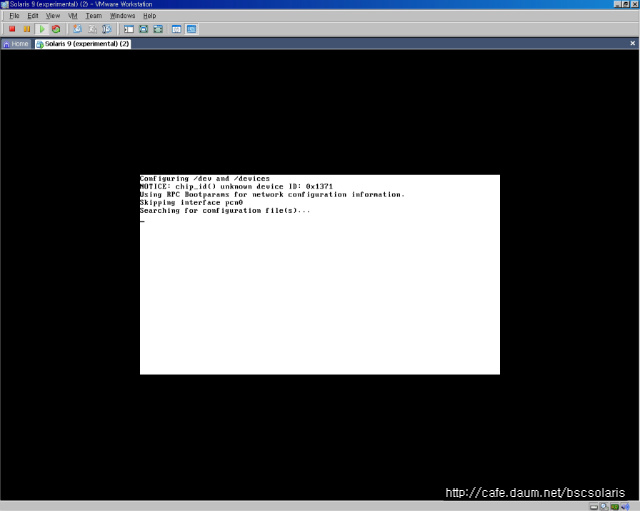
(1). Booting for Solaris Installation
(a). CD-ROM 부팅을 통해 설치하는 방법
- ok boot cdrom // 일조의 cmos mode와 같다.
or
- # init 0
- ok boot cdrom
(b). 네트워크 부팅을 통해 설치하는 방법
<STOP + A>
ok boot net - install
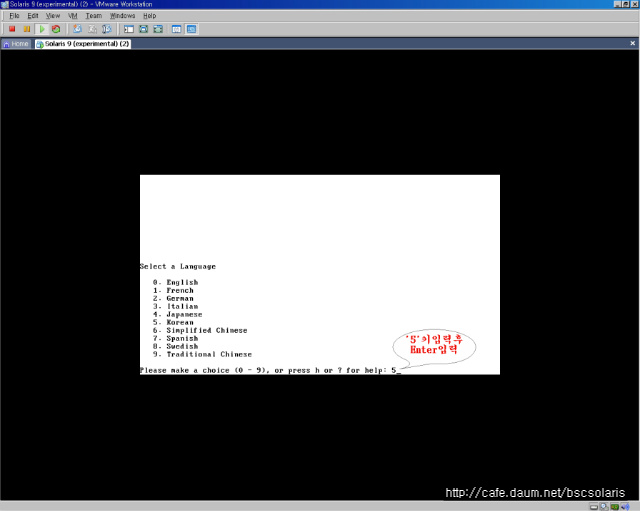
(2). Solaris 9 OE Installation Process // sparc 기준
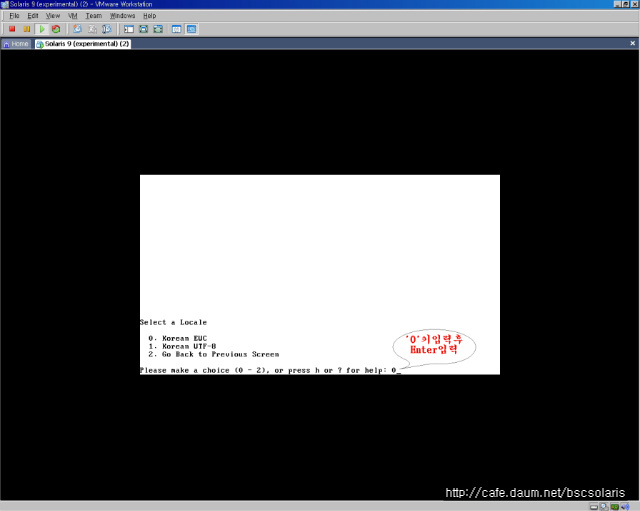
1. Select a Language : 5.Korean
2. Select a Locale : 0.Korean EUC
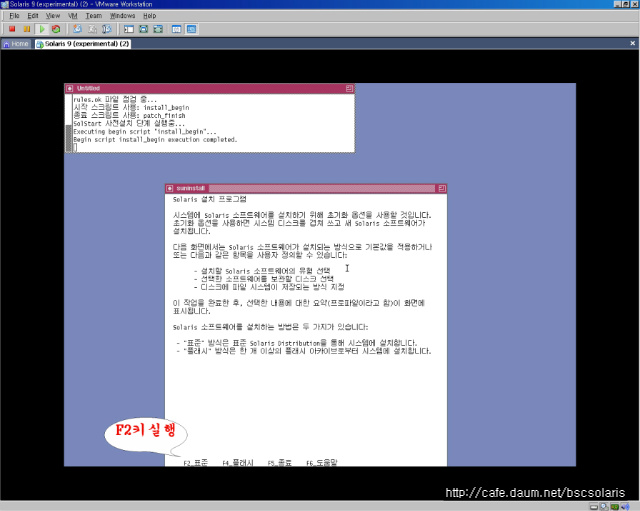
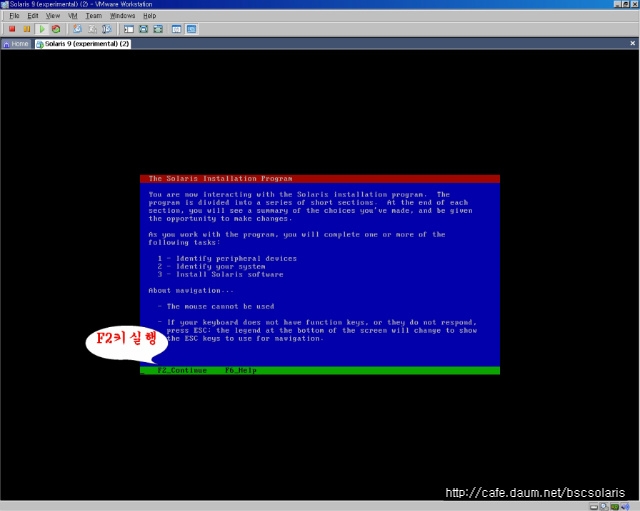
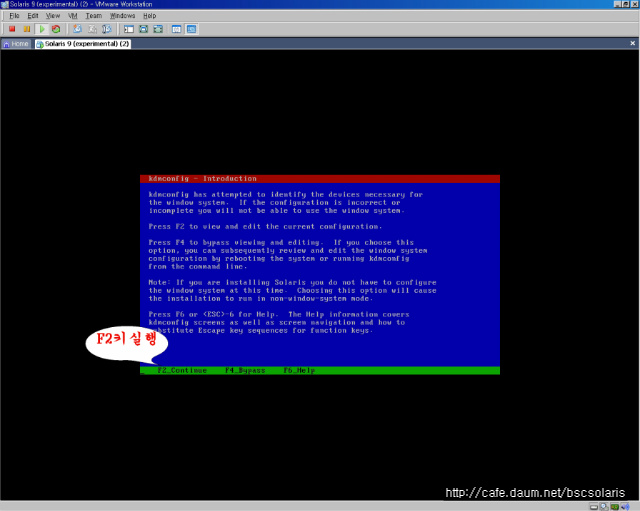
3. 설치 안내 : F2_계속
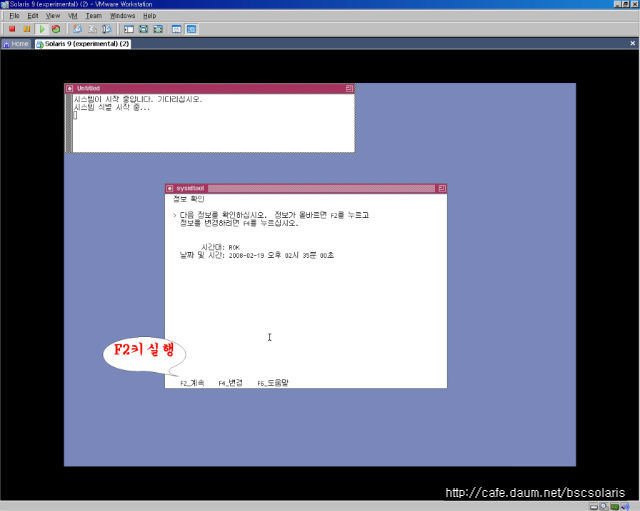
4. 시스템 식별 : F2_계속
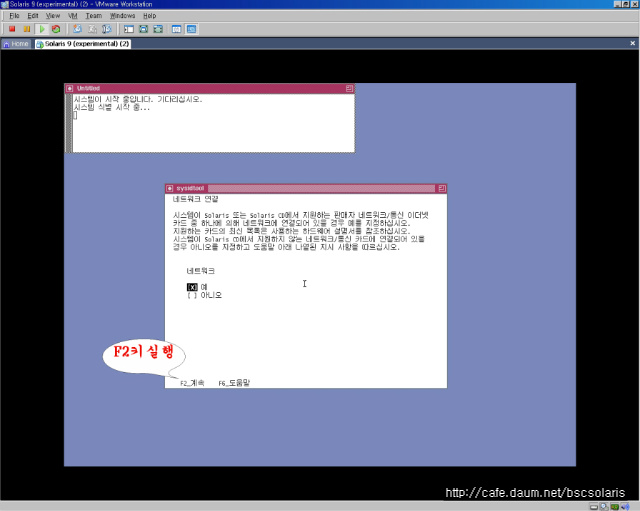
5. 네트워크 [X] 예 : F2_계속
6. DHCP 사용 : 아니오
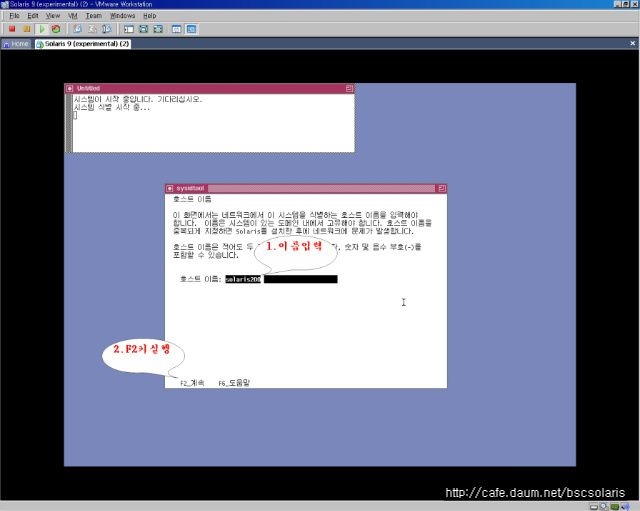
7. 호스트 이름 : solarisXXX (범위:200 ~ 214, 예: solais200)
--------------------------------------------------------
solarisXXX(172.16.8.XXX)
--------------------------------------------------------
200 201 202 203 204 205
206 207 208 209 210 211
212 213 214 215 216 217
218 219 220 221 222 223
224 225 226 227 228 229
--------------------------------------------------------
8. IP : 172.16.8.XXX (예: 172.16.8.205)
9. 서브넷 : 255.255.0.0
10. IPv6 사용 : 아니오
11. 기본경로 : 지정
12. 라우터 IP : 172.16.0.1
13. 커버로스 : 아니오
14. 이름서비스 : none
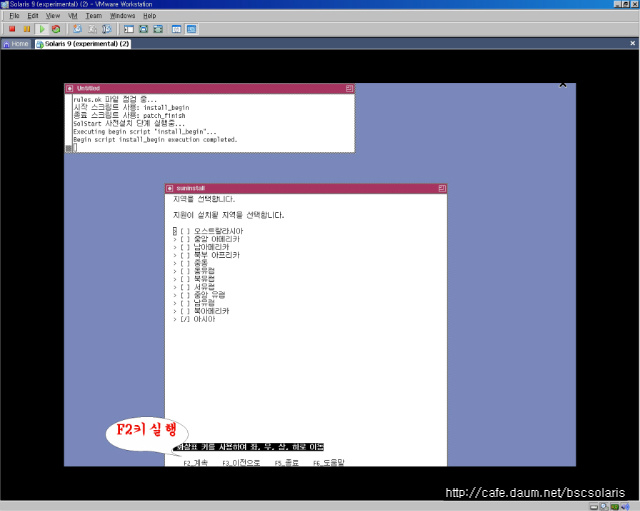
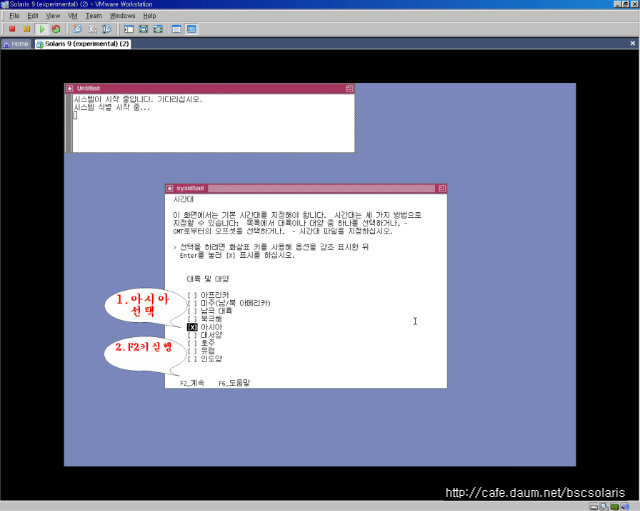
15. 대륙 및 대양 : 아시아
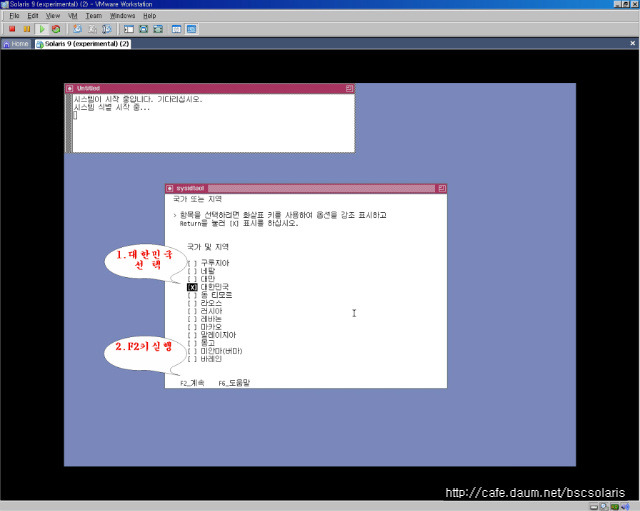
16. 국가 및 지역 : 대한민국
17. 날짜 및 시간 : 시간확인(ROK)
18. F4_초기
19. F2_표준
20. 지역선택 : F2_계속
21. [X]64비트 지원 : F2_계속 // x86 플랫폼에는 없음
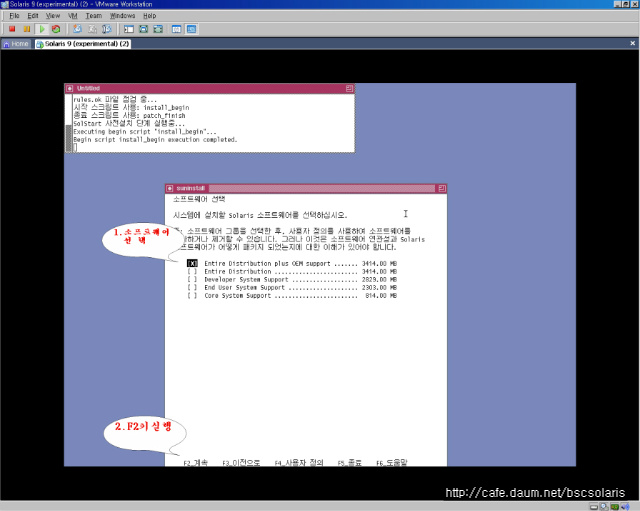
22. 소프트웨어 선택 : Entire Distribution plus OEM Support 64-bit
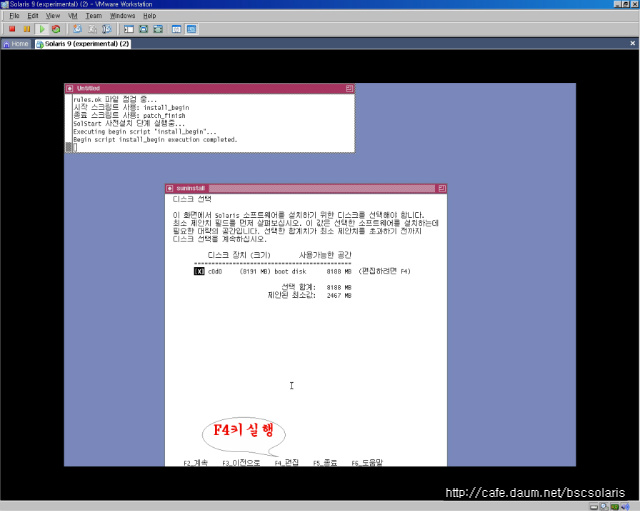
23. 디스크선택 [X]c0t0d0 : F2_계속
24. 데이터 보존 : F2_계속
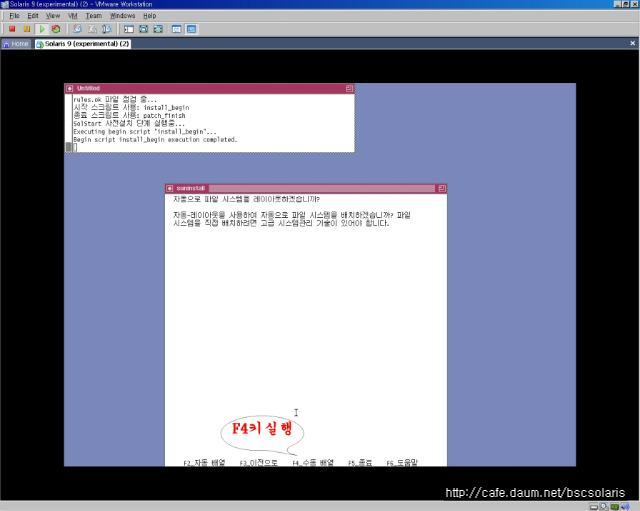
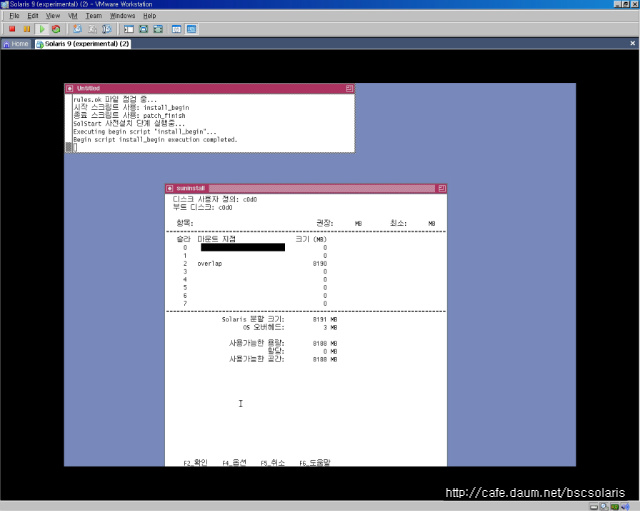
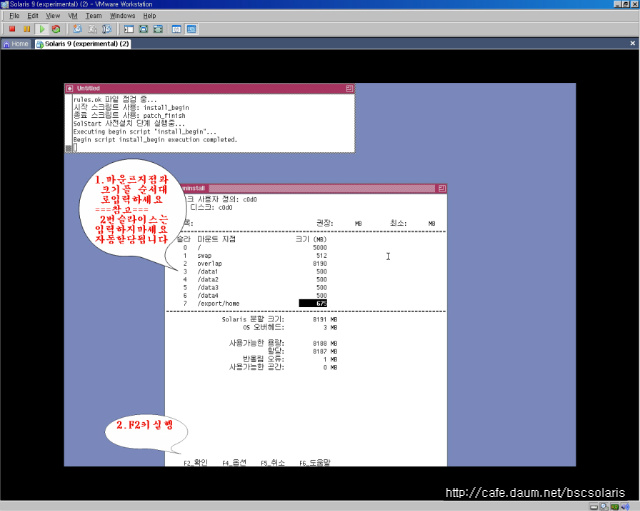
25. 레이아웃 : F2_자동배열 (이 부분은 필요한 경우만)
26. 자동레이아웃 : [X]/ [X]swap : F2 (이 부분은 필요한 경우만)
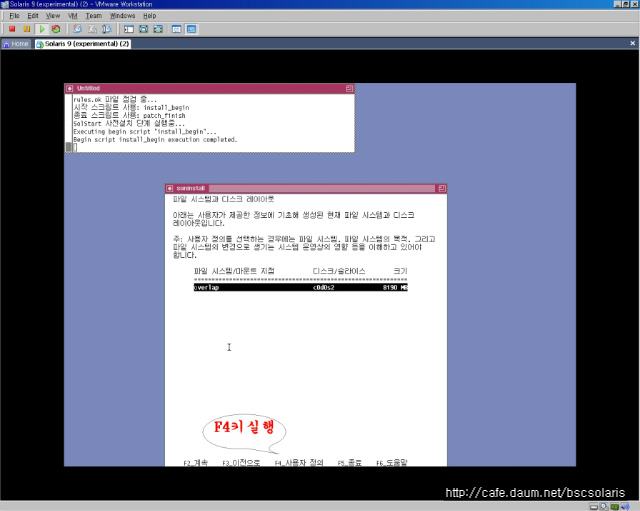
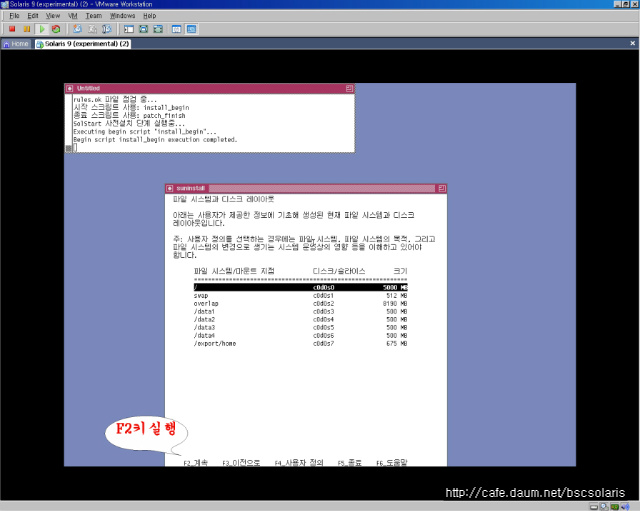
27. 디스크레이아웃 : F4_사용자정의 (수동레이아웃을 선택한경우만)
28.
+------------------------------------------------------------+
|8G 기준) Sparc / Intel(VMWare) |
+------------------------------------------------------------+
|Slice Mount Pointer Size |
+------------------------------------------------------------+
| 0 / 5000 |
| 1 swap 512 |
| 2 overlap (Entire) |
| 3 /data1 500 |
| 4 /data2 500 |
| 5 /data3 500 |
| 6 /data4 500 |
| 7 /export/home (Free) |
+------------------------------------------------------------+
[참고] 실무에서 많이 사용되고 있는 파티션들 예제
/, /usr, /var, /tmp, /export/home(/user), /database, /oracle, /was
위와 같이 입력후 "F2_계속"
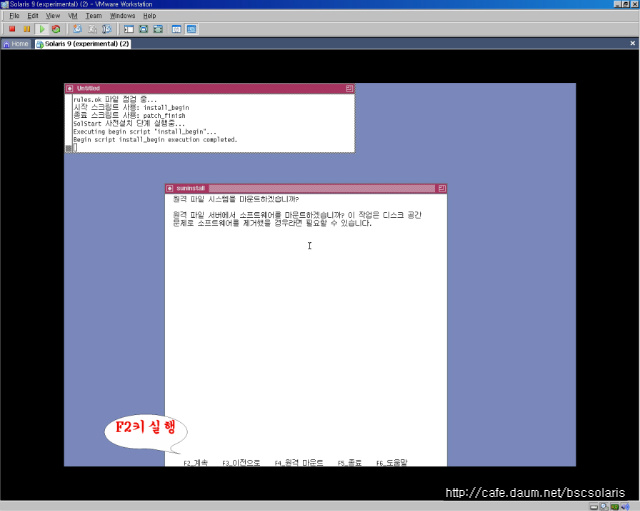
29. 원격파일시스템 : F2_계속
30. 프로파일 : F2_계속
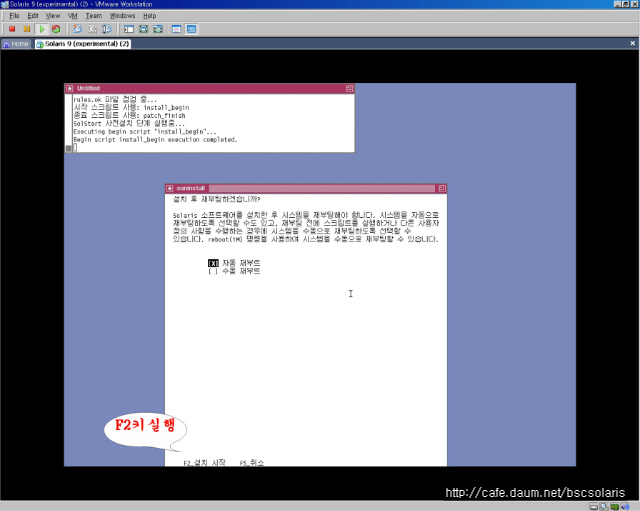
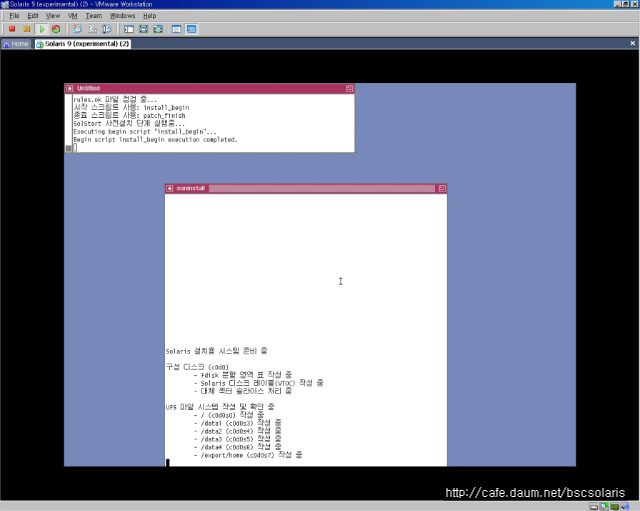
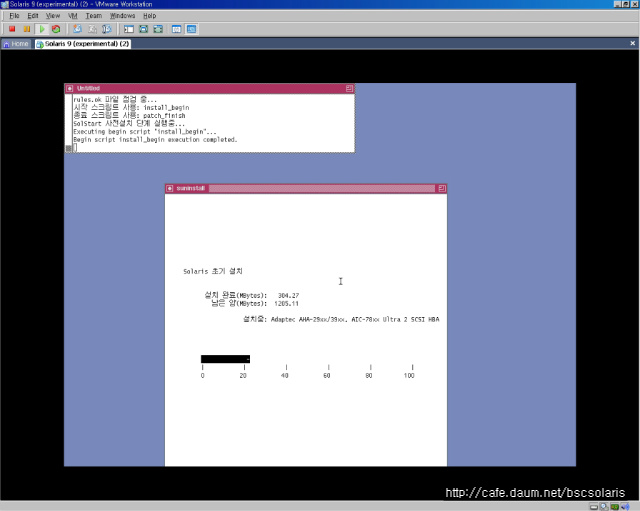
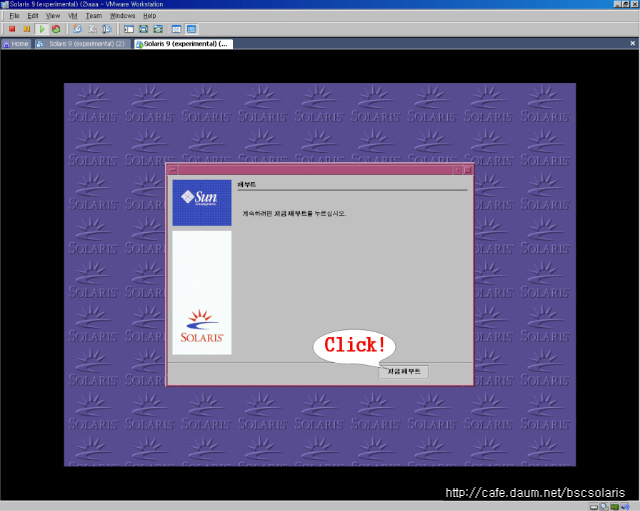
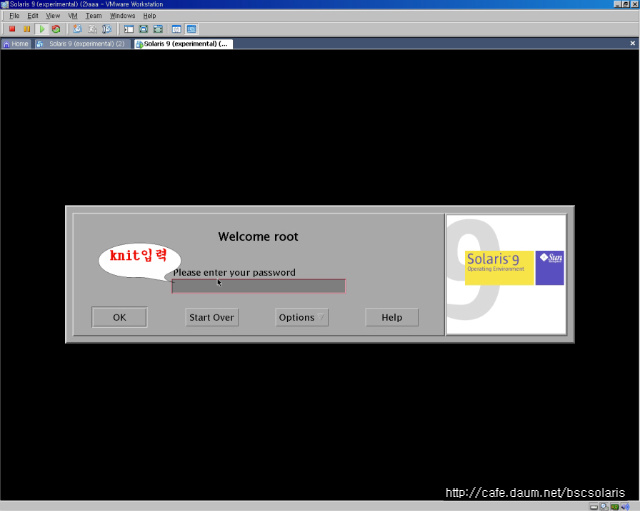
31. [X]자동재부트 : F2_설치시작
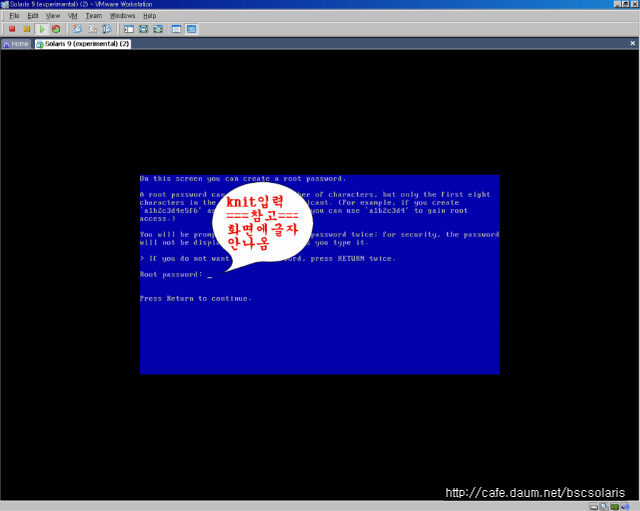
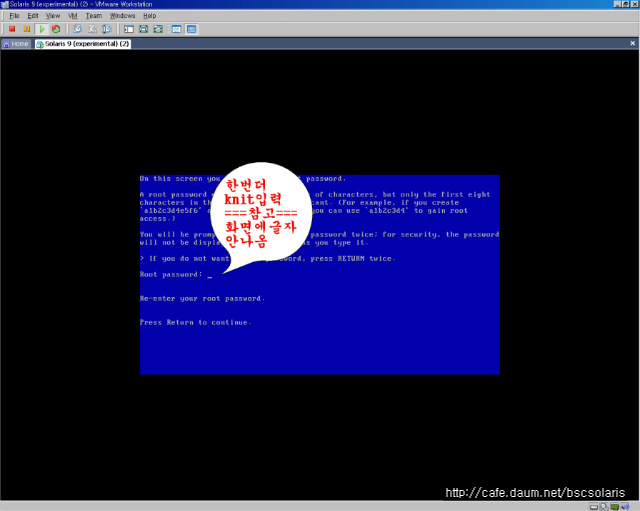
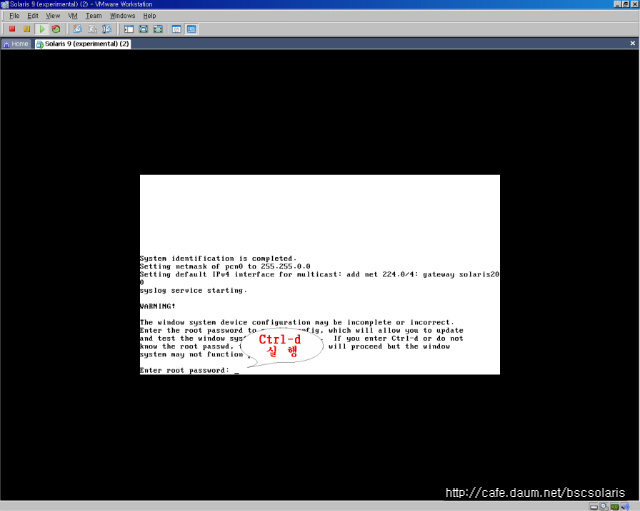
32. root password 입력 : knit
33. 자동절전기능 사용여부 : n
34. 다음에 다시 질문여부 : n // x86 에는 없다.
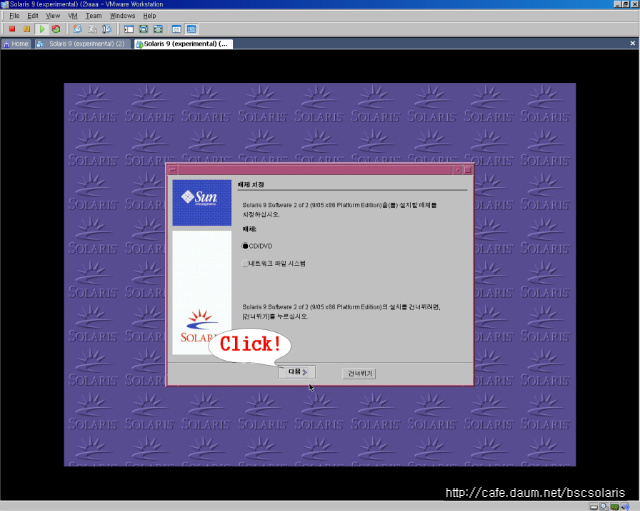
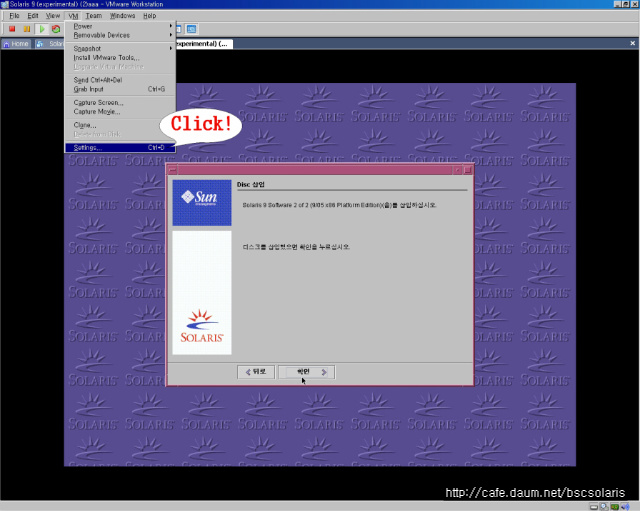
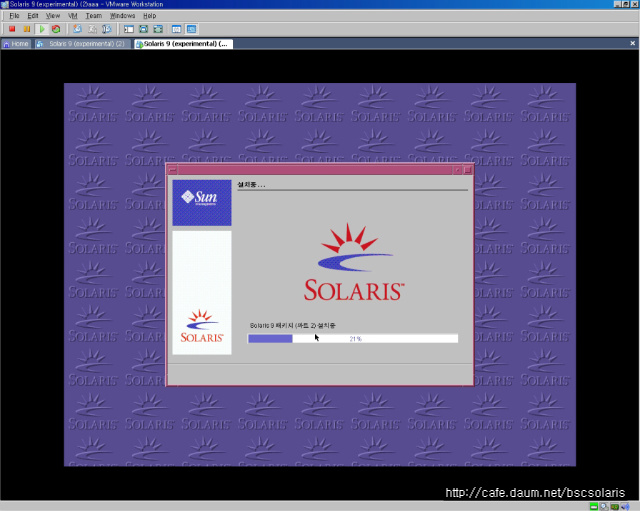
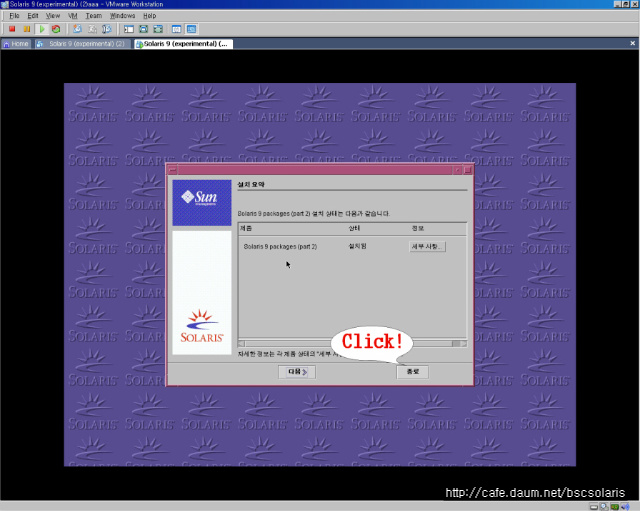
35. 2번 CD 설치
36. 3번 CD(language) 설치
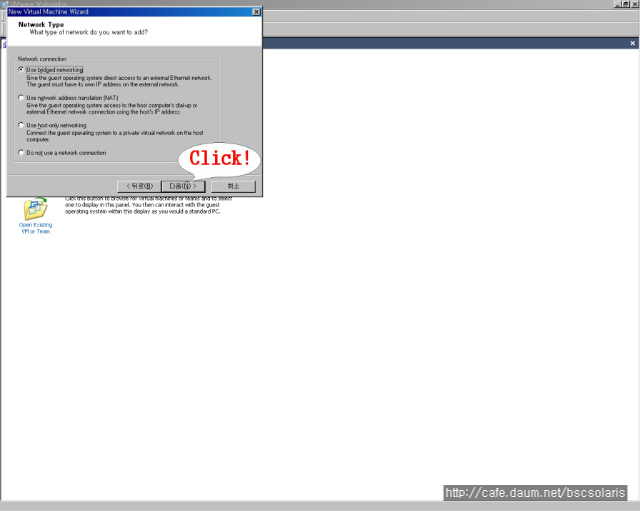
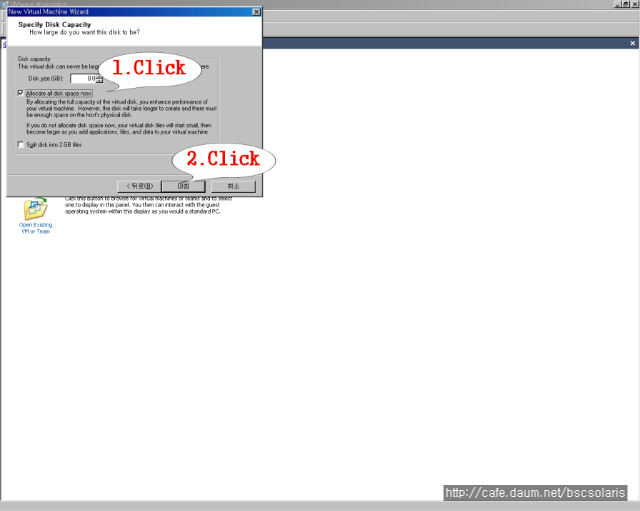
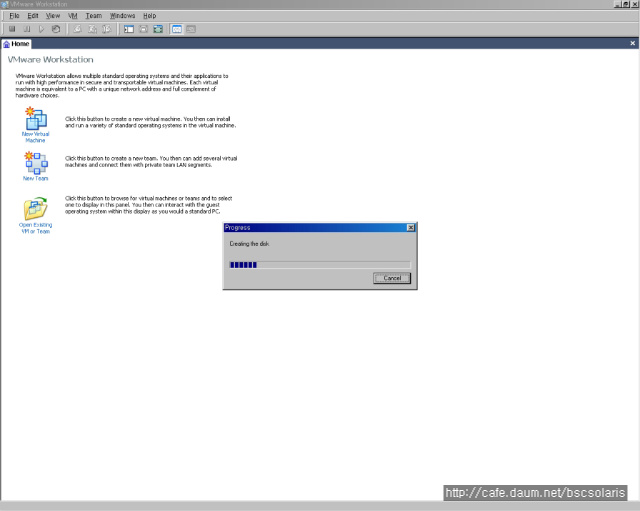
[참고] 인텔 플랫폼 설치 방식에 대해서는 http://cafe.daum.net/bscsolaris 참고
- Solaris 9 Installation on VMWare
- Solaris 10 Installation on VMWare
[참고] 자동절전기능
Sparc Platform Sun Solaris 설치시 자동절전기능을 설정한 경우(yes로 설정한 경우)
이 기능을 해제 시키 위해서는 다음과 같은 방법이 가능하다.
(1). Power Saving Function OFF
/noautoshutdown 파일 생성하는 방법
# touch /noautoshutdown
두번째 방법)
/etc/power.conf 파일을 편집하는 방법
# vi /etc/power.conf 편집
세번째 방법)
CDE 환경에서 "Desktop Control" 아이콘을 사용하는 방법
- CDE환경에서
- 패널에 있는 "Desktop Control" 아이콘을 클릭하고
- 전원관리(Power Management) 아이콘을 클릭한다.(Yellow Icon)
- 자동 절전 기능을 OFF 한다.
4. 파티션 정책과 파티션 용량
다음 예는 실무에 바로 적용할수 있는 예는 아니다. 하지만 파티션 정책과 파티션 용량
을 결정할때 한가지 참고 사항으로만 사용할수는 있다.
시스템 자원 사항
- Total Disk : 8G
- Total Mem : 256MB
(1). 파티션 정책 (Partition Policy) 수립시 고려사항
- 소스(추가패키지)가 있는 위치를 나누어야 하는가? 예: /var/apache/htdocs
- 추가적인 패키지 설치 위치를 나누어야 하는가? 예: /oracle
- 데이터가 있는 위치를 나누어야 하는가? 예: /data1, /data2
- 로그 기록을 남기는 위치를 나누어야 하는가? 예: /data1/logs
- 기본적인 프로그램이 위치한곳을 나눌것인가? 예: /usr, /opt, /usr/local
- 운영체제의 /tmp, /var, /export/home을 나눌것인가? 예: /tmp, /var, /export/home
- 스토리지는 붙일것인가?
- NAS의 일부 파일시스템을 사용할것인가?
- RAID 구성을 할것인가?
일반적인 파티션 방법과 용량
/ 200 - 500M // / 와 swap는 기본!!
swap Mem * 2 // 실 메모리용량의 두배
/usr 3G - 4G // 대두분의 prog 가 설치됨
/var 200 - 500M
/tmp 200 - 300M
서버의 목적에 맞는 파티션 정책 // optional
/oracle
/data1
/data2
/was
/log
(2). 파티션 정책과 용량 예제
다음은 파티션 정책에 대한 하나의 예이다. 실무에 바로 적용할 수 있는 예는 아니다. 각
각의 서버의 목적에 맞는 사용자 정의가 필요하다.
[Web Server]
________________________________________________
0 / 1000
1 swap 512
2 overlap 8692 (전체용량)
3 /usr 2000
4 /tmp 500
5
6 /WAS 2000
7 /www *
________________________________________________
[Anonymous FTP Server]
________________________________________________
0 / 1000
1 swap 512
2 overlap 8692 (전체용량)
3 /usr 2000
4 /tmp 500
5
6
7 /export/ftp *
________________________________________________
[Mail Server]
________________________________________________
0 / 1000
1 swap 512
2 overlap 8692 (전체용량)
3 /usr 2000
4 /tmp 500
5
6
7 /var *
________________________________________________
5. 수업전에 알아 두어야 하는 사항들 또는 환경 설정 사항
(1). 유닉스의 디렉토리 구조
/
|
+-------+------+-----+------+---------+-----------+--------+------
| | | | | | | | ....
etc usr tmp var home export work work2
|
home
|
+---+---+
| |
user01 user02
[그림] 유닉스 디렉토리 구조
(2). 기본 디렉토리의 역할
모든 파일시스템의 마운트 포인터가 존재한다.
/usr - 프로그램이 설치되는 디렉토리이다.(Bundle Packages, 정식적인~)
/opt - 프로그램이 설치되는 디렉토리이다.(Unbundle Packages, 부가적인~)
/etc - 시스템 설정 파일이나 관리상에 필요한 파일이 존재하는 디렉토리이다.
(사용자/그룹관리정보, 패스워드, 서비스 설정 파일, 시작스크립트등 일종의 제어판!!)
/dev - 디바이스 디렉토리이다.
/export/home - 사용자의 홈디렉토리이다.
(3). 시스템 관리자의 역할
- 프로그램 관리(Software Administration)
- 패치 관리(Patch Managing)
- 백업과 복구(Backup & Recovery)
- 하드웨어 관리(H/W Administration)
- 성능과 장애처리(Performance & System Fault Administration)
- 시스템 보안 관리(System Security)
- 관리자 지식 업데이트(Education)
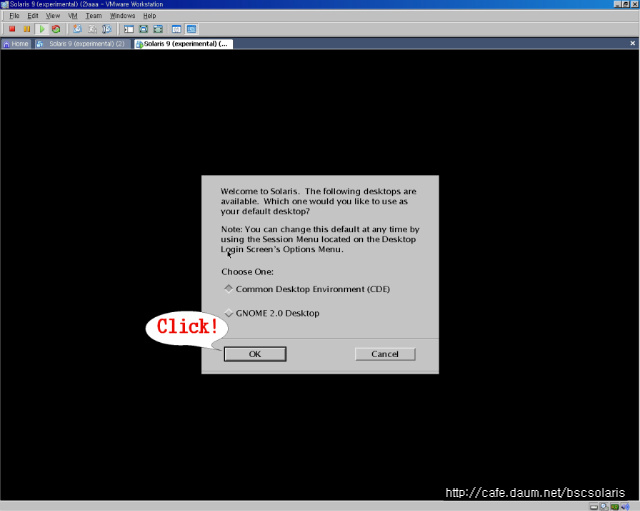
(4). 솔라리스 GUI 환경 종류
- CDE(Common Desktop Environment)
- Openwindow
- GNOME(Including solaris9)
- Java Desktop Environment(Including solaris10)
[참고] CDE?
CDE는 Open Group에서 제정된 개방형시스템의 GUI 표준이다. Motif에 기반을 두고, HP,
IBM, 그리고 다른 회사들에서 나온 요소들을 가미하였으며, 원래는 COSE에 의해 관리되
었다. 대부분의 주요 유닉스 공급자들이 CDE를 지원한다. CDE는 또한 원격 프로그램 실
행과 자신의 작업공간에 있는 응용프로그램을 일시적으로 중지하거나 재개하는 등의 능
력을 제공한다. CDE라는 상표는 X/Open, 즉 Open Group에 의해 관리되어진다.
[참고] GNOME?
GNOME[그놈]은 유닉스 기반의 운영체계 사용자들을 위한 그래픽 사용자 인터페이스와 일
련의 컴퓨터 데스크탑 애플리케이션들이다. GNOME은 유닉스 기반의 운영체계를 프로그래
머가 아닌 사람들도 쉽게 사용할 수 있고, 일반적으로 윈도우 데스크탑 인터페이스와 그
것의 대부분의 보편적인 애플리케이션 들에 상응하도록 만드는데 목적이 있다. 실제로,
GNOME은 사용자들이 여러 개의 데스크탑 외관 중 하나를 선택할 수 있게 해주는데, 예를
들면 사용자 인터페이스를 윈도우나 맥OS처럼 보이도록 만들 수 있다. 게다가, GNOME은
워드프로세서, 스프레드시트, 데이터베이스 관리자, 프레젠테이션 개발도구, 웹브라우저
및 전자우편 프로그램 등, 윈도우의 오피스97 제품에 있는 것들과 같은 형태의 애플리케
이션들을 포함한다.
GNOME은 리처드 스톨먼에 의해 설립된 조직인 FSF의 후원 아래, 자원자들의 장시간에 걸
친 노력의 산물이다. 스톨먼과 FSF의 동료 회원들은 소프트웨어의 소스코드가 다른 사람
들에 의해 계속적으로 개선될 수 있도록 항상 공개되어야 한다고 여기고 있다. GNOME은
데스크탑 운영체계 시장이 어떤 한 회사에 의해 통제되지 않도록, 리눅스와 다른 유닉스
시스템들을 윈도우에 대한 존립 가능한 대안으로 만들기 위한 노력의 일부이다. GNU는
FSF의 운영체계와 일련의 응용프로그램들이다 (리눅스는, 리누스 토발즈가 GNU로부터 나
온 부가적인 운영체계 요소에 커널을 추가함으로써 개발된 운영체계이다).
GNOME은 GNOME 프로그램들과 다른 운영체계 플랫폼 프로그램들이 상호운용성을 가질 수
있도록 CORBA를 지원하는 ORB와 함께 나온다. GNOME은 또한 프로그래머들이 GNOME 사용
자 인터페이스를 사용하는 응용프로그램들을 개발하는데 사용할 수 있도록 위짓 라이브
러리를 포함한다. GNOME은 데스크탑 버전 외에도, 포켓용 PalmPilot 등을 위한 사용자
인터페이스와 일련의 응용프로그램도 나온다.
(5). 윈도우 클라이언트에서 유닉스 서버로 터미널 접속
[ Window XP ] -----> [ Solairs Server ]
시작 > 실행 > cmd > telnet 172.16.8.254 > 사용자ID/패스워드
(6) 참고 웹사이트(URL)
(6.1) 솔라리스에 관련한 썬 사이트 모음
Sun Site
- http://www.sunfreeware.com (GNU Package Site)
- http://sunsolve.sun.com (Patch Site)
- http://docs.sun.com (Sun Manual Site)
(6.2) 솔라리스에 관련한 한국사이트 모음
Solaris Reference Site
- http://cafe.daum.net/bscsolaris
- http://cafe.daum.net/solagoing
- http://solaris.superuser.co.kr
- http://www.solarisschool.co.kr
- http://www.howtosolaris.com
- http://www.unix.co.kr
- http://stone.backrush.com
- http://cafe.naver.com/solatech
- http://cafe.naver.com/backupkorea
- http://www.unixsun.co.kr/
- http://cafe.naver.com/sunschool.cafe
- http://cafe.daum.net/osschool
- http://ndocs.com/
- http://ksun.co.kr
(7) 수업 전 환경 설정 사항
수업전에 환경에 관련한 사항들을 자동으로 설정해 주는 ENV_main.sh 스크립트를 실행 한다.
솔라리스 환경 설정(Solaris Environment Setting)
■ 콘쉘로 변경 (/sbin/sh -> /bin/ksh)
■ ENV_main.sh 스크립트 실행
ENV_main.sh 스크립트는 다음과 같은 역할을 갖는다.
● ~/.profile 파일생성 및 설정
● ~/.kshrc 파일생성 및 설정
● ~/.exrc 파일생성 및 설정
● ~/.rhosts 파일생성 및 설정
● /etc/default/login 설정 변경
● /etc/ftpd/ftpusers 설정 변경
● /etc/sshd/sshd_config 파일 설정 변경
(a). ENV_main.sh 스크립트 실행
# dfshares 172.16.8.254
# mkdir /mnt/server
# mount 172.16.8.254:/root/shell /mnt/server
# cd /mnt/server
# ls
# ./ENV_main.sh
(b). root 사용자의 쉘을 ksh로 변경
# passwd -e // 쉘 변경
Old shell: /sbin/sh
New shell: /bin/ksh <----- "/bin/ksh" 입력
(c). 로그아웃/로그인
CDE 환경 패널(Pannel) > EXIT 아이콘 클릭 -> 로그아웃 -> 로그인
[참고] 현재 적용
# . /.profile
# . /.kshrc
[/]# <----- 쉘 프롬프트 변경 확인
[참고] Intel Platform on VMWare
(a). http://www.daum.net/bscsolaris 에서 ENV.zip 파일 다운로드(MS Windows)
(b). 알FTP 프로그램을 사용하여 솔라리스 서버에 파일을 업로드 한다.
(c). ENV.zip 압축 해제 후 실행
# unzip ENV.zip
# chmod 755 ENV_main.sh
# ./ENV_main.sh
(8). 제어 문자
썬 솔라리스에서 다음과 같은 제어문자(Control Charaters)들을 사용할수 있다.
Control Charaters
Ctrl + C Terminates the command currently running.
Ctrl + D Indicates end-of-file or exit.
Ctrl + U Erases all characters on the current command line.
Ctrl + W Erase the last word on the command line.
Ctrl + S Stops output to the screen
Ctrl + Q Restarts output to the screen after you have pressed Control-S
----------------------------------------------------------------------------------------
TIP .
ctrl + space // 한영 전환
[실습1] <Ctrl + C>
# man ls
<Ctrl + C>
# find / -name core -type f
<Ctrl + C>
[실습2] <Ctrl + D>
1. 파일의 끝의 의미를 갖는다.
# mkdir /test
# cd /test
# cat > file1
Hello, Solaris
<Ctrl + D>
# cat file1
2. 현재 쉘을 종료하는 의미를 갖는다.
# telnet 172.16.8.254
Trying 172.16.8.254...
Connected to 172.16.8.254.
Escape character is '^]'.
SunOS 5.9
login: root <----- ID : root
Password: <----- PASS:
Last login: Tue Mar 11 11:04:50 from solaris215
Sun Microsystems Inc. SunOS 5.9 Generic January 2003
# hostname
# <Ctrl + D>
[실습3] <Ctrl + U>
명령어 라인 전체를 지워 주는 역할을 갖는다.
# find / -name core -type f <Ctrl + U>
[실습4] <Ctrl + W>
명령어 라인상에 마지막 단어를 지워주는 역할을 갖는다.
# find / -name core -type f <Ctrl + W> <Ctrl + W> <Ctrl + W>
[실습5] <Ctrl + S>, <Ctrl + Q> // ctrl + s : 화면 출력 정지 , ctrl + q : 화면정지 복귀
# du /
<Ctrl + S>
<Ctrl + Q>
<Ctrl + S>
<Ctrl + C>
(9). 수업에 사용되는 사용자
수업을 위한 사용자 추가
# admintool &
-------------------------------------
User Name : user01
Login Shell : /bin/ksh
Password : Normal Password
Home Dir. : /export/home/user01
-------------------------------------
(10). CDE 환경 사용에 대한 설명
(a) 터미널 사용시 설명
- 한개의 터미널을 띄운다.
- 터미널의 (ㄱ)왼쪽 상단 "Exit" 아이콘,
(ㄴ)오른쪽 상단 "Minimize/Maximize" 아이콘,
(ㄷ)오른쪽 상단 "Icon Coversion" 아이콘
(b) CDE 환경에서 사용되는 아이콘 설명
CDE 환경의 패널 부분에 존재하는 아이콘
- Netscape Icon
- Calendar Icon
- Homedirectory Icon
- Text Node Icon
- MailBox Icon
- Screen Lock Icon
- Workspace Icon
- Exit Icon
- Printer Icon
- Application Icon(Desktop Control Icon)
- CPU_DISK Icon
- Help Icon
- Trash Icon
(11). 사용자의 쉘프롬프트
root 사용자 : #
일반 사용자 : $
출처 : http://cafe.daum.net/bscsolaris
Chapter 3. Solaris Introducing
_________________________________
솔라리스 환경은 SunOS(5.x)와 ONC+(Open Network Computing) 제품, CDE GUI
(Graphical User Interface)로 구성이 된다. SunOS는 시스템 자원(System Resources)과 시
스템 동작을 위한 스케줄 프로그램등으로 구성이 된다. ONC+ 프로그램은 네트워크 서비스
즉 NIS(Network Information Services), NIS+(Network Information Service Plus),
NFS(Network Filesystem)와 같이 네트워크 상에서 자원을 공유하고 정보를 전달하는 서비
스 제품으로 구성된다. CDE 환경은 GUI 방식으로 되어 있으며 로그인 스크린이나 운영체제
의 거의 모든 기능을 접근하는데 사용한다.
솔라리스 이전 버전
- Solaris 1.x & Solaris 2.x
- SunOS 4.x & SunOS 5.x
(1). Solaris 9 버전이란?
■ 솔라리스 버전간의 상관관계
Solaris 2.6 = SunOS 5.6
Solaris 2.7 = SunOS 5.7 = Solaris 7
Solaris 2.8 = SunOS 5.8 = Solaris 8
Solaris 2.9 = SunOS 5.9 = Solaris 9
Solaris 2.10 = SunOS 5.10 = Solaris 10
(2). 솔라리스 플랫폼(Platform)
■ Sparc Platform
■ Intel Platform(x86 용)
(3). 대표적인 UNIX
■ Sun Solaris
■ HP HP-UX
■ IBM AIX
■ Compaq Tru64 (Include HP)
■ SGI IRIX
[참고] 인텔 호환 PC에서 동작하는 유닉스
Solaris(X86), OpenServer, Unixware, NextStep, Minix
FreeBSD, NetBSD, OpenBSD
Linux(RedHat RHEL, SuSE Linux, Tubo Linux, Debian Linux 등)
(4). UNIX 시스템의 사용
KT : 80 %
HanJun : 50 %
KTF : 33 %
COSCO : 80 %
철도청 : 제어용 시스템
반도체 : 반도체 기기 테스트용 장비
CAD 서버: 디자인 프로그램 애뮬레이션 용도
(5). 최근 유닉스 시장
■ Unix 서버 시장(한국기준, 매출액 기준, 2007년 8월기준)
(a). IBM
(b). HP
(c). SUN
■ X64 서버 시장(한국기준, 매출액 기준, 2007년 8월 기준)
(a). HP
(b). IBM
(c). 삼성전자
(d). DELL
(e). SUN
(6). 솔라리스 9의 새로운 기능
솔라리스의 새로운 기능에 대해서는 다음 사이트를 참고하였다.
- http://docs.sun.com/app/docs/doc/816-3925/6ma624fq7?a=view
(6.1). 솔라리스 9 버전 릴리즈
- 2002년 09월(http://docs.sun.com/app/docs/coll/768.6)
- 2002년 12월(http://docs.sun.com/app/docs/coll/768.7)
- 2003년 04월(http://docs.sun.com/app/docs/coll/768.8)
- 2003년 08월(http://docs.sun.com/app/docs/coll/768.9)
- 2003년 12월(http://docs.sun.com/app/docs/coll/768.10)
- 2004년 04월(http://docs.sun.com/app/docs/coll/768.11)
- 2004년 09월(http://docs.sun.com/app/docs/coll/768.12)
- 2005년 09월
(6.2). 중요 기능 추가 / 업데이트
■ Solaris 9 Resource Manager을 통한 시스템 자원 자원 개선
■ Linux와의 호환성 개선함(리눅스의 프로그램을 아무런 변경없이 실행 가능하게 됨)
■ 개선된 보안성
- Internet Key Exchange(많은 보안 네트워크 관리 가능)
- Solaris Secure Shell(SSH) 내장
- 안전한 LDAP 클라이언트(SSL/TLS 및 CRAM-MD5 암호화 기법 제공)
- 강력한 암호화(최대 128비트 강력한 암호화 가능)
■ iPlanet Directory Server 5.1 내장
■ Solaris Volume Manager(RAID 구성 강화)
■ 파일 시스템 개선(파일 시스템 입출력 기능 향상)
■ Solaris Live Upgrade 2.0 포함
■ Web Start Flash(플래쉬 설치 방식 제공)
■ 최소 설치(필요한 패키지만 설치 가능)
■ Multiple Page Size Support
■ 향상된 다중 스레드 라이브러리
■ Solaris 운영 환경을 위한 NetscapeTM 6.2.1 포함
■ Solaris 운영 환경을 위한 GNOME 2.0 Desktop 포함
[참고] SUN/IBM/HP 서버의 종류와 Linux 지원가능 시스템
/root/docs/Reference/UnixServerType.txt
출처 : http://cafe.daum.net/bscsolaris
Chapter 2. OS Overview
_________________________
1. 운영체제(OS)란?
운영체제(OS)는 사용자 H/W 에 대한 사용자 인터페이스 역할을 가진다. 운영체제의 핵심
(core)은 kernel이고 실제적인 H/W을 제어 하는 역할을 가진다. Shell은 명령어 해석기의
역할을 가지고 나머지 파일과 디렉토리 구조로 구성이 되어 있다.
2. 운영체제의 구조
-------------------------------------
USER
-------------------------------------
Application(웹브라우저,편집기) => ls, find, .. (명령어)
OS Shell(sh,csh,ksh,tcsh,zsh,bash) => ksh (명령어해석기)
Kernel(unix, genunix) => unix (커널)
-------------------------------------
H/W => disk, monitor(디바이스)
-------------------------------------
컴퓨터의 구성은 하드웨어와 소프트웨어로 나눌수 있다. 하드웨어는 CPU, RAM, Disk 등이고
소프트웨어는 컴퓨터안에서 실행할 수 있는 프로그램을 말한다. 운영체제는 이런 하드웨어
와 소프트웨어를 직접 제어 가능하도록 하는 프로그램이다.
(1). 하드웨어(H/w)
■ CPU(Central Processing Unit)
중앙처리장치는 컴퓨터 하드웨어의 핵심으로서 기억장치로부터 기계어 코드(컴퓨터가 이해
할수 있는 기게어 코드)를 읽어 들여 실행하는 역할을 한다. 다시말하면 컴퓨터내의 모든
제어와 연산을 담당한다. 명령어의 해석과 자료의 연산, 비교 등의 처리를 제어하는 컴퓨
터 시스템의 핵심적인 장치이다. 중앙처리장치의 성능은 컴퓨터의 성능과 직결되며 CPU
내부의 구성에 따라 컴퓨터의 계열이 다양하게 구분된다. 컴퓨터 시스템 전체를 제어하는
장치로서, 다양한 입력장치로부터 자료를 받아서 처리한 후 그 결과를 출력장치로 보내는
일련의 과정을 제어하고 조정하는 일을 수행한다. 모든 컴퓨터의 작동과정이 중앙처리장치
의 제어를 받기 때문에 컴퓨터의 두뇌에 해당한다.
중대형 컴퓨터에서는 이를 중앙처리장치(central processing unit:CPU)라 하지만, 소형 컴
퓨터에서는 때로 마이크로프로세서(micro processor) 또는 줄여서 그냥 프로세서라 부르기
도 하는데, 명칭만 다를 뿐 기본적으로 동일한 기능을 수행한다.
■ RAM(Ramdom Access Memory)
램(RAM)은 일반적으로 메모리 혹은 주기억장치라고 부르는데 중앙처리장치에 의해 접근되
는 기계어 코드와 자료(혹은 데이터)를 저장한다. 주기억장치로 널리 사용되고있는 메
모리로로, Random Access Memory 의 약어이다. 플립플롭으로 만들어진 기억소자를 사용
한다. 기록과 해독의 두 회로가 있어서 정보의 기록, 해독이 가능하고 컴퓨터나 주변 단말
기기의 기억장치에 널리 쓰인다. 종류로는 전원이 연결된 상태에서 일정한 주기마다 리프
레시(refresh) 조작을 해주어야만 정보가 지워지지 않는 DRAM과 전원만 연결되어 있으면
정보가 지워지지 않는 SRAM이 있으며 고밀도 집적회로를 사용하여 소형, 대용량화되고 있
다.
SunOS 5.X은 가상 메모리 운영체제이다. RAM의 사용공간 보다 더 많은 메모리 공간을 사용
하는 프로그램을 실행시켰을 때 사용되는 것이 가상 메모리이다. 가상 메모리는 하드 디스
크에 있는 메모리 공간이며 실제 메모리의 연장 공간처럼 쓰이게 된다.
프로그램은 하드디스크에 저장되며 프로그램이 실행되면 메모리에 복사가 되고 활성화 된
프로그램 동안 프로그램의 일부분이 RAM에 복사횓된다. 작업이 끝날 때 까지 가상 메모리
에 남아 있게 된다.
프로그램이 종료 되면 가상 메모리공간을 다른 프로그램 실행시 덮어 쓰게 되고 이것의
관리를 운영체제가 한다. 만약 전원이 꺼지면 저장하고 있는 모든 가상 메모리의 내용은
없어지게 된다.
■ Hard Disk
하드 디스크는 자기적 매체 장치로서 파일, 디렉토리, 프로그램들등을 저장하는 장치이다.
자성체로 코팅된 원판형 알루미늄 기판에 프로그램이나 데이터를 영구 보관하기 위한 외부
기억장치 자료를 저장할 수 있도록 만든 보조기억장치이다. 디스크가 레코드판처럼 겹
쳐져 있는 것으로, 디스크 위에는 트랙이라고 하는 동심원이 그려져 있다. 이 동심원 안에
데이터를 전자적으로 기록하게 된다. 헤드는 트랙에 정보를 기록하거나 읽어 내는 역할을
한다.
자기디스크 장치가 처음 나타났을 때는 디스크를 사용자가 컴퓨터에 장착하여 사용하게
했다. 그러나 먼지에 오염되거나 사용자의 조작 실수로 자료가 파손되는 일이 잦아서 현
재와 같이 밀봉하는 형태로 바뀌었다. 하드디스크라는 말은 PC가 출현되었을 때 플로피디
스크(FDD)만 사용할 수 있었는데, 점차 용량이 큰 현재의 디스크가 사용되면서 플로피에
상대되는 말로 하드라는 수식어가 붙게 되었다.
■ I/O 장치
입력장치는 컴퓨터에 자료를 입력하기 위한 장치를 말하며, 인풋시스템(Input System)이라
고도 한다. 인간이 정보를 해석하고 기억하는 방식과는 달리 컴퓨터는 0과 1로 정보를 표
시하게 되어 있다. 사람들이 사용하는 문자, 도형, 목소리, 숫자 등의 자료를 읽어 들여
0과 1의 이진수 형태로 바꾸어 컴퓨터가 처리를 할 수 있도록 해주는 역할을 하는 것이 입
력장치이다. 입력장치로는 키보드, 마우스, 조이스틱, 터치스크린, 이미지 스캐너, 디지털
카메라, 광학 마크 판독기(OMR), 바코드 판독기(Bar Code Reader), 자기잉크문자판독기
(MICR)등이 있다.
출력장치는 컴퓨터에서 정보를 처리한 결과를 기계로부터 인간이 알 수 있는 언어(言語)로
변환해서 꺼내는 장치이다. 출력장치는 모니터, 프린터, 종이테이프, 카드천공기, 라인프
린터, 자기테이프등이 있다.
(2). 운영체제
SunOS 운영체제는 다음과 같은 3가지로 구성이 된다.
■ 커널(Kernel)
■ 쉘(Shell)
■ 디렉토리 구조(Directory Structure)
① 커널
커널은 SunOS 운영체제의 핵심 부분으로 컴퓨터의 물리적인 자원을 관리해 주는 역할을 가
지고 다음과 같은 기능등을 가진다.
■ CPU 기능 관리(CPU 스케줄링)
■ 메모리 관리 및 가상메모리 관리
■ 프로세스 관리
■ 파일시스템과 구조 관리
■ 디바이스 관리(주변 장치, 입출력 장치)
■ 기타
커널은 솔라리스가 부팅될 때 가장 먼저 읽혀진다. 솔라리스 커널은 unix, genunix로 구성
되어 있으며 커널을 제외한 다른 특성이 있는 모든 기능들을 모듈(Module) 형태로 제공하
고 있다.
② 쉘(Shell)
쉘은 명령어를 해석하는 부분으로서 사용자와 솔라리스 시스템을 연결시켜 주는 인터페이
스 역할을 한다. 즉 사용자가 입력한 명령어를 해석하여 커널이 이해할 수 있는 명령으로
번역하여 커널에게 넘겨 준다. 그러면 커널이 그것을 수행하고 수행된 결과 값을 쉘에게
다시 넘겨주게된다. 그러면 쉘은 사용자에게 명령어의 결과 값을 돌려 준다. 결국 사용자
의 명령을 해석하는 역할을 한다. 쉘은 이렇게 ㉮명령어를 해석하는 역할외에도 ㉯프로그
램을 할수 있는 특징을 가지고 있다. 쉘의 특성을 이용한 프로그램을 쉘프로그램 또는 쉘
스크립트라고 한다.
솔라리스에서는 6가지 쉘을 제공해 주고 있다. 기본 쉘(Basic Shell)과 추가적인 쉘이다.
솔라리스 9에서의 기본 쉘
■ Bourne Shell
■ C Shell
■ Korn Shell
솔라리스 9에서의 추가적인 쉘
■ Bash
■ Z Shell
■ TC Shell
솔라리스의 추가적인 쉘은 솔라리스 8에서 처음 내장이 되었으며 그 전까지는 기본 쉘 3가
지만 제공하고 있었다. 실제적으로 다른 디렉토리 안에서 많은 쉘의 이름이 존재하지만 실
제 이 기본 쉘과 추가적인 쉘에 링크 되어진 상태이다.
쉘의 역할을 정리하여 보면 다음과 같다.
① 입력을 읽고 해당 명령행을 분석한다.
② 특수 문자들을 평가한다.
③ 파이프, 리다이렉션, 백그라운드 프로세스를 설정한다.
④ 시그널을 처리한다.
⑤ 프로그램을 올바르게 실행시킨다.
다음은 쉘의 발전 과정에 대한 그림이다.
sh --------------> ksh --------------> zsh
csh ------------------------> tcsh
bash(sh + csh + ksh)
[그림] 쉘의 발전 과정
출처 : http://cafe.daum.net/bscsolaris
Chapter 1. UNIX History
_________________________
Mutics => UNIX(AT&T, 1969년)
(1). System V 계열
(2). BSD(Berkeley Software Distribution)
(3). SVR4(System V Release 4)
[참고] 유닉스 역사 / 유닉스 소개
[유닉스의 역사]
1960년대 AT&T 벨연구소에서 개발한 Multics 라는 운영체제가 너무 복잡하여
운영체제의 필요성이 생기게 되었다. 1969년 AT&T Bell 연구소의 Ken Thompson과
C언어를 만든 Dennis Rithie에 의해 PDP-7를 사용하여 어셈블리로 개발 되었다.
초기의 유닉스 운영체제는 어셈블리(Assembly) 언어로 작성되어 Dennis Ritchie가
B언어를 개선한 C언어를 개발한 뒤 1973년에 C언어를 사용하여 유닉스를 다시 만
들것을 제한하였고 그리하여 유닉스의 90% 이상이 C로 다시 작성이 되고 나머지는
어셈블리 언어 및 스크립트로 작성되었다. 이로인해 다른 시스템에도 아주 쉽게
이식하여 사용할수 있게 되었다.
1976년도 AT&T는 외부의 여러 대학에 소스 코드와 매뉴얼을 배포하였으며 유닉스의
소스 코드를 받은 여러 연구소는 개량 판을 발표하였는데 그 중에서 가장 유명하고
활발한 활동을 하였던 것이 BSD(Berkely Software Distribution)이다.
1978년 UNIX V6(Version 6)라는 이름으로 일반인에게 공개되면서 IBM 370 컴퓨터에
이식하여 시험하였고 다른 많은 회사에서도 자사의 중대형 컴퓨터에 유닉스를 이식
하기 시작하였다.
BSD는 1978년도 버클리 대학의 빌 조이가 발표하여 1979년 가상 메모리 개념을 최초
로 도입했으며, 1980년에는 TCP/IP를 구현한 최초의 운영체제가 되었다.
AT&T의 벨 연구소도 유닉스를 꾸준히 개량하여 1983년 UNIX System V라는 이름으로
새 버전을 발표하였다.
썬은 BSD를 만든 빌 조이를 영입하여 1984년 BSD를 바탕으로 많은 독자적인 기능을
추가한 SunOS를 발표하였고 많은 유닉스 계열의 기술적인 공헌과 개선을 하였다.
유닉스의 원조이자 UNIX System V 계열의 대표인 AT&T와 BSD 계열의 선두 주자인 썬
은 UNIX System V와 SunOS를 근간으로 SVR4(System V Release 4)를 발표하였다.
SVR4는 1991년도 썬이 Solaris 2.X라는 상표명으로 발표를 한 이후에 많은 유닉스
제조회사들이 채택하여 유닉스의 기본이 되었다.
[유닉스의 소개]
유닉스는 1969년에 벨연구소에서 인터랙티브 시분할 시스템으로서 만든 것이 그 시초
가 된 운영체계이다. 켄 톰슨과 데니스 리치가 유닉스의 창시자로 알려져 있다. 유닉
스라는 이름은 그 이전의 시스템인 멀틱스에 기반을 두고 지은 일종의 말장난이었다.
1974년에 유닉스는 C 언어로 쓰여진 최초의 운영체계가 되었다. 유닉스는 여러 회사
들이나 대학 및 개인들에 의해 많은 확장판과 새로운 아이디어들이 다양한 버전의 유
닉스에 추가됨으로써, 대형 프리웨어 제품의 한 종류로 진화하였다. 유닉스는 앞서가
는 특정 컴퓨터 회사들에 의해 소유된 독점적인 운영체계가 아니었다는 것과, 또 그
것이 표준 프로그래밍 언어로 작성되고, 대중적인 많은 아이디어를 받아들였다는 이
유 때문에,누구에 의해서도 개선되고 강화될 수 있는 최초의 개방형 표준 운영체계가
되었다. 다양한 버전의 유닉스로부터 나온 C 언어와 쉘 인터페이스의 복합체는 IEEE의
찬조 하에서 POSIX로 표준화되었다. POSIX 인터페이스들은 번갈아 가며, X/Open 프로
그래밍 가이드 4.2 ("단일 유닉스 규격"과 "유닉스95"로 알려져있다)에 명기되었다.
단일 유닉스 규격의 버전2는 유닉스98로도 알려져 있다. 유닉스의 공식적인 등록상표
는 현재 산업표준기구인 오픈그룹이 소유하고 있으며, 유닉스 관련 제품들의 인증과
상표부여 등을 관장하고 있다.
유닉스 운영체계는 널리 판매된 썬마이크로시스템즈, 실리콘그래픽스, IBM, 그리고
그외 많은 회사들의 워크스테이션 제품들에서 사용된다. 유닉스 환경과 클라이언트/
서버 프로그램 모델은 인터넷 개발과 네트웍 중심의 컴퓨팅 국면을 새로이 하기 위한
중요한 요소였다. 유닉스에서 파생하여, 현재 무료 소프트웨어와 상용버전이 모두 존
재하는 리눅스는 독점 운영체계의 대안으로서 명성을 더해가고 있다.
출처 : http://cafe.daum.net/bscsolaris
solaris 폴더내 모든 자료는
http://cafe.daum.net/bscsolaris
에서 퍼온 자료이며 개인적인 자료 정리용으로 쓰였습니다
# http://nchc.dl/sourceforge.net/sourceforge/oinkmaster/oinkmaster-2.0.tar.gz
# tar xvfz oinkmaster-2.0.tar.gz
# cd oinkmaster-2.0 ; ls
# cp oikmaster.pl /user/local/bin // oinkmaster를 패스변수에 등록되어지게끔 하기 위해
# cp oikmaster.conf /etc/snort
# cd contrib && ls
# ./makesidex.pl /etc/snort/rules > /etc/snort/aaa.conf
# vi /etc/snort/oinkmaster.conf
52 주석 제거후 <oinkcode> 항목을
oinkcode : 6ef3413ed223eef4ae68b2bb43ce7b9b1b026f7c 로 바꾸자 < > 없어야 한다.
or
550a8353a52415adbd2f47770bf153bc5318bd1a
# oinkmaster.pl --help
# chown -R root.root /etc/snort/ oinkmaster가 룰을 업데이트후 저장할 수 있도록 하기 위해 소유자를 첸지 .. 딴데? 서는 snort.snort로 바꾸기도 하는데 그 차이를 잘 모르겠다.// root.root로 테스트 했을때는 잘되었다.
# ls -l /etc/snort/rules/*.rules | wc -l > /tmp/old_rules.txt
# cat /tmp/old_rules.txt
48
# rdate -s time.bora.net // 시간 동기화
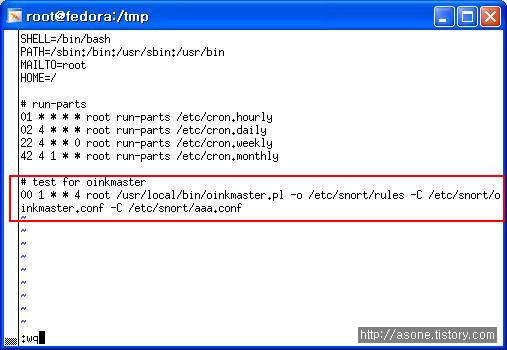
# oinkmaster.pl -v -o /etc/snort/rules -C /etc/snort/oinkmaster.conf -C /etc/snort/aaa.conf
-v 자세히
-o 저장될 목적지
-C 설정파일 위치 / /헌데 설정 파일 위치가 두개 나온것은 업데이트 되기전
// aaa.conf파일에서 목록을 저장된것과 비교후 업데이트 하기 위한것으로 추정된다.
업데이트 완료후
# ls -l /etc/snort/rules/*.rules | wc -l > /tmp/newrules.txt
# cat /tmp/oldrules.txt
# cat /tmp/newrules.txt // 업데이트 된것을 알 수 있다.
정기적인 업데이트
---------------------------------------------------------------------------------------------------
정기적 작업을 위해서
crontab을 이용하여 등록 시켜 보자.
# vi /etc/contab
분 시 일 주 달
01 * * * * root run-parts /etc/cron.hourly
02 4 * * * root run-parts /etc/cron.daily
22 4 * * 0 root run-parts /etc/cron.weekly
42 4 1 * * root run-parts /etc/cron.monthly
# sevice cond restart
---------------------------------------------------------------------------------------------------
TIP
---------------------------------------------------------------------------------------------------
snort 부팅시 자동 실행
/etc/rc.d/rc.local
에다
snort -c /etc/snort/snort.conf -D // 실행문을 넣게 되면 부팅시 자동 실행 하게 된다.
---------------------------------------------------------------------------------------------------
---------------------------------------------------------------------------------------------------------
snort 에 의해 생긴 자료를 DB와 연동 시켜 보았지만 이를 분석 하기가 상당히? 까다롭다 .
해서 웹상에서 간편히 볼 수 있도록 웹서버와 연동시켜 보자.
---------------------------------------------------------------------------------------------------------
아파치 서버 설치
---------------------------------------------------------------------------------------------------------
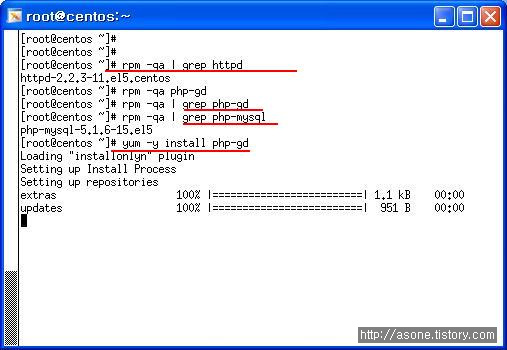
아파치를 돌리기 위해서는 APM ( httpd, php-gd, php-mysql)관련 패키지가 필요하다.
또한 adodb, base source 도 필요하다.
[centos]
역시 adodb, base source도 받자
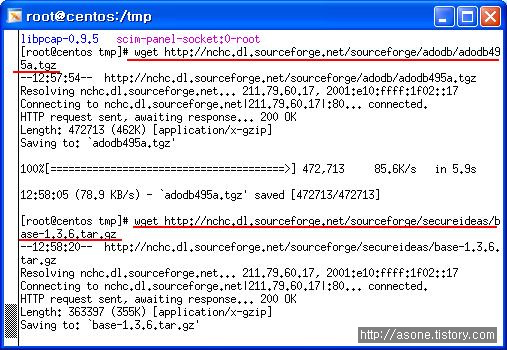
# tar xvfz base-1.3.6.tar.gz -C /var/www/html // -C 풀릴 위치 지정
# cd /var/www ; ls
adodb cgi-bin error html icons //adodb
# cd html ; ls
base-1.3.6
# mv base-1.3.6/ base
# cd base
# ls
# cp base_conf.php.dist base_conf.php
# vi base_conf.php
48 $BASE_urlpath = '/base';
70 $DBlib_path = '/var/www/adodb';
92 $alert_dbname = 'snort';
95 $alert_user = 'base';
96 $alert_password = 'base123'; // 각각 수정
# service httpd start // 웹데몬 시작 . mysql 이 정지 되어있다면 시작시켜야한다.
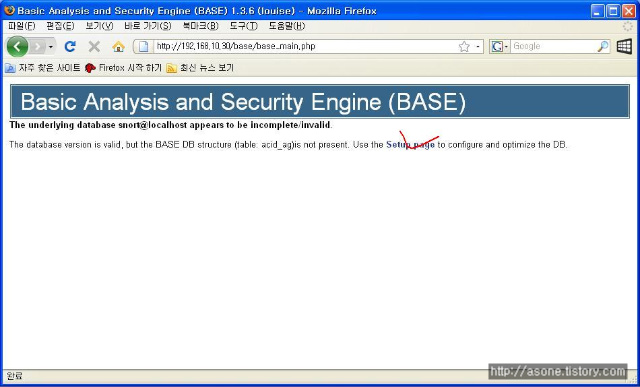
setup page 광클
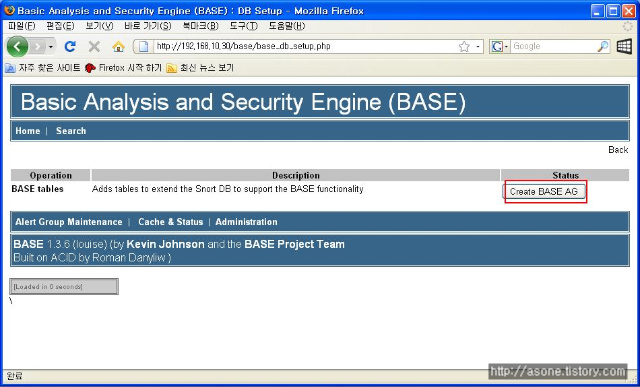
create BASE AG를 누르게 되면 DB를 바탕으로 웹페이지가 생성 된다.
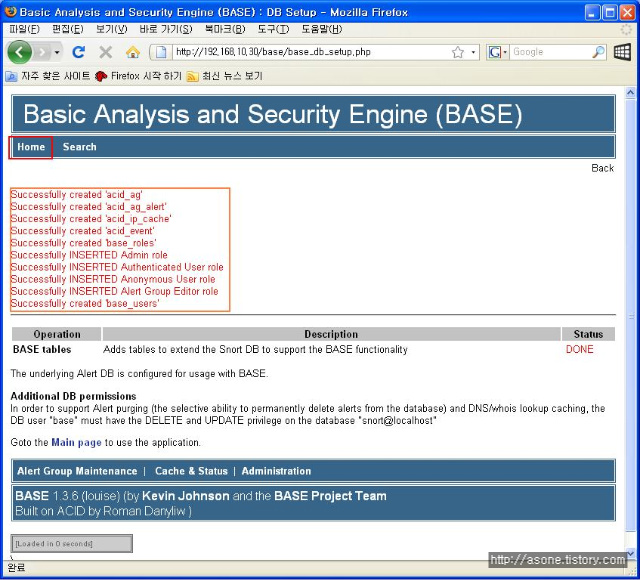
여기서 HOME을 눌른 다음 그 페이지에서 각각 끌리는? 것에 눌러 보면 /var/log/snort에서 본 정보가
일목 요연? 하에 보여진다는 것을 알 수 있다.
-----------------------------------------------------------------------------------------------------------------------------------------------------------------------------------------------------------------------------------------
DB를 생각 하면 머리에 쥐가..쳇..
DB언어
DDL ( 정의어 ) : create, drop, alter
DML ( 조작어 ) : select, insert, update, delete(데이터만 삭제)
DCL ( 제어어 ) : grant, reboke , deny
성능에 따라
IBMDB2 > Oracle > MS- SQL > Access > excel > my- sql
순으로 성능이 좋고 가격도 좋다? 비싸다 ㅡㅡㅋ
--------------------------------------------------------------------------------------------------------
실습
--------------------------------------------------------------------------------------------------------
[centos]
[root@centos ~]# rpm -qa | grep sql
sqlite-3.3.6-2
python-sqlite-1.1.7-1.2.1
hsqldb-1.8.0.4-3jpp.4
mysql-5.0.22-2.2.el5_1.1
php-mysql-5.1.6-15.el5
postgresql-libs-8.1.9-1.el5
mysql-server-5.0.22-2.2.el5_1.1 // mysql-server가 있따.
없다면
# yum -y install mysql-server // 의존성 패키지 (mysql, perl-DBD-MYSQL, perl-DBI)
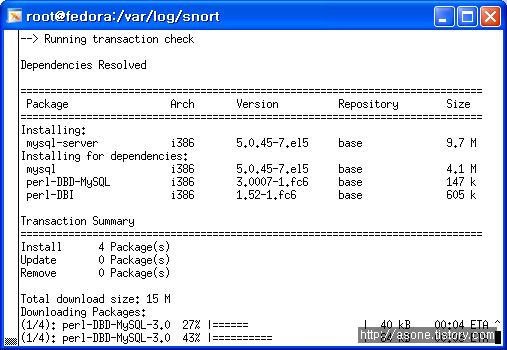
yum설치 하면 잘됩니다.
[root@centos ~]# service mysqld start
어찌 됐는 okok 뜨면서 실행 된다. ㅡㅡ/
# netstat -ntlp // 3306 포트 확인
# /usr/bin/mysqladmin -u root password '123456'
// 처음 접속시 관리자 계정과 패스워드를 설정해줘야 한다.
mysql> show databases;
mysql> create database snort;
mysql> use snort;
mysql> show tables;
[fedora]
// snort를 받아 압축을 푼 폴더로 이동
# cd /tmp/snort
# make clean // 컴파일된 파일 삭제
# reset // 메모리 올려진 컴파일 삭제
// 재 컴파일 하자
# ./configure --prefix=/etc/snort --with-mysql && make && make install
or
# ./configure --with-mysql && make && make install
// 여기서 주의할 점은 나중에 # snort -c snort.conf 로 실행 했을때 에러가 뜨면
위의 작업을 다시 해야한다. --prefix 부분을 삭제하고 다시 하자.
# ehco $?
0
# vi /etc/snort/snort.conf
/mysql
830
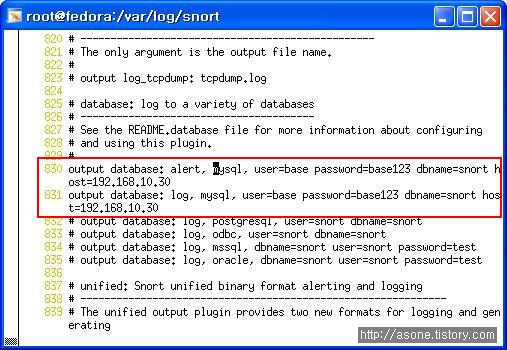
alert 와 log를 mysql 로 내보낼때 쓰인다.
user snort가 DB에 쓸때 쓰일 계정이다. 임의로 해도 된다 . 단 mysql에서 맞춰우어야 하낟.
dbname - snort가 데이터가 들어갈 db
host db가 저장될 host
수정후 저장
/tmp/snort-2.6.1.5/schemas 로 이동 후
# pwd
/tmp/snort-2.6.1.5/schemas
# ls
Makefile Makefile.in create_mssql create_oracle.sql
Makefile.am create_db2 create_mysql create_postgresql
# more create_mysql // snort에 쓰일 db구문이 있다.
# scp create_mysql root@192.168.10.30 //centos로 이동
[centos]
다른 터미널로 로긴
# mysql -u root -p snort < create_mysql // 리다이렉션을 이용 snort 테이블에 대해 create_mysql문 적용
sql접속되어있는 터미널에서
mysql> shoq tables;
mysql> select * from data;
mysql> select * from signature; // data, sig 둘다 비어있다.
mysql> use mysql;
mysql> select host,user,password form user;
계정에 권한을 주자
mysql> grant CREATE,SELECT,INSERT,UPDTE,DELETE on snort.* to base@localhost;
//base@localhost 에게 CREATE ~~등등의 권한 할당
mysql> set password for base@localhost=PASSWORD('base123');
// 암호 설정
mysql> grant CREATE,SELECT,INSERT,UPDATE,DELETE on snort.* to base@192.168.10.10;
//base@192.168.10.10 에게 CREATE ~~등등의 권한 할당
mysql> set password for base@192.168.10.10=PASSWORD('base123');
//암호설정
mysql> select host,user,passwrod from user;
// 권한이 grant되어진것을 확인 할 수 있다.
[fedora]
# snort -c /etc/snort/snort.conf
정상 실행 되는지 확인해보자
만약 메모리가 모자르다면 일단 필요없는 프로세스 를 잠깐 끄자.
ctrl +z
# pkill -9 snort
# snort -c /etc/snort/snort.conf -D
[centos]
# nmap -sS -O -v 192.168.10.10 // 스캔
sql이 켜진 터미널로 이동
mysql> user snort;
mysql> select * from data;
mysql> select * from signature; // 데이터가 생성 된것을 볼 수 있다.!!!!!!!!!!!!!!!!!!!!!!!!!!!!!
Dokdo is a Korean territary.
얼마전 기사에 뉴욕타임지에 실린 기사라면서 소개된 글이 있었다.
서경덕 씨와 가수 김장훈 두분의 노력이 일궈낸 소식이였다.
뉴욕 타임지에 DO YOU KNOW? 라고 시작된 전면 광고 였다.
내용은 아래 사진을 봐도 되고 신문 기사를 참고 해도 되고 ㅡㅡㅋ
firefox에 piclen이라고 플러그인이 있는데 이를 돌다가 우연히 발견한 사진이 있어 포스팅 한다
저 사진을 보고 . 아........ 정말 멎지다
정말 두분을 존경하지 않을 수 없겠다. 이런 가슴 서글픈 마음을 가져보며 몇장의 사진을 올려본다


마지막 컷은 piclen에서 찾은 센스사진 ''ㅋ
3. 침입탐지 모드
------------------------------------------------------------------------------------------------------
rule 을 이용하여 캡처된 패킷과 비교 후 경고 및 기록
[fedora]
받은 패키지를 푼 디렉토리로 이동하자
# cd /tmp
# cd snort-2.6.1.5
# ls
COPYING aclocal.m4 configure libtool snort.8
ChangeLog config.guess configure.in ltmain.sh src
LICENSE config.h contrib m4 stamp-h1
Makefile config.h.in depcomp missing templates
Makefile.am config.log doc mkinstalldirs verstuff.pl
Makefile.in config.status etc rpm
RELEASE.NOTES config.sub install-sh schemas
# cd etc
# mkdir /etc/snort // 룰 적용을 위한 설정 폴더
# cp * /etc/snort -v // 설정파일 복사
# cd /etc/snort
# vi snort.conf
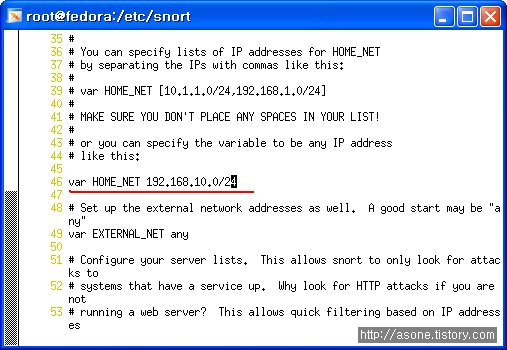
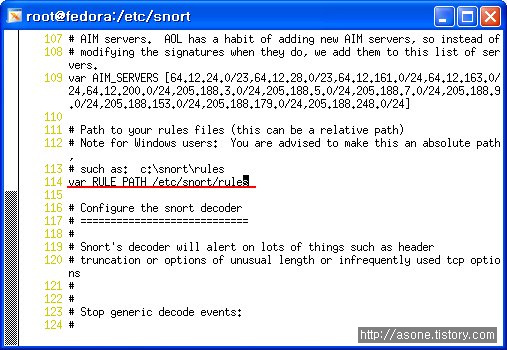
114 line 에서 rule의 위치를 절대경로 로 수정 후 저장
# ls /var/log/snort // 기존 로그가 있다면 삭제
# rm -rf /var/log/snort/*
snort 구동
# pwd
/etc/snort
# snort -c snort.conf // -c conf 파일 위치
// rule파일이 없어서 error
# wget http://www.snort.org/pub-bin/downloads.cgi/Download/vrt_pr/snortrules-pr-2.4.tar.gz
// rule 다운로드
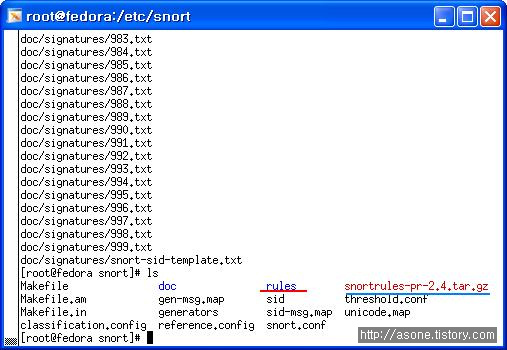
# ls
# tar xvfz snortrules-pr-2.4.tar.gz // snort rule파일을 풀어 주자 # pwd 는 /etc/snort
# ls // rules 폴더가 생겼다.
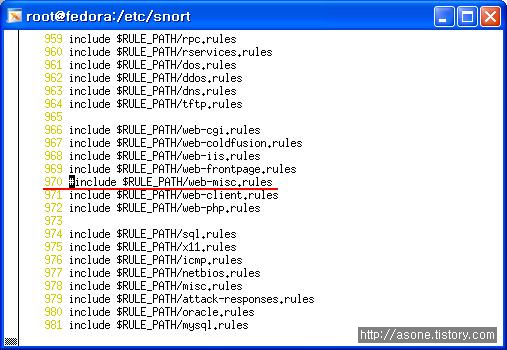
에러가 메시지가 뜬다 . 아마도? web-misc 부분일것이다.
snort.conf 파일 수정하자
# vi /etc/snort/snort.conf
/web-misc
해당 라인을 주석 처리 하자.
# snort -c /etc/snort/snort.conf
혹
/var/log/snort 폴더 가 없다는 이유로 에러가 뜰수 있다.
# mkdir /var/log/snort
# snort -c /etc/snort/snort.conf
정상 작동 된다면
ctrl + z
강종
# ps -ef | grep snort // snort 는 아주 독한? 프로그램이라 ctrl +z 만 먹는다.
// 종료후 남은 프로세스를 킬해주자
snort pid #
# kill -9 # ( snort pid )
or // 귀찮다면 아래처럼 해도 된다.
# pkill -9 snort
# ps -ef | grep snort
# snort -c /etc/snort/snort.conf -D // -D 데몬 형태로 백그라운드에서 실행
[ centos ]
# nmap -sS -O -v 192.168.10.10 // fedora로 스캔 땡겨보자
[ fedora ]
# ls -l /var/log/snort
alert 외 snort.log.xxxx 파일이 생성되었다. 탐지 했다는 뜻 ㅡㅡ/
# cat alert | more
# cat snort.log.xxxx // 꺠져 보인다. alert는 그냥 볼 수 있지만 log파일은 snort로 보자.
# snort -r /var/log/snort/snort.log.xxxx
------------------------------------------------------------------------------------------------------


------------------------------------------------------------------------------------------------------
1. snort 는 공개형 s/w 가장 대표적인 침입탐지 시스템이다
2. 패킷 수집 라이브러리인 libpcat에 기반한 네트워크 스니퍼로 정의되며 침입탐지 rule들에 일치 하는 네트워크 트래픽을 감시, 기록, 경고 할 수 있다.
3. Overflow, Stealth 포트 스캔, CGI공격, SMB탐색, OS확인 시도등 다양한 공격에 대해 탐지가 가능하다.
4. 탐지 룰은 지속적으로 업데이트 되며, 자신이 직접 작성할 수 있으므로 최신의 공격에 대응이 가능하다.
------------------------------------------------------------------------------------------------------
SPAN을 이용한 snort 구성
------------------------------------------------------------------------------------------------------
switch에 물린 각 client가 물려져 있다면 이에 더해서 IDS를 같이 물려 사용할 수 있다.
이때 이용하는 방법이 switch에 SPAN이다. 또는 미러링 포트, 모니터 포트라고도 한다.
----------------------------
|ㅁ ㅁ ㅁ ㅁ ㅁ ㅁ | Switch
-+---+------------------+--
| | |
clientS .... IDS
------------------------------------------------------------------------------------------------------
설치 전 준비사항
------------------------------------------------------------------------------------------------------
libpcap
: http://www.tcpdump.org
: libpcat v0.9.8
: wget http://www.tcpdump.org/release/libpcap-0.9.8.tar.gz
pcre
: http://sourceforge.net/progect.showfiles.php?group_id=10194
: pcre , pcre-devel
snort
: snort v2.6.1.5
: 소스 http://www.snort.org/dl/old/snort-2.6.1.5.tar.gz
: sign http://www.snort.org/dl/old/snort-2.6.1.5.tar.gz.sig
: 공개키 http://www.snort.org/sl/pubkeys/public_key_2601
------------------------------------------------------------------------------------------------------
설치
------------------------------------------------------------------------------------------------------
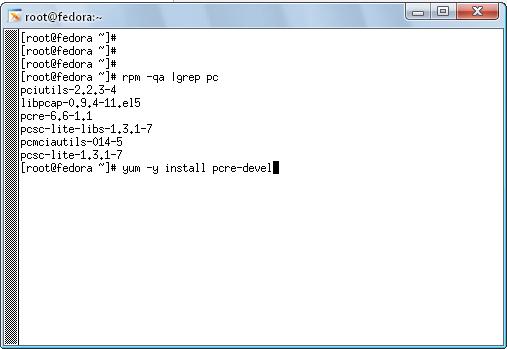
libpcap과 pcre는 설치되어있으나 pcre-devel은 없다. yum을 통해서 설치하자. 역시 앞의 두가지도 없다면 설치하자
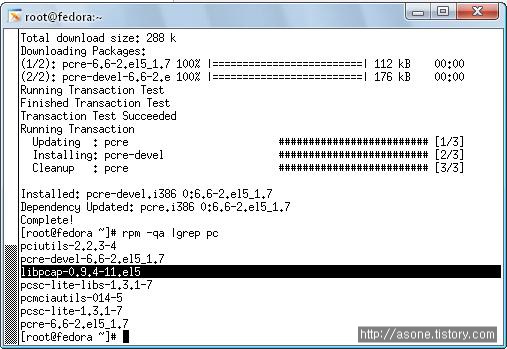
snort 설치
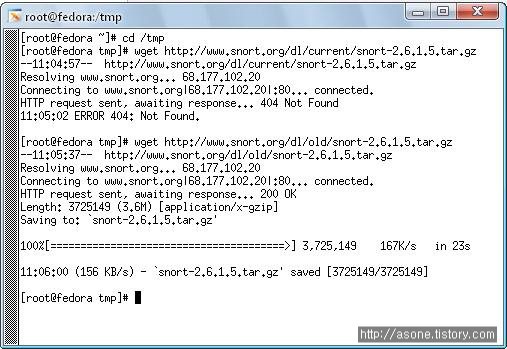
# wget http://www.snort.org/dl/old/snort-2.6.1.5.tar.gz.sig
 # wget http://www.snort.org/sl/pubkeys/public_key_2601
# gpg --import public_key_2601
# gpg --list-key // 공개키값을 확인하자
# gpg --edit-key ####(공개키값 )
command> trust
command> 5
y
command> quit
# gpg --verify snort-2.6.1.5.tar.gz.sig snort-2.6.1.5.tar.gz
// 하게 되면 good signature 어쩌구 저쩌구 나온다
이작업은 snort에 대한 변조 유무를 확인 하는작업이다.
tip . 에러 메시지 뜰때는 # rdate -s time.bora.net으로 시간 동기화를 해보길 바란다.
# tar xvzf snort-2.6.1.5.tar.gz
]# cd snort-2.6.1.5
# ls
COPYING aclocal.m4 contrib m4 src
ChangeLog config.guess depcomp missing templates
LICENSE config.h.in doc mkinstalldirs verstuff.pl
Makefile.am config.sub etc rpm
Makefile.in configure install-sh schemas
RELEASE.NOTES configure.in ltmain.sh snort.8
# ./configure && make && make install
# echo $?
touble 발생
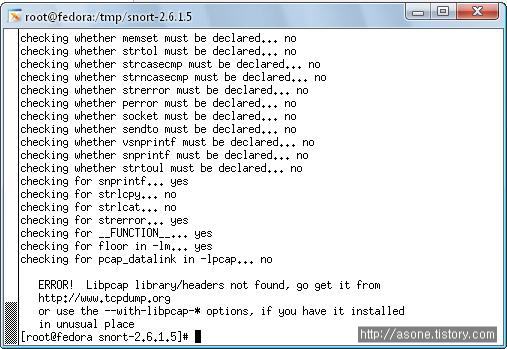
헌데 문제가 생겼다 libpcap 문제로 설치 중단이 되었다. 해서 원본 소르를 받아 설치하려
tcpdump 사이트를 뒤져 봤으나
사이트가 문을 닫은 상태였다 ..
해서 일단 중지
------------------------------------------------------------------------------------------------------
하여 이리저리 문서를 찾은 결과
CentOS에서는 libpcap-devel을 설치 한뒤에 해야 한단다. 설치해야 한다는건지 필요하다는건지''
죄 영어라 원..
fedora 로 썼을때는 따로 설치 한 기억이없었는데 이거원..... 가짢은게 괴롭힌다...
http://www.snort.org/archive-11-4370.html
# yum -y install libpcap-devel
설치후
# ./configure && make && make install
이자 잘된다 ㅡ.,ㅡㅋ
# echo $?
0
설치끝 ㅡ.,ㅡ헥헥
------------------------------------------------------------------------------------------------------
snort의 동작 방식
------------------------------------------------------------------------------------------------------
1. 스니핑 모드 (ethereal 처럼 패킷을 캡쳐, 화면에 출력)
2. 로깅 모드(파일에 저장)
3. 침입탐지 모드
------------------------------------------------------------------------------------------------------
1. 스니핑 모드
------------------------------------------------------------------------------------------------------
[fedora]
# snort -v
[centos]
# nmap -sS -O -v 192.168.10.30 // 조금 하다가 중지
[fedora]
관찰 정보가 주르르륵 뜬다 탐지가 된다는것
[centos]
ctrn +z
# pkill -9 snort
# ps -ef | grep snort
snort가 남아있는지 확인~
------------------------------------------------------------------------------------------------------
2. 로깅 모드(파일에 저장)
------------------------------------------------------------------------------------------------------
# snort --help
-K <mode> : logging mode (pcap (default), ascii, none)
# snort -vde -K ascii // log 디렉토리가 없어 에러
# mkdir /var/log/snort 로그 디렉토리 생성
# snort -vde -K ascii
-v: verbose
-d : dump the application layer
-e : display the second layer header info
-vde : layer 2~7 packet 정보 감시
[xp]
telnet 192.168.10.10 [fedora]
------------------------------------------------------------------------------------------------------
-----------------------------------------------------------------------------------------------------
방화벽을 성문에 비유했을 때 성문에서 철저히 감시한다고 해도 성 안에서 나쁜짓을 하는 경우도 있다. 어디나 구멍은 있기 마련이다. 특히 개구멍 ''
아무튼 이런 경우를 캐치 하기 우해 경찰과 같은 감시가자 필요하다.
이것이 바로 IDS다
이번에 다뤄볼 것은 snort로 네트워크 기반의 침입탐지 시스템이라고도 하며 NIDS라 한다.
-----------------------------------------------------------------------------------------------------
IDS의 3가지 특성
-----------------------------------------------------------------------------------------------------
1. 무결성(intergrity)
- 자원이 훼손되거나 변경되지 않음을 뜻한다. 해커에 의해서 귀중한 정보를 파괴 당하거나 정보의 내용이 변경되었다면 해커는 자원의 무결성을 해치는 침입자인것이다.
2. 가용성(availabillty)
- 권한을 가진 사용자에게는 접근이 언제나 가능함을 뜻한다. 해커에 의해서 자원의 접근을 방해 받는 다면 해커는 지금 자원의 가용성을 해치고 있는 침입자이다.
3. 기밀성(confidentiality)
- 자원으로 접근은 권한은 가진 사람만이 가능하다는 것을 뜻한다. 공개가 되면 안되는 중요한 정보가 해커에 의해서 공개가 된다면 해커는 기밀성을 해치는 침입자이다.
-----------------------------------------------------------------------------------------------------
IDS의 분류
-----------------------------------------------------------------------------------------------------
호스트 기반 IDS(Tirpwire, AIDE(파일 ,디렉토리), Portsentry(port)...)
- 바이러스 , 백도어 탐지 , 설치 및 유지 비용 저렴
네트워크 기반 IDS(snort(free), Etrust Intrustion Dection, RealSecure)
- 오탐율 높다, 트래픽이 높은 곳에서는 유용하지 않다., 네트워크 전체에 대한 트래픽 감시 및 검사 가능, 초기 설치 비용 높다.
-----------------------------------------------------------------------------------------------------
HIDS vs NIDS
-----------------------------------------------------------------------------------------------------
HIDS는 보통 O/S 의 일부로서 작동된다. 전체적인 네트워크에 대한 침입탐지는 불가능하며 스스로가 공격 대상이 될때만 침입탐지 할 수 있다.
NIDS 는 네트워크에 하나의 독립적으로 운용된다. TCPdump도 하나의 NIDS가 된다. TCPdump를 기반하는 것이
snort이다. HIDS로 할 수 없는 네트워크 전반에 대한 감시할 수 있으며 보통 스위칭 환경에 물려 있고 또한 ip를 소유 하지 않아 침입 공격에 대해 거의 완벽한? 방어를 할 수 있다.
-----------------------------------------------------------------------------------------------------
IDS 의 요소 ,기능
-----------------------------------------------------------------------------------------------------
자료의 수집(Raw Data Collection)
자료의 필터링과 축약(data Reduction and Filtering)
- 수집된 자룡를 한곳에 모아 상호 연관 분석을 통해 좀더 효과를 누릴 수 있다. 또한 보안이 강화된 시스템에 자료를 보관 함으로써 침입에 대한 자료 손실을 막을 수 있다. 또한 IDS는 자료가 매우 크기 때문에 효과적으로 필터링 하는 방법도 필요하다.
침입 탐지(Analysis and Intrusion Detection)
- 오용탐지 (Misuse Detection) : 이미 발견된 패턴에 대해서 탐지
- 이상탐지 (Anomaly Detection) : 정상 상태를 기준으로 이상에 대한?(정량적 분석, 통계적분석, ...)에 대한 인공지능으로 탐지, 역시 오탐율이 높다.
책임 추적성과 대응(Reporting and Response)
-----------------------------------------------------------------------------------------------------
IDS vs IPS
-----------------------------------------------------------------------------------------------------
IDS - detection
- 단순히 침입에 대한 메시지를 남겨 주지만.
IPS - prevention
- IPS는 detection 을 넘으 탐지 한 결과에 대해 prevention 까지 겸한다 , 좀더 능동적인~
-----------------------------------------------------------------------------------------------------
NIDS의 설치 위치
-----------------------------------------------------------------------------------------------------
1, 패킷이 라우터로 들어오기전
2. 라우터 뒤
3. 방화벽 뒤
4. 내부 네트워크
5. DMZ
-----------------------------------------------------------------------------------------------------
portsentry 는 host기반 침입 탐지 시스템으로 열려 있는 모든 포트를 모니터링 할 수 있는 것이 특징이다.
포트 스캔 공격을 받았을 경우 방화벽과 연동하여 보안정책을 구성 할 수 있다.
특징 ( 차단방법)
----------------------------------------------------------------------------------------------------
호스트로 들어오는 모든 패킷을 ROUTE명으로 DROP시킬 수 있다.
xinetd 기반의 서비스에 접근하지 못하도록 /etc/hosts.deny 파일을 갱신 할 수 있다. (tcpd)
연결을 막지 위해 iptables와 연동가능
----------------------------------------------------------------------------------------------------
다운로드
----------------------------------------------------------------------------------------------------
http://rpm.pbon.net
# wget ftp://ftp.pbone.net/mirror/ftp.falsehope.net/home/tengel/centos/4/te/i386/RPMS/portsentry-1.2-1.te.i386.rpm // centos용
http://rpmfind.net
http://centos.org
----------------------------------------------------------------------------------------------------
설치
----------------------------------------------------------------------------------------------------
portsentry 실행파일
portsentry.conf 환경설정 파일
portsenty.history 거부된 host정보 저장
portsenty.ignor 감시예외파일
----------------------------------------------------------------------------------------------------
실행 모드
----------------------------------------------------------------------------------------------------
portsentry 는 스캔 공격자가 스캔을 하기 위해 사용하는 다양한 공격에 대비하여 탐지하고 싶은 공격에 따라서 여러가지 방법으로 실행가능
----------------------------------------------------------------------------------------------------
실행 옵션
----------------------------------------------------------------------------------------------------
-tcp / -udp : 표준 tcp/udp host기반 IDS로 동작
-stcp / -sudp : 스텔스 tcp/udp 스캔 감시
-atcp / -audp : portsentry.conf 파일에 지정한 port 에 어떤 host도 접근하지 못하도록 설정
----------------------------------------------------------------------------------------------------
----------------------------------------------------------------------------------------------------
[fedora]
위에서 받은 rpm 패키지를 설치 하자
# rpm -Uvh portsentry
# rpm -ql portsentry
# cd /etc/portsentry
# ls
portsentry.conf portsentry.ignore portsentry.modes
# vi portsentry.conf
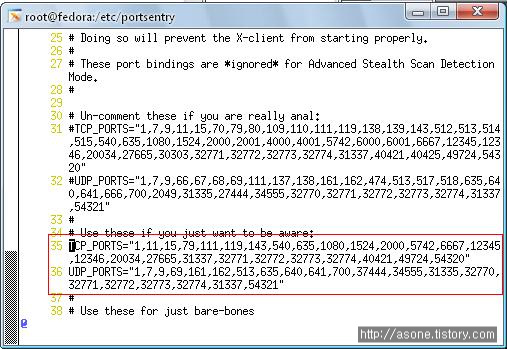
35~36 라인에 감시할 포트를 추가할 수 있다.최대64
42 ###########################################
43 # Advanced Stealth Scan Detection Options #
44 ###########################################
58 ADVANCED_PORTS_TCP="1024"
59 ADVANCED_PORTS_UDP="1024"
// 스텔스 스캔 포트 감시영역
72 # Default TCP ident and NetBIOS service
73 ADVANCED_EXCLUDE_TCP="21,22,25,53,80,110,113,135,137,138,139,443"
74 # Default UDP route (RIP), NetBIOS, bootp broadcasts.
75 ADVANCED_EXCLUDE_UDP="520,517,518,513,138,137,123,68,67,53"
// 감시제외 포트
78 ######################
79 # Configuration Files#
80 ######################
81 #
82 # Hosts to ignore
83 IGNORE_FILE="/etc/portsentry/portsentry.ignore" // 각 파일 위치
84 # Hosts that have been denied (running history)
85 HISTORY_FILE="/etc/portsentry/portsentry.history"
86 # Hosts that have been denied this session only (temporary until next re start)
87 BLOCKED_FILE="/etc/portsentry/portsentry.blocked"
89 ##############################
90 # Misc. Configuration Options#
91 ##############################
96 RESOLVE_HOST = "1" : DNS 사용안함 ' 0' 으로 수정
109 ##################
110 # Ignore Options #
111 ##################
128 # 0 = Do not block UDP/TCP scans. : 차단 안함
129 # 1 = Block UDP/TCP scans. : 차단
130 # 2 = Run external command only (KILL_RUN_CMD) : 역해킹
// ?????
135 ###################
136 # Dropping Routes:#
137 ###################
160 #KILL_ROUTE="/sbin/route add $TARGET$ 333.444.555.666" // route 명령어로 차단
205 # iptables support for Linux
206 KILL_ROUTE="/sbin/iptables -I INPUT -s $TARGET$ -j DROP"
// iptables로 차단 시킴
220 ###############
221 # TCP Wrappers#
222 ###############
229 #KILL_HOSTS_DENY="ALL: $TARGET$"
282 SCAN_TRIGGER="2" : 스캔 간격 딜레이 ' 0 '
이상 conf 파일을 둘러 봤지만 집중하지 않아서 그런지 그냥 넘어간 부분이 있다 이해해주길
----------------------------------------------------------------------------------------------------
실행
----------------------------------------------------------------------------------------------------
# portsentry --help
# portsentry -stcp
# ps ax | grep port
# iptables -F
# iptables -P INPUT ACCEPT // free nmap으로는 DROP상태에서 안됨
[Centos]
# yum -y install nmap
# nmap -v -sS -o 192.168.10.10 // fedora 스캔하다 멈추고
[fedora]
# iptables -L
192.168.10.20 즉 centos 에 대한 차단 룰이 적용되어 있는것을 볼 수 있다.
----------------------------------------------------------------------------------------------------
----------------------------------------------------------------------------------------------------
----------------------------------------------------------------------------------------------------
----------------------------------------------------------------------------------------------------
----------------------------------------------------------------------------------------------------
----------------------------------------------------------------------------------------------------
----------------------------------------------------------------------------------------------------
- application + packet filtering 방식 혼합
- 사용자 편의성과 기업환경에 따른 유연성 있게 방화벽을 구성할 수 있지만 관리가 복잡하다.
설치 확인
[root@fedora ~]# cd /boot && ls -l
-rw-r--r-- 1 root root 64551 11월 12 2007 config-2.6.18-53.el5
[root@fedora boot]# vi config-2.6.18-53.el5 // config -2.~~~ 커널종류에따라 다르게 표시될것이다.
/NETFILTER
확인
CONFIG_NETFILTER=y ( m은 모듈 형태, y는 커널형태)
CONFIG_IP_NF_CONNTRACK=m (steteful과 같은것으로 상태 추적)
# service iptables status
Firewall is stopped.
# lsmod // 현재 모듈과 사이즈등을 보여준다.
// 정지 상태였기 때문에 iptables가 보여지지 않을것이다.
Netfileter는 리눅스 커널에 포함된 방화벽 프로그램이며 iptables는 방화벽 관리 프로그램이다.
netfilter 프로그램 (iptables)
3개의 기본 테이블로 구성된다. ( filter , nat, mangle)
각 테이블은 chain(패킷 이동통로)로 구성되며, 각 chain에 rule을 설정하게 된다.
mangle : 패킷 속성 변경
NAT : 사설 ip => 공인 ip
Filter : 패킷의 허용/차단, 패킷의 필터링(기본_)
룰테이블
Filter
INPUT - source 와 destination으로 따질때 destination이 나일때 S-> D로
OUTPUT - INPUT의 반대상황
FORWARD - 지나치는 ㅡㅡㅋ
NAT
POSTROUTING - 사설 - > 공인ip
PREROUTING - 외부에서 내부로 사설ip로 접속시
OUTPUT
mangle
ALL
# iptables -L -t filter
# iptables -L -t nat
# iptables -L -t mangle
-------------------------------------------------------------------------------------------------
[root@fedora boot]# ifconfig
eth0 Link encap:Ethernet HWaddr 00:0C:29:25:E1:23
inet addr:192.168.10.10 Bcast:192.168.10.255 Mask:255.255.255.0
에서 192.168.10.20의 텔넷 접속 차단할 시
layer 3에서
-s 192.168.10.20
# iptables -A INPUT -s 192.168.10.20 -j DORP
layer 4에서
-p tcp --dport 80 / -p udp --sport 123
# iptables -A INPUT -s 192.168.10.20 -p tcp --dport 23 -j REJECT
기본 테이블이 filter 라 생략 하면 -t filter가 되어있는것
-p 프로토콜 --ssport 출발지, --dport 목적지
-j 는 jump target처리할
DROP 패킷 버림
REJEXCT 접속 거부하면서 메시지 리턴
ACCEPT 통과
saving /restoring
백업
# rpm -ql iptables | less
# iptables-save > firewall.rule : 설정내용을 파일로 저장
복구
# iptables-restore < firewall.rule : 파일에서 설정정보로 업!
# cd /etc/sysconfig/
# cat iptables // 없을 수가 있는데 이때는 딴시스템? 에서 얻어오자 ex. centos에서 # scp iptables root@192.168.10.10
//이 파일은 iptables 서비스가 시작할때 읽어 오게 되는데 이것이 없으면 서비스 시작이 안된다.
# service iptables restart / stop / reload / start
iptables에 관련된 설정파일을 보자
iptables -F
service iptables restart 를 해보면 이전에 설정 작업 외에 iptables에 저장된 파일로 재수정 되는것을 볼 수 있다.
이를 피하기 위해서는 아래의 작업이 필요하다.
# vi /etc/sysconfig/iptables-config
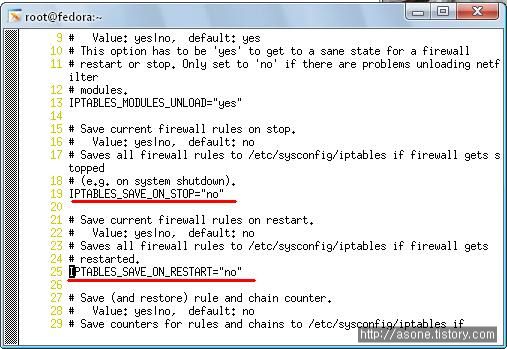
룰 생성 / 삭제 / 교체
----------------------------------------------------------------------------------------------
# iptables -I INPUT -s 192.168.10.30 -j DROP / /기본적으로 최상위 추가됨
# iptables -A INPUT -s 192.168.10.30 -p tcp --dport 23 -j ACCEPT
# iptables -L // 두개의 룰이 보인다.
# iptables -D INPUT 2 // 두번째 룰을 지운다
# iptables -F // 플러쉬 전체 지움
# iptables -A INPUT -s 192.168.10.30 -p tcp --dport 23 -j ACCEPT
# iptables -R INPUT 1 -s 192.168.10.30 -p tcp --dport 23 -j DROP // 교체
----------------------------------------------------------------------------------------------
사용자 체인 생성
----------------------------------------------------------------------------------------------
# iptables -Z INPUT
# iptables -N INTRANET // 사용자 정의 체인 생성
# iptables -E INTRANET EXTRANET // 체인명 변경
# iptables -I INPUT 2 -j EXTRANET // 사용자 체인을 기본 INPUT 체인에 연결
이때 주의할 점은 체인 삭제시에 체인 속에 룰이 포함되어 있다면 룰부터 제거 후 거꾸로 삭제해 나가야 한다.
# iptables -D INPUT # ( rule ofextranet)
# iptables -D EXTRANET # ( EXTRANET의 모든 룰 삭제)
# iptables -X EXTRANET // 체인 삭제
----------------------------------------------------------------------------------------------
접속 상태에 따른 패킷 필터링
----------------------------------------------------------------------------------------------
-m state -- state {NEW, ESTABLISHED, RELATED, INVALID]}
NEW : 새롭게 맺어진 경우
ESTABLISHED : 연결시도 후 server에서 응답하여 이미 연결 된상태
RELATED : 새롭게 연결을 시작하려 하나 이미 연결 추적 테이블에 접속과 관련 있는 항목이 있는 경우
즉 FTP같이 제어포트와 데이터 포트가 별도로 존재할때 , 접속해제와 데이터 포트가 다르다.
INVALID : 연결 상태 알 수 없거나 잘못된 헤더인 경우
----------------------------------------------------------------------------------------------
# iptables -A INPUT -s ! 192.168.10.20 -j DORP ' ! ' 를 제외한 모든것은 드랍
ICMP 설정
----------------------------------------------------------------------------------------------
# iptables -A INPUT -p icmp --icmp-type echo-request -j DROP
# iptables -A OUTPUT -p icmp --icmp-type echo-reply -j DROP
icmp echo request , reply 응답 드랍
----------------------------------------------------------------------------------------------
multiple choice && MAC addre filtering
----------------------------------------------------------------------------------------------
iptables -A INPUT -s 192.168.1.1 -p tcp --dport 24 -j ACCEPT
iptables -A INPUT -s 192.168.1.1 -p tcp --dport 25 -j ACCEPT
iptables -A INPUT -s 192.168.1.1 -p tcp --dport 26 -j ACCEPT
=>
# iptables -A INPUT -s x.x.x.x -p tcp -m multiport --dport 24,25,26 -j ACCEPT 로 할 수 있다.
-m mac --mac-source 00:00:00:00:00:00 ( mac address)로 추가 할 수 있다.
----------------------------------------------------------------------------------------------
LOG messages 남기기
----------------------------------------------------------------------------------------------
Firewall LOG는 /etc/syslog.conf 이용해서 위치를 재지정한다.
기본 값으로 /var/log/messgae 에 저장되게 되어 있다. 지정된 정보를
kern.* /var/log/firewall 로 수정후
log-prefix
--log-prefix "unknown port attemped..."
# service syslog restart
# ls /var/log
# cat /var/log/firewall
# iptables -I INPUT -p tcp -m multiport --dport 21,22,23,80 -j LOG
# iptables -I INPUT 2 -s 192.168.10.10 --dport 80 -j ACCEPT
# service httpd restart
# watch tail -3 /var/log/firewall
[ xp ]
웹으로 접속 시도 해볼것
[fedora]
# iptables -R INPUT 1 -p tcp -m multiport --dport 21.23.80 -j LOG --log-prefix "unknown host ATTACK me"
[xp]
다시 접속 시도 해볼것
후에 log file 보면 메시지가 출력 된것을 볼 수 있다.
- 네트워크 보안으 ㄴ외부의 악의적인 침입으ㅗ부터 내부의 컴퓨터를 보호하는것을 말한다.
가자아 안전한 네트워크 설계는 내부의 네트워크와 외부를 완전히 차단하여 내부에서 외부로 접속하지 못하도록 완전히 고립시키는 것이다. 하지만 이 방법은 도둑이 무서워서 집의문과 창문을 완전히 페쇄하고 집밖에 나가지 않는것과 마찬가지다.
하여 내부의 사용자는 외부의 인터넷을 이용하면서 외부에서는 내부로 침입할 수 없게 하는 방법이 보편적 방법이 되었다.
1. 내부와 외부를 분리 시키고 그 사이에 방화벽을 배치 시켜 s/w , h/w를 총체적으로 구현한 제품을 말한다.
2. 비인가자 , 불법 침입자 해커의 침입으로 인한 정보손실 변조 파괴등을 최소화 시켜준다.
3. 네트워크를 통해 흐르는 packet들에 대해 미리 정해놓은 보안정책에 따라 차단 허용 할 수 있다.
호스트 기반 : INPUT OUTPUT 만 사용
네트워크 기반 : FORWARD 사용
FIREWALL 주요 기능
1. access control
2. auth
3. integrity
4. logging / auditing
5. NAT
침입 차단 시스템의 동작 방식
1. packet filtering - 1세대
- osi 7laters mode 중 3,4계층에서 사용하는 source ip, destination ip, source port destination port 를 이용하는 방식
- app 7layer보다 속도 빠르고 app 보다 적용과 운용이 쉽다.
(단점)
- tcp / ip 프로토콜의 구조적 결함 때문에 패킷 헤더 조작이 가능
- 바이러스에 감염된 메일과 첨부 파일등의 전송 차단 불가
- 접속제어 규칙수에 따른 부하 증가
(목적)
- 패킷 제어
2. application gatewat -2세대
- 전체 패킷 검사하고 패킷으 실질적 내용에 기반하여 접근 허용/거부 결정을 내리는 방화벽
- osi 7계층까지 동작
- 각 서비스 별로 프락시 데몬이 구동되어 client/ server사이의 접속 관리
- 외부 시스템과 내부 시스템은 방화벽의 프락시를 통해서만 연결이 허용
- 수동 프락시 - Transparent
(장점)
- 응용 프로토콜의 종류에 따른 기록이 가능
- 네트워크의 성능을 향상시키고 부하가 줄어듬
- packet의 data부분까지 제어가능
- proxy사용의 보안성이 packet filtering보다 우수
(단점)
-해당 서비스의 데몬이 필요
- packet filering 보다 처리가 느림
- 상위 레벨에서 동작하기에 많은 부하 유발
- 특정 프로그램은 동작 하지 않는다(p2p, 메신저)
3. stateful Inspection -3 세대
- MAC layers와 ip 프로토콜의 스택사이에서 동작
- syn 패킷에 의해 생성된 접속 테이블의 정보를 이용하여 후속 패킷들에 대해 보안정책의 검사 없이 고속으로 패킷 처리
- 패킷 필터링과 게이트 웨이의 단점을 보완한 새로운 기술
-
4. dynamic packet filtering -4 세대
- 보안정책을 동적으로 수정가능
- 실제 접속상태를 감시하여 상태에 따라 네트워크 패킷들이 방화벽을 통과하도록 허용할 것인지 거부할 것인지를 결정
- ip주소와 port번호등과 같은 세션 정보를 기록/유지 함으로써 능동적인 보안관리가 가능 방화벽 시스템과 IDS와의 연동
5. hybrid - 5세대
- 대부분의 firewall 채택방식
- application + packet filtering 방식 혼합
- 사용자 편의성과 기업환경에 따른 유연성 있게 방화벽을 구성할 수 있지만 관리가 복잡하다.
시스템에 설치된 파일 및 디렉토리의 무결성을 검사하는 프로그램으로 변견된 사항을 추적 할 수 있으며 파일, 디렉토리의 크기와 날짜, inode, 해시코드 등의 정보를 기록하고 해킹이나 시스템의 이상징후가 있을 경우 서버를 검색하여 이전의 검색과 비교대조를 한후 변경 내용을 출력해 준다.
[fedora]에서 아래 처럼 다운로드
[root@fedora tmp]# wget http://downloads.sourceforge.net/mhash/mhash-0.9.9.tar.bz2
[root@fedora tmp]# wget http://downloads.sourceforge.net/aide/aide-0.13.1.tar.gz
[root@fedora tmp]# mkdir /root/hids
[root@fedora tmp]# mv aide-0.13.1.tar.gz mhash-0.9.9.tar.bz2 /root/hids/
[root@fedora tmp]# cd /root/hids
압축 해제
[root@fedora hids]# tar xvzf aide-0.13.1.tar.gz
[root@fedora hids]# tar xvjf mhash-0.9.9.tar.bz2
[root@fedora aide-0.13.1]# cd ..
[root@fedora hids]# cd mhash-0.9.9
[root@fedora mhash-0.9.9]# ./configure && make && make install // 컴파일 동시에 설치까지
[root@fedora mhash-0.9.9]# echo $? // 잘 실행 되었는지 보자 0 이 나오면 정상실행되었다.
0
마찬 가지로 aide도 설치 하자
[root@fedora hids]# cd aide-0.13.1
[root@fedora aide-0.13.1]# ls
AUTHORS Makefile.in aclocal.m4 depcomp src
COPYING NEWS aide.spec.in doc version.m4
ChangeLog README config.h.in include ylwrap
INSTALL README-snprintf configure install-sh
LICENSE-snprintf.txt Todo configure.in missing
Makefile.am acinclude.m4 contrib mkinstalldirs
[root@fedora aide-0.13.1]# ./configure && make && make install // configure -> make -> make install 동시에
[root@fedora mhash-0.9.9]# which aide
/usr/local/bin/aide
[root@fedora mhash-0.9.9]# ls /root/hids/aide-0.13.1/doc // aide.conf 파일이 있는지 확인
Makefile Makefile.in aide.1.in aide.conf.5 aide.conf.in
Makefile.am aide.1 aide.conf aide.conf.5.in manual.html
[root@fedora mhash-0.9.9]# cp /root/hids/aide-0.13.1/doc/aide.conf /root/hids
[root@fedora mhash-0.9.9]# cp /root/hids/aide-0.13.1/doc/aide.conf /root/hids
[root@fedora mhash-0.9.9]# cd ..
[root@fedora hids]# vi aide.conf
22 @@define TOPDIR .. -> 22 @@define TOPDIR /root/hids // 디렉토리 지정
46 database=file:@@{TOPDIR}/doc/aide.db -> database=fiel:/root/hids/aide.db // 디비파일 정의
51 database_out=file:aide.db.new -> database_out=file:aide.db // 출력 파일 정의
137 /etc R //추가, DB화 시킬 디렉토리 설정 /etc
[root@fedora hids]# aide -c aide.conf -i
118:Error in expression:selinux
// 에러가 날 수 있다. aide.conf 의 118번재 라인의 해당 에러 구문을 삭제후 재실행
Configuration error
[root@fedora hids]# aide -c aide.conf -i
118:Error in expression:xattrs
Configuration error
[root@fedora hids]# vi aide.conf
[root@fedora hids]# aide -c aide.conf -i
118:Error in expression:xattrs
Configuration error
[root@fedora hids]# vi aide.conf
[root@fedora hids]# aide -c aide.conf -i
// -i 데이터 베이스 생성
// -C aide를 사용하여 백업된 database와 비교
// -c 설정 파일
AIDE, version 0.13.1
### AIDE database at aide.db initialized. // 완료 되었다.
test하기
[root@fedora hids]# seq 10 > /etc/.virus
// 자 이러면 /etc/ 밑에 새로운 파일이 생성되어 내용이 바뀌었을 것이다.
// aide를 이용해 검증 시켜 보자
[root@fedora hids]# aide -c /root/hids/aide.conf -C
AIDE found differences between database and filesystem!!
Start timestamp: 2008-07-05 21:47:53
Summary:
Total number of files: 2043
Added files: 1
Removed files: 0
Changed files: 1
---------------------------------------------------
Added files:
---------------------------------------------------
added: /etc/.virus
---------------------------------------------------
Changed files:
---------------------------------------------------
changed: /etc
--------------------------------------------------
Detailed information about changes:
---------------------------------------------------
Directory: /etc
Mtime : 2008-07-05 21:08:21 , 2008-07-05 21:47:22
Ctime : 2008-07-05 21:08:21 , 2008-07-05 21:47:22
[root@fedora hids]# vi aide.conf // 중요하다고 생각되는 디렉토리 추가 시켜 보자
루트킷
| [사회] 7.5국민승리 선언 범국민 촛불문화제 | ||
 |
||
| 5일 오후 서울 시청광장 일대에서 열린 시민사회단체와 종교계, 야당 및 노동계 등이 참가한 '7.5 국민승리 선언 범국민 촛불대행진'이 열리고 있다. 연합뉴스 [2008/07/05 20:15] |


:
password 입력 없이 원격 시스템에 접속할때 사용
로그인 하려고 하는 서버에 공개키를 전송해야 한다.
공개키를 만들기 우해선 openssh로부터 공인키와 개인키를 받아야 한다.
먼저 fedora에서 centos로 ssh로 접속해 공인키와 개인키를 받은 것을 확인하자.
[fedora]
[root@fedora ~]# ssh user01@192.168.10.30
The authenticity of host '192.168.10.30 (192.168.10.30)' can't be established.
RSA key fingerprint is 9b:e8:94:91:ed:5c:d3:4a:cb:9d:70:6a:d3:d7:e1:dc.
Are you sure you want to continue connecting (yes/no)? yes
Warning: Permanently added '192.168.10.30' (RSA) to the list of known hosts.
user01@192.168.10.30's password:
처음 접속시 public key를 받아 온다
[root@fedora ~]# ls -a
. .dmrc .lesshst anaconda-ks.cfg
.. .eggcups .metacity bbb.lst
.ICEauthority .esd_auth .mozilla ftp.sniff
.Trash .gconf .nautilus install.log
.Xauthority .gconfd .redhat install.log.syslog
.bash_history .gnome .scim nero.md5
.bash_logout .gnome2 .serverauth.2576 nero.tar.gz
.bash_profile .gnome2_private .ssh scsrun.log
.bashrc .gstreamer-0.10 .tcshrc
.cshrc .gtkrc-1.2-gnome2 Desktop
[root@fedora ~]# cd .ssh
[root@fedora .ssh]# ls
known_hosts // centos에서 받아온 public key
[root@fedora .ssh]# cd /etc/ssh
[root@fedora ssh]# ls -l
합계 200
-rw------- 1 root root 132839 11월 10 2007 moduli
-rw-r--r-- 1 root root 1827 11월 10 2007 ssh_config
-rw------- 1 root root 668 6월 19 07:43 ssh_host_dsa_key
-rw-r--r-- 1 root root 590 6월 19 07:43 ssh_host_dsa_key.pub
-rw------- 1 root root 963 6월 19 07:43 ssh_host_key
-rw-r--r-- 1 root root 627 6월 19 07:43 ssh_host_key.pub
-rw------- 1 root root 1675 6월 19 07:43 ssh_host_rsa_key
-rw-r--r-- 1 root root 382 6월 19 07:43 ssh_host_rsa_key.pub
-rw------- 1 root root 3300 6월 19 08:13 sshd_config
[root@fedora ssh]# cat ssh_host_rsa_key.pub // 자신에게 접속할시 나눠주는 pub key
ssh-rsa
AAAA~~~~~~~~~~~~~~~~~~~~~~~~~~~~~~~~~~~~~~~~~~~~~~
[root@fedora ssh]# su - test01
[test01@fedora ~]$ ssh-keygen -t rsa // 공개키 생성
Generating public/private rsa key pair.
Enter file in which to save the key (/home/test01/.ssh/id_rsa): 엔터
Created directory '/home/test01/.ssh'.
Enter passphrase (empty for no passphrase): 엔터
Enter same passphrase again: 엔터
Your identification has been saved in /home/test01/.ssh/id_rsa.
Your public key has been saved in /home/test01/.ssh/id_rsa.pub.
The key fingerprint is:
e6:81:da:5f:5d:4a:c1:b3:44:bc:8b:14:bb:db:c9:c7 test01@fedora.linux.com
[test01@fedora ~]$ cd .ssh
[test01@fedora .ssh]$ ls
id_rsa id_rsa.pub // 공개키와 사설키 생성 되었따.
[test01@fedora .ssh]$ scp id_rsa.pub user01@192.168.10.30: // 공개키를 보내자
The authenticity of host '192.168.10.30 (192.168.10.30)' can't be established.
RSA key fingerprint is 9b:e8:94:91:ed:5c:d3:4a:cb:9d:70:6a:d3:d7:e1:dc.
Are you sure you want to continue connecting (yes/no)? yes
Warning: Permanently added '192.168.10.30' (RSA) to the list of known hosts.
user01@192.168.10.30's password:
id_rsa.pub 100% 405 0.4KB/s 00:00
[test01@fedora .ssh]$
[centos]
[root@centos ~]# su - user01
[user01@centos ~]$ ls
id_rsa.pub
[user01@centos ~]$ mkdir .ssh
[user01@centos ~]$ mv id_rsa.pub .ssh/authorized_keys
[user01@centos ~]$ ls -l .ssh
합계 4
-rw-r--r-- 1 user01 user01 405 6월 29 17:37 authorized_keys
[user01@centos ~]$ chmod 700 .ssh/ // 실행 권한 줌
[fedora]
[test01@fedora .ssh]$ ssh user01@192.168.10.30
Last login: Sun Jun 29 17:38:43 2008 from 192.168.10.10 // 패스워드 없이 바로 로긴 되었다.
[user01@centos ~]$
해시 함수로 암호화 하기
[root@centos ~]# seq 10 > nero.tar.gz
[root@centos ~]# cat nero.tar.gz
1
2
3
4
5
6
7
8
9
10
[root@centos ~]# md5sum nero.tar.gz
3b0332e02daabf31651a5a0d81ba830a nero.tar.gz
[root@centos ~]# md5sum nero.tar.gz > nero.md5
[root@centos ~]# scp nero.tar.gz nero.md5 root@192.168.10.10:
The authenticity of host '192.168.10.10 (192.168.10.10)' can't be established.
RSA key fingerprint is 5c:d1:a6:22:9c:d8:20:fb:6b:4c:e4:af:76:00:9e:d2.
Are you sure you want to continue connecting (yes/no)? yes
Warning: Permanently added '192.168.10.10' (RSA) to the list of known hosts.
root@192.168.10.10's password:
nero.tar.gz 100% 21 0.0KB/s 00:00
nero.md5 100% 46 0.0KB/s 00:00
[root@centos ~]#
[root@fedora ~]# ls
Desktop bbb.lst install.log nero.md5 scsrun.log
anaconda-ks.cfg ftp.sniff install.log.syslog nero.tar.gz
[root@fedora ~]#
[root@fedora ~]# cat nero.md5
3b0332e02daabf31651a5a0d81ba830a nero.tar.gz
[root@fedora ~]# md5sum nero.tar.gz
3b0332e02daabf31651a5a0d81ba830a nero.tar.gz
두 값이 같다 고로 변조 x
[root@fedora ~]# echo "11" >> nero.tar.gz
[root@fedora ~]# md5sum nero.tar.gz
8ce7e6758e82461bb878b63ca917a3fa nero.tar.gz
[root@fedora ~]# cat nero.md5
3b0332e02daabf31651a5a0d81ba830a nero.tar.gz
두 값이 다르다 고로 변조!!!
특징
- 압축 : 실제로 암호학적 해시함수는 입력 길이에 상관없이 고정된 크기의 출력을 만든다.
- 효율성 : 어떤 입력 x에 대해 해시함수 h(x)를 계산 하기 쉬워야 한다.
- 단방향 : 주어진 값 y에 대해 h(x)=y 의 x값을 찾는 계산이 어려워야 한다. 즉 해시함수를 찾기 어려워야한다.
- 약한 충돌 방지 : 주어진 x 와 h(x)에 대해 h(y) = h(x) 를 만족하면서 y ~= x 인 y를 찾기 어려워야 한다.
해시 결과 값이 같더라도 y 를 유추하기 어렵게 해야한다는 말?
- 강한 충돌 방지 : h(x) = h(y) 를 만족하면서 x ~= y인 x와 y를 찾기 어려워야 한다.
같은 해시 함수를 찾더라도 y를 찾기 어렵게 해야한다.
유형
- mac : cbc-mac, hmac // 비밀키 알고리즘에 근간을 두며 키를 사용
- mdc : md2, md4, md5, sha ,hval // 키를 이용하지 않는 함수
일반적으로 해시 함수는 mdc를 주로 사용한다.
MD5 (message digest 5)
- 입력 값 : 입력 메시지 크기는 무한대, 512 bits block단위
- 출력 값 : 128bits
해시 함수의 용도
표준 응용 분야에 인증, 메시지 무결성, 메시지 지문, 데이터 변형 탐지, 전자 서명 효율성, 대킹키 암호가 할 수 있는 어떤것,
암호 프로토콜
- 메시지나 파일을 암호화 하여 전송 할 수 있는 툴로서 소스를 배포하는 각종 서버 프로그램의 변조 유무를 검사 할 수 는 프로그램
응용 프로토콜
전자우편 : PGP, PEM , S/MIME, MOS
웹 서비스 : SSL/TLS
원격 로그인 :SSH
전자 결제 : SET
기본 접근법
- 메시지 기밀성 : 대칭키 암호화 기법
- 키 교환 : 비대칭키 암호화 기법 사용
- 서명 : 디지털 서명
- 메시지 무결성 : 키가 있는 해시 함수와 키가 없는 해시 함수
공개키 암호화 시스템
- 공개키 시스템은 공개키와 사설키 두개의 키를 사용한다. 공개키는 메시지를 암호화해서 전송하고자 하는 사람은 누구나 사용 가능하다. 사설키는 그 메시지를 복호화 하는데 사용된다. 그러므로 비밀키를 교환할 필요가 없어지게 되는 것이다.
공개키 암호 시스템에서 주의사항
- 공개키로는 암호화된 메시지를 복호화 할 수 없다.
- 이상적으로 공개키를 가지고 사설키를 알아낼 수 없다.
- 이 키 중 한 개로 암호화된 메시지는 다른 키로 복호화 될 수 없다.
- 사설키는 개인적으로 보관된다.
특징
- 암호화/ 복호화 키가 다름
- 모든 사용자들은 쌍으로 키를 갖는다.
- 암호화 할 때 사용되는 키에 따라 암호모드와 인증모드로 구분
- 암호모드
- 평문을 상대방의 공개키로 암호화 하여 암호문 생성
- 암호화에 사용된 공개키와 쌍을 이루는 사설키 소유자가 복호화 가능
1. 암호 모드
- 송신자 : 수신자의 공개키로 암호화
- 수신자 : 자신의 개인키로 복호화 함
- 수신자의 공개키 : 송신자는 공개키 리파지토리에서 가져옴
2. 인증 모드
- 송신자 : 자신의 사설키로 암호화
- 수신자 : 송신자의 공개키로 복호화 함
- 송신자의 공개키 : 수신자는 공개키 리파지토리에서 가져옴
공개키 알고리즘 종류
DIffie-Hellman ,RSA , Knapsack, Rabin , Ei Gamal, Schonorr, DSA, LUC, ECC
단, 암호 효율과 강도는 대칭키에 비해 현저히 떨어짐
공개키 암호화의 장점과 단점
장점
- 대칭 시스템보다 더 나은 키 분배
- 대칭 " 더 좋은 확장 가능성
- 기밀성, 인증 및 부인봉쇄를 제공할 수 있다.
단점
- 대칭 시스템보다 훨씬 느리게 작동한다.
암호학의 목적
- 전송 되는 정보가 전달하고자 하는 상대방 이외의 다른 사람한테 읽히거나 내용이 파악되는 것을 막기 위함
이상적인 상황에서는 허가 받지 않은 개인은 결코 암호화된 메시지를 읽을 수가 없다.
제공되는 보안 서비스
비밀성 : 허가되지 않은 자가 정보를 읽는 것을 방지하는 것
무결성 : 인가되지 않은 정보의 쓰기를 방지하는것
가용성 : 자료는 필요할 때 적절하게 가용하게 하는것
인증 : 통신하고 있는 상대방이 맞는지를 호가인하고, 서로에게 전송한 데이터가 위조되지 않았음을 확인할 수 있게 한다.
부인 봉쇄 : 이전의 통신 내용을 보낸 적이 없다고 속일 수 없게 한다. 즉, 데이터를 받은 사람은 나중이라도 보낸 사람이 실제로 데이터를 보냈을을 증명할 수있도록 한다.
암호화 : 평문( 누구나 쉽게 읽을 수 있는 메시지)을 암호문으로 변환하는 과정.
복호화 : 암호문을 평문으로 만드는것.
키 : 암호화와 복호화에 필요한 정보
스테가노그래피 : 전하고자 하는 의미를 숨겨놓은 비밀통신.
대칭키 암호시스템
- 비밀키 암호화는 대부분의 사람들에게 친숙한 암호 방식이다. 이런 유형의 암호 방식에서는 송신자와 수신자가 모두 하나의 동일한 비밀키를 알고 있다. 송신자는 평문 메시지를 이 비밀키로 암호화 하고 수신자는 역시 같은 키로 메시지를 복호화 한다.
데이터 암호화 표준(DES)
- IBM에서 개발 Lucifer
- 미국정부 표준으로 선정
- 64 비트의 블록 길이
- 56 비트의 키 길이를 사용
- 16개 회전을 갖는 페이스텔 암호.
- 각 회전에서 48 비트의 보조키를 사용하고, 각 보조키는 56비트 키 중에서 48비트를 사용해 구성된다.
DES의 네가지 운영 모드
- 암호 블록 체이닝 CBC
- 전기적 코드 북 ECB
- 암호 피드백 CFB
- 결과 피드백 OFB
대칭키 시스템의 장단점
장점
- 비대칭 시스템보다 훨씬 더 빠르다.
- 커다란 키 크기를 사용하면 해독하기 어렵다.
단점
- 키 분배 : 키를 올바르게 전달하는 안전 메커니즘이이 요구된다.
- 확장가능성(scalability) : 각 쌍의 사용자들은 독특한 쌍의 키가 필요하고, 따라서 키의 숫자는 기하급수적이 된다.
- 제한된 보안 : 기밀성을 제공할 수 있으나 인증서 또는 부인봉쇄는 제공할 수 없다.
linux - file 속성 명령어 , chattr , lsattr
[root@fedora ~]# which chattr
/usr/bin/chattr
[root@fedora ~]# which lsattr
/usr/bin/lsattr
[root@fedora ~]# rpm -qf /usr/bin/chattr
~~~
[root@fedora ~]# ls -l /usr/bin/lsattr /usr/bin/chattr
-rwxr-xr-x 1 root root 9796 11월 11 2007 /usr/bin/chattr
-rwxr-xr-x 1 root root 8388 11월 11 2007 /usr/bin/lsattr
루트 사용자만 변경할 수 있게 700으로 바꾸자
[root@fedora ~]# chmod 700 /usr/bin/lsattr /usr/bin/chattr
[root@fedora ~]# ls -l /usr/bin/lsattr /usr/bin/chattr
-rwx------ 1 root root 9796 11월 11 2007 /usr/bin/chattr
-rwx------ 1 root root 8388 11월 11 2007 /usr/bin/lsattr
[root@fedora ~]# chattr --help
'i' 옵션 : 읽기 전용
'a' 옵션 : 추가만 허용 , 문서에 내용을 덧붙일 수만 있다.
먼저
# touch aaa.lst
# ls -al aaa.lst
# chmod 777 aaa.lst
# rm aaa.lst // 잘 지워진다.
# touch bbb.lst
# chmod 777 bbb.lst
# chattr +i bbb.lst
# rm bbb.lst //
# rm bbb.lst
rm: remove write-protected 일반 빈 파일 `bbb.lst'? y
rm: cannot remove `bbb.lst': 명령이 허용되지 않음
안된다 ㅡ.,ㅡㅋ
# lsattr bbb.lst 해보면 속성이 적용되어 있는것을 볼 수 있다.
# chattr -i bbb.lst
# rm bbb.lst //지워진다.
chattr += i file
a file
로 사용할 수 있다.
보나마나.
로그 파일에 덧붙이기 옵션 주기
/var/log/secure란 파일에 a 옵션을 주고
watch tail -3 /var/log/secure
텔넷 등으로 로그를 발생 시켜 보자 .
 Prev
Prev
 Rss Feed