'Linux_Server'에 해당되는 글 7건
- 2009.02.06 Tomcat JSP server 설치 2
- 2009.01.23 NFS 서버 구축관리
- 2008.12.20 웹서버 구축관리 / Apache , PHP , MySQL 설치 설정
- 2008.12.18 ProFTPD 설치와 설정, 운영
- 2008.12.18 DHCP 서버 설정, 운영
- 2008.12.16 네임서버 설치, 운영 / DNS (bind 9.3)
- 2008.11.22 samba 서버 설치 및 설정
Tomcat JSP server 설치
1. JDK 설치
1.1 다운로드
--------------------------
http://java.sun.com
--------------------------
에서 java se 버전 다운로드
# ls
jdk-6u12-linux-i586.bin
1.2. JDK 설치 파일 실행
# sh jdk-6u12-linux-i586.bin
..
more
...
[yes] 입력
..
Done.
# mv jdk-6u12-linux-i586.bin /usr/local
# cd /usr/local
# ls
# ln -s /usr/local/jdk1.6.0_12/ java <링크생성>
1.3. /etc/profile 에 환경변수 등록
# vi /etc/profile < 환경 변수 등록>
..
# SET JAVA ENV
export JAVA_HOME=/usr/local/java
export PATH=$PATH:$JAVA_HOME/bin
export CLASSPATH=.$JAVA_HOME/jre/lib/ext:$JAVA_HOME/lib/tools.jar
..
# source /etc/profile < 현재 쉘에 바로 적용 >
# javac
Usage: javac <options> <source files>
where possible options include:
-g Generate all debugging info
-g:none Generate no debugging info
-g:{lines,vars,source} Generate only some debugging info
.. < 정상 등록되었음 >
# env
/usr/local/java/bin
JAVA_HOME=/usr/local/java
CLASSPATH=./usr/local/java/jre/lib/ext:/usr/local/java/lib/tools.jar
2. Tomcat 설치
2.1. Tomcat 다운로드 및 설치
---------------------------------
http://tomcat.apache.org
---------------------------------
< 현재 6.x 버전 까지 나와있으나 안정화 버전인 5.x 버전을 다운로드 >
< tomcat 서버는 압축 해제가 바로 서버 설치와 같다.>
# pwd
/usr/local
# wget http://mirror.khlug.org/apache/tomcat/tomcat-5/v5.5.27/bin/apache-tomcat-5.5.27.tar.gz
# ls
apache-tomcat-5.5.27.tar.gz
# tar -xvzf apache-tom*
# cd apache-to*
# ls
LICENSE RELEASE-NOTES bin conf server temp work
NOTICE RUNNING.txt common logs shared webapps
# ln -s /usr/local/apache-tomcat-5.5.27 /usr/local/tomcat
2.2 /etc/profile 에 환경변수 등록
# SET JAVA ENV
export JAVA_HOME=/usr/local/java
export CATALINA_HOME=/usr/local/tomcat
export PATH=$PATH:$JAVA_HOME/bin:$CATALINA_HOME/bin
export CLASSPATH=.$JAVA_HOME/jre/lib/ext:$JAVA_HOME/lib/tools.jar:$CATALINA_HOME
/common/lib/jsp-api.jar:$CATALINA_HOME/common/lib/servlet-api.jar
# source /etc/profile
# env
:/usr/local/tomcat/bin
:/usr/local/tomcat/common/lib/jsp-api.jar:/usr/local/tomcat/common/lib/servlet-api.jar
2.3. Tomcat 서버 시작
# /usr/local/tomcat/bin/startup.sh
Using CATALINA_BASE: /usr/local/tomcat
Using CATALINA_HOME: /usr/local/tomcat
Using CATALINA_TMPDIR: /usr/local/tomcat/temp
Using JRE_HOME: /usr/local/java
# ps -ef | grep tomcat
root 24200 1 2 06:54 pts/2 00:00:02 /usr/local/java/bin/java -Djava.util.logging.config.file=/usr/local/tomcat/conf/logging.properties -Djava.util.logging.manager=org.apache.juli.ClassLoaderLogManager -Djava.endorsed.dirs=/usr/local/tomcat/common/endorsed -classpath :/usr/local/tomcat/bin/bootstrap.jar:/usr/local/tomcat/bin/commons-logging-api.jar -Dcatalina.base=/usr/local/tomcat -Dcatalina.home=/usr/local/tomcat -Djava.io.tmpdir=/usr/local/tomcat/temp org.apache.catalina.startup.Bootstrap start
root 24255 3559 0 06:55 pts/2 00:00:00 grep tomcat
# /usr/local/tomcat/bin/shutdown.sh
Using CATALINA_BASE: /usr/local/tomcat
Using CATALINA_HOME: /usr/local/tomcat
Using CATALINA_TMPDIR: /usr/local/tomcat/temp
Using JRE_HOME: /usr/local/java
# /usr/local/tomcat/bin/startup.sh
Using CATALINA_BASE: /usr/local/tomcat
Using CATALINA_HOME: /usr/local/tomcat
Using CATALINA_TMPDIR: /usr/local/tomcat/temp
Using JRE_HOME: /usr/local/java
2.4. 웹브라우저 확인
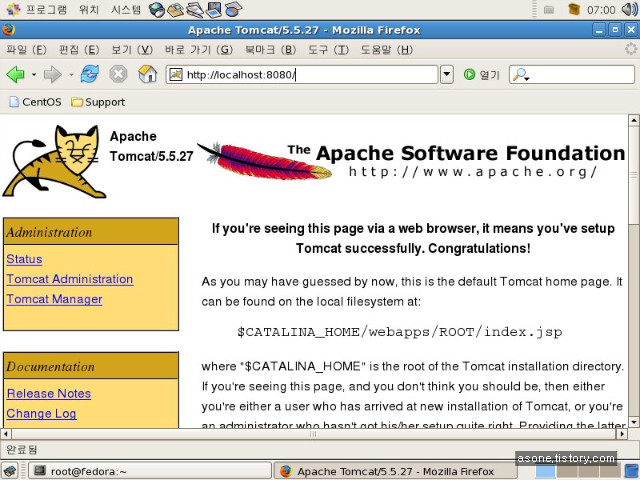
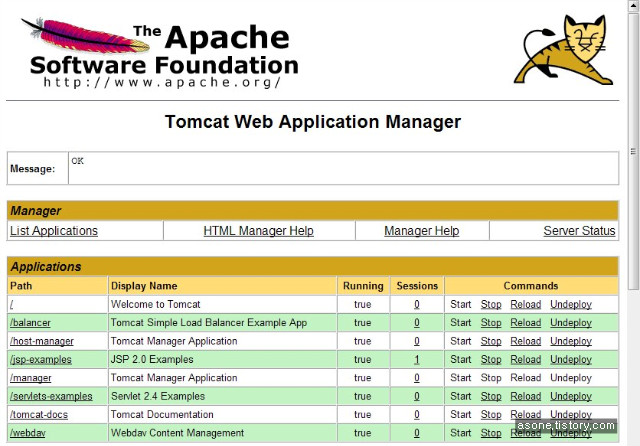
2.5. Tomcat manager 접속
2.5.1 환경설정
# vi /usr/local/tomcat/conf/tomcat-users.xml
<?xml version='1.0' encoding='utf-8'?>
<tomcat-users>
<role rolename="tomcat"/>
<role rolename="role1"/>
<role rolename="admin"/>
<role rolename="manager"/>
<user username="admin" password="passwd" roles="admin,manager"/>
<user username="tomcat" password="tomcat" roles="tomcat"/>
<user username="both" password="tomcat" roles="tomcat,role1"/>
<user username="role1" password="tomcat" roles="role1"/>
</tomcat-users>
2.5.2. 톰캣서버 재시작 (스톱 -> 시작) 스크립트 실행>
# /usr/local/tomcat/bin/shutdown.sh
Using CATALINA_BASE: /usr/local/tomcat
Using CATALINA_HOME: /usr/local/tomcat
Using CATALINA_TMPDIR: /usr/local/tomcat/temp
Using JRE_HOME: /usr/local/java
# /usr/local/tomcat/bin/startup.sh
Using CATALINA_BASE: /usr/local/tomcat
Using CATALINA_HOME: /usr/local/tomcat
Using CATALINA_TMPDIR: /usr/local/tomcat/temp
Using JRE_HOME: /usr/local/java
#
2.5.3 웹브라우저 확인
첫페이지의 Tomcat manager << 항목에서 확인할 수 있다.
tomcat 서버의 전반적인 상황을 파악할 수 있다. <server status>
2.6. JSP 간단 테스트
# pwd
/usr/local/apache-tomcat-5.5.27/webapps
# mkdir home
# cd home/
# pwd
/usr/local/apache-tomcat-5.5.27/webapps/home
# cp -R ../ROOT/WEB-INF ./
# vi time.jsp
<%@ page contentType="text/html; charset=utf-8" %>
<%@ page import="java.util.Date" %>
<%
Date nowTime = new Date();
%>
<html>
<head>
<title>JSP time test</title>
</head>
<body>
NOw Time is <%= nowTime %>
</body>
</html>
2.6.1. tomcat server 재시작
2.6.2. 웹브라우저 확인

■ NFS 패키지 준비
portmap-4.0-65.2.2.1
# rpm -qa nfs-utils
nfs-utils-1.0.9-24.el5
만약 없다면
# yum install portmap nfs-utils
■ NFS 서버의 공유목록 관리
# vi /etc/exports
/share 192.168.10.30(rw,sync)
#/share 폴더를 해당 아이피에만 read write할 수 있게 .
■ /etc/exports 파일 설정 형식
[형식]
공유디렉토리 접근 호스트(옵션)
[옵션]
rw : 읽기 쓰기
ro : 읽기만 가능
secure : 클라이언트 마운트 요청시 포트를 1024 이하
noaccess : 엑세스 거부
root_squach : 클라이언트의 root가 서버의 root권한을 획득하는 것을 막는다.
sync : 파일 시스템 변경시 즉시 동기화
■ NFS 사용
# /etc/init.d/portmap start
portmap (을)를 시작 중: [ OK ]
# /etc/init.d/nfs start
NFS 서비스를 시작 중: [ OK ]
NFS 쿼터를 시작 중: [ OK ]
NFS 데몬을 시작 중: [ OK ]
NFS mountd를 시작 중: [ OK ]
■ NFS 부팅시 자동시작
# chkconfig nfs on
# chkconfig --list | grep nfs
nfs 0:off 1:off 2:on 3:on 4:on 5:on 6:off
■ 공유목록 확인
# exportfs -v
/share 192.168.10.30(rw,wdelay,root_squash,no_subtree_check,anonuid=65534,anongid=65534)
nfs 서버 다시 시작않고 공유목록 수정
-a : /etc/exports 파일 load
-r : /etc/exports 파일 reload
-u IP:/디렉토리 : 입력한 디렉토리를 공유목록에서 제외
-v : 현재의 공유목록 확인
■ 클라이언트에서 확인
[nfs server]
# touch /share/hello.txt
[client]
# mkdir /mnt/nfs
# mount -t nfs 192.168.10.10:/share /mnt/nfs
# ls /mnt/nfs
hello.txt
■ 마운트 확인
# cat /etc/mtab
192.168.10.10:/share /mnt/nfs nfs rw,addr=192.168.10.10 0 0 < 정상 마운트 >
부팅시 자동마운트 하고 싶다면
#vi /etc/fstab에 추가 해주면 된다.
■ 아파치 서버 설정
■ 설치전 준비 사항
0. php
0. mysql
0. gcc 관련 패키지
0. libjpeg , libpng , freetype , gd
■ 소스 다운로드
// 아파치
www.apache.org --> http server --> from a mirror --> unix source
# cd /usr/src
# wget http://mirror.apache-kr.org/httpd/httpd-2.2.11.tar.gz
// php
www.php.net --> downloads --> php 5.x.x -
# wget http://kr2.php.net/get/php-5.2.8.tar.gz/from/this/mirror
// mysql
www.mysql.org or mysql.com --> downloads --> Compressed GNU TAR archive (tar.gz)
--> pick a mirror -- >
# wget http://dev.mysql.com/get/Downloads/MySQL-5.1/mysql-5.1.30.tar.gz/from/http://mysql.byungsoo.net/
# ls -l
-rw-r--r-- 1 root root 6806786 12월 13 23:35 httpd-2.2.11.tar.gz
-rw-r--r-- 1 root root 29050568 11월 20 08:19 mysql-5.1.30.tar.gz
-rw-r--r-- 1 root root 12427411 12월 8 04:43 php-5.2.8.tar.gz
■ 라이브러리, 컴파일러 확인
# rpm -qa gcc* cpp* compat-gcc* flex*
gcc-c++-4.1.2-42.el5
gcc-objc++-4.1.2-42.el5
gcc-objc-4.1.2-42.el5
compat-gcc-34-3.4.6-4
gcc-java-4.1.2-42.el5
flex-2.5.4a-41.fc6
cpp-4.1.2-42.el5
compat-gcc-34-g77-3.4.6-4
gcc-gfortran-4.1.2-42.el5
gcc-4.1.2-42.el5
gcc-gnat-4.1.2-42.el5
# yum -y install libjpeg-devel libpng-devl freetype-devel gd-devel
# rpm -qa libjpeg* libpng* freetype* gd-*
libpng-1.2.10-7.1.el5_0.1
libjpeg-6b-37
gd-devel-2.0.33-9.4.el5_1.1
libjpeg-devel-6b-37
freetype-devel-2.2.1-20.el5_2
freetype-2.2.1-20.el5_2
libpng-devel-1.2.10-7.1.el5_0.1
■ MySQL 설치
# useradd -M -s /bin/false mysql
# ./configure \
--prefix=/usr/local/mysql \
--with-charset=utf8 \
--with-extra-charsets=all
....
MySQL has a Web site at http://www.mysql.com/ which carries details on the
latest release, upcoming features, and other information to make your
work or play with MySQL more productive. There you can also find
information about mailing lists for MySQL discussion.
hints about installing MySQL on your platform. Also have a look at the
files in the Docs directory.
# make && make install
....
# echo $?
0
#
// 환경 설정파일 복사 , 소스 폴더내에 있다.
my-large.cnf 512M
my-medium.cnf 128M~ 256M
my-small.cnf 64M 이하
초기 샘플 파일에 대해서..
vmware상에서 구현중 메모리 512로 잡고 하지만 vmware상 문제인지 small외에 사용하면
아래 install db가 되지 않는다.
또한 mysqld 시작시 위 파일들 때문에 시작이 안된다.. 혹시 안되는 분들이 있다면
rm -f /etc/my.cnf 하고 작업을 진행 하길. 문제 해결을 위해 검색 중이나
마땅히 해결책이 보이질 않고 있음..(vmware상의 문제로 보여짐)
// 기본 DB생성
# cd bin
# ls
# ./mysql_install_db --user=mysql
Installing MySQL system tables...
OK
Filling help tables...
OK
To start mysqld at boot time you have to copy
support-files/mysql.server to the right place for your system
PLEASE REMEMBER TO SET A PASSWORD FOR THE MySQL root USER !
To do so, start the server, then issue the following commands:
/usr/local/bin/mysqladmin -u root password 'new-password'
/usr/local/bin/mysqladmin -u root -h fedora password 'new-password'
Alternatively you can run:
/usr/local/bin/mysql_secure_installation
which will also give you the option of removing the test
databases and anonymous user created by default. This is
strongly recommended for production servers.
See the manual for more instructions.
You can start the MySQL daemon with:
cd /usr/local ; /usr/local/bin/mysqld_safe &
You can test the MySQL daemon with mysql-test-run.pl
cd /usr/local/mysql-test ; perl mysql-test-run.pl
Please report any problems with the /usr/local/bin/mysqlbug script!
The latest information about MySQL is available at http://www.mysql.com/
Support MySQL by buying support/licenses from http://shop.mysql.com/
# echo $?
0
# chown -R mysql:mysql .
// 환경변수 등록
# vi ~/.bash_profile
PATH=$PATH:$HOME/bin:/usr/local/mysql/bin
# source ~/.bash_profile < 로긴 과정 없이 적용 >
//자동실행 설정
# cp share/mysql/mysql.server /etc/init.d/mysqld
# chkconfig --add mysqld
# chkconfig --list mysqld
// mysqld 시작
# /etc/init.d/mysqld start
Starting MySQL. [ OK ]
# mysql
Welcome to the MySQL monitor. Commands end with ; or \g.
Your MySQL connection id is 1
Server version: 5.1.30 Source distribution
Type 'help;' or '\h' for help. Type '\c' to clear the buffer.
mysql> exit
Bye
// 암호 설정
# mysqladmin -u root password ****
# # mysql -u root -p
Enter password:
Welcome to the MySQL monitor. Commands end with ; or \g.
Your MySQL connection id is 4
Server version: 5.1.30 Source distribution
Type 'help;' or '\h' for help. Type '\c' to clear the buffer.
mysql> exit
■ APACHE 설치
# ls
httpd-2.2.11.tar.gz
# tar xvfz httpd-2.2.11.tar.gz
# cd httpd-2.2.11
# ls
# ./configure --prefix=/usr/local/apache --enable-mods-shared=all --enable-so --enable-rewrite
// prefix ( 위치 ), enable-mods-shared=all (모든 모듈을 DSO로)
// enable-so (DSO 모드 활성)
// enable-rewrite ( URL 재작성 모듈 활성)
# echo $?
# make && make install
# echo $?
■ 자동실행 스크립트 정의
# chkconfig --add httpd
안됨
# vi /etc/init.d/httpd
#!/bin/sh
# chkconfig: 2345 90 90
# description: init file for Apache server daemon
# processname: /usr/local/apache/bin/apachectl
# config: /usr/local/apache/conf/httpd.conf
# pidfile: /usr/lcoal/apache/logs/httpd.pid
....
# chkconfig --add httpd
# chkconfig --list httpd
httpd 0:off 1:off 2:on 3:on 4:on 5:on 6:off
■ httpd.conf 환경 설정
#ServerName << 주석 해체
# /etc/init.d/httpd restart
웹브라우저에서 접속 테스트
■ PHP 설치
# ls
php-5.2.8.tar.gz
# tar xvzf php-5.2.8.tar.gz
# cd php-5.2.8
# ./configure --prefix=/usr/local/php --with-apxs2=/usr/local/apache/bin/apxs --with-mysql=/usr/local/mysql --with-config-file-path=/usr/local/apache/conf --disable-debug --enable-safe-mode --enable-track-vars --enable-sockets --enable-mod-charset --with-charset=utf8 --with-xml --with-language=korean --enable-mailparse --enable-calendar --enable-sysvsem=yes --enable-sysvshm=yes --enable-ftp --enable-magic-quotes --enable-gd-native-ttf --enable-url-includes --enable-trans-id --enable-inline-optimization --enable-bcmath --with-jpeg --with-png --with-zlib --with-jpeg-dir=/usr --with-png-dir=/usr/lib --with-freetype-dir=/usr --with-libxml-dir=/usr --enable-exif --with-gd --with-ttf --with-gettext --enable-sigchild --enable-mbstring
with-apxs2 (아파치의 apxs를 이용해 아파치에 모듈적재)
with-mysql (mysql과 연동)
with-config-file-path ( php 의 환경설정 파일인 php.ini가 생성될 위치)
이하 라이브러리 포함 위치
....
+--------------------------------------------------------------------+
| License: |
| This software is subject to the PHP License, available in this |
| distribution in the file LICENSE. By continuing this installation |
| process, you are bound by the terms of this license agreement. |
| If you do not agree with the terms of this license, you must abort |
| the installation process at this point. |
+--------------------------------------------------------------------+
--with-charset=utf8
--with-xml
--with-language=korean
--enable-mailparse
--enable-calender
--enable-url-includes
--enable-trans-id
--with-jpeg
--with-png << 없는 옵션일 경우 출력됨
# echo $?
0
# make && make install
<IfModule dir_module>
DirectoryIndex index.html index.html index.php
</IfModule>
<IfModule mime_module>
AddType application/x-httpd-php .php
AddType application/x-httpd-php-source .phps
</IfModule>
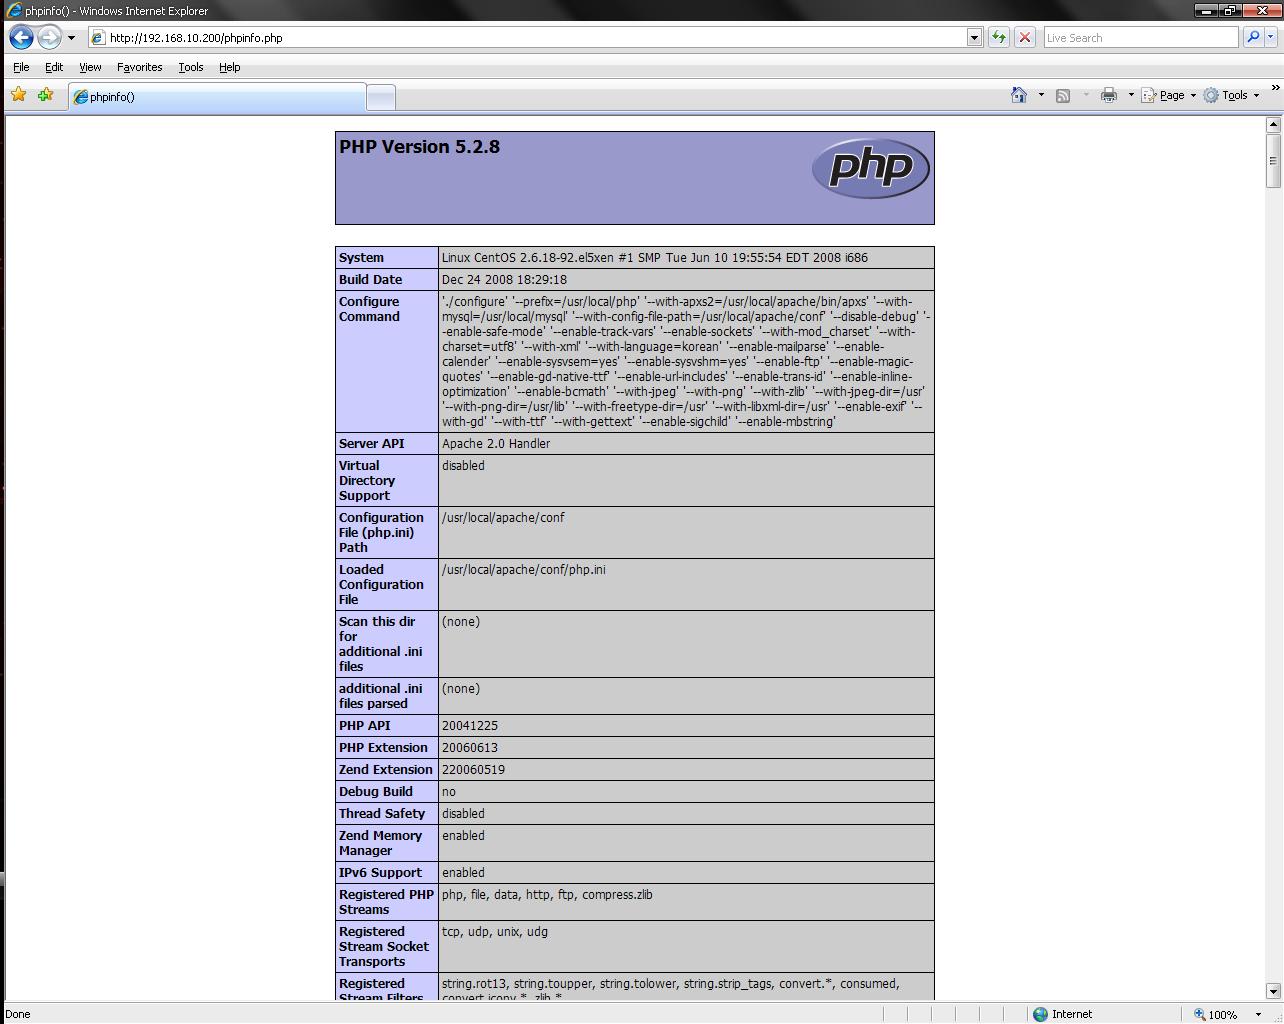
# vi /usr/local/apache/htdocs/phpinfo.php
<? phpinfo(); ?>
# /etc/init.d/httpd restart
웹브라우저에서 확인
■ apache 환경 설정 ( # vi /usr/local/bin/apache/conf/httpd.conf )
# 아파치 웹서버가 설치된 디렉토리
# 아파치가 사용할 포트번호
LoadModule authn_dbm_module modules/mod_authn_dbm.so
LoadModule authn_anon_module modules/mod_authn_anon.so
# 아파치에 등록된 모듈목록
<IfModule !mpm_winnt_module>
User daemon
Group daemon
</IfModule>
</IfModule>
# 아파치 데몬은 root권한 그 자식 프로세스는 위에서 지정된 이름으로 실행된다.
# 아파치서버의 웹문서가 있는 경로 설정
Options FollowSymLinks
AllowOverride None
Order deny,allow
Deny from all
</Directory>
# 해당 디렉토리 이하의 웹문서를 어떻게 제어할 것인가를 설정
<IfModule dir_module>
DirectoryIndex index.html index.html index.php
</IfModule>
# 클라이언트가 파일이름없이 접근시 나열된 파일을 순서대로 검색하여 보여준다.
<FilesMatch "^\.ht">
Order allow,deny
Deny from all
Satisfy All
</FilesMatch>
# 특정한 파일형식을 정규표현식으로 지정해서 해당 파일에 대한 접근 제어을 설정할때 사용
ErrorLog "logs/error_log"
# 에러로그파일 위치
LogLevel warn
# 에러로그레벨 지정
<IfModule log_config_module>
LogFormat "%h %l %u %t \"%r\" %>s %b \"%{Referer}i\" \"%{User-Agent}i\"" combined
LogFormat "%h %l %u %t \"%r\" %>s %b" common
LogFormat "%h %l %u %t \"%r\" %>s %b \"%{Referer}i\" \"%{User-Agent}i\" %I %O" combinedio
</IfModule>
CustomLog "logs/access_log" common
</IfModule>
# 웹서버 로그 포멧 지정
<IfModule alias_module>
ScriptAlias /cgi-bin/ "/usr/local/apache/cgi-bin/"
</IfModule>
# Redirect지시어는 앞에 지정한 주소로 접속하면 뒤에 지정한 URL로 이동한다.
# Alias 지시어는 경로를 짧게 줄이거나 DocumentRoot 외에 다른곳에 있는 디렉토리 접근
# ScriptAlias 는 서버 스크립트를 포함한다.
<IfModule cgid_module>
#Scriptsock logs/cgisock
</IfModule>
# CGI 데몬과 통신을 위해 사용할 소켓의 이름 지정
<Directory "/usr/local/apache/cgi-bin">
AllowOverride None
Options None
Order allow,deny
Allow from all
</Directory>
# cgi 스크립트가 있는 디렉토리의 설정내용
DefaultType text/plain
# 웹서버가 데이터를 전송하는 문서 형식 지정, mime.types파일에 정의되지않는 형식을 표시
<IfModule mime_module>
TypesConfig conf/mime.types
# 웹서버의 mime type을 지정한 파일을 지정
# Addtype 특정 확장자 지정
# AddEncoding 특정 확장자를 가진 파일을 특정 형식으로 인코딩
# AddHandler 특정 확장자를 가진 파일의 핸들러를 지정한다.
#AddType application/x-gzip .tgz
#AddEncoding x-compress .Z
#AddEncoding x-gzip .gz .tgz
AddType application/x-compress .Z
AddType application/x-gzip .gz .tgz
AddType application/x-httpd-php .php
AddType application/x-httpd-php-source .phps
#AddHandler cgi-script .cgi
# For type maps (negotiated resources):
#AddHandler type-map var
#AddType text/html .shtml
#AddOutputFilter INCLUDES .shtml
</IfModule>
#MIMEMagicFile conf/magic
# RFC 형식이 지정되어있지 않을때 파일의 내용을 통해 자동적으로 결정하게 되는데 해당 지시어를 # 통해서 conf/magic 파일을 힌트 삼아서 문서 형식을 결정
#ErrorDocument 500 "The server made a boo boo."
#ErrorDocument 404 /missing.html
#ErrorDocument 404 "/cgi-bin/missing_handler.pl"
#ErrorDocument 402 http://www.example.com/subscription_info.html
# 에러 발생시 응답 페이지
#EnableMMAP off
#EnableSendfile off
# 메모리 대응 or 메모리 매핑
#Include conf/extra/httpd-mpm.conf
# 다중 처리 모듈
#Include conf/extra/httpd-multilang-errordoc.conf
# 에러메시지 다중언어 지원
#Include conf/extra/httpd-autoindex.conf
# 클라에게 보여줄 디렉토리 목록 설정
# 다중 언어를 지원키 위한 설정 파일
#Include conf/extra/httpd-userdir.conf
# 사용자 홈 디렉토리 설정 파일
#Include conf/extra/httpd-info.conf
# 아파치 웹서버의 상태와 환경설정 제공 파일
#Include conf/extra/httpd-vhosts.conf
# 가상호스트 설정파일
#Include conf/extra/httpd-manual.conf
# 아파치 메뉴얼
#Include conf/extra/httpd-dav.conf
# 웹사이트 개발도구 WebDAV 지원 모듈
#Include conf/extra/httpd-default.conf
# 아파치 기본 설정 파일
#Include conf/extra/httpd-ssl.conf
# 보안 소켓 레이어
#
# Note: The following must must be present to support
# starting without SSL on platforms with no /dev/random equivalent
# but a statically compiled-in mod_ssl.
#
<IfModule ssl_module>
SSLRandomSeed startup builtin
SSLRandomSeed connect builtin
</IfModule>
# 보안 소켓 레이어 모듈이 Load되어질때, 인터넷을 통해 비공개문서를 전송키위해 사용
■ 설치전 준비
# rpm -qa | grep ftpd
lftp-3.5.1-2.fc6
vsftpd-2.0.5-12.el5
ftp-0.17-33.fc6
# rpm -e vsftpd
# rpm -qa | grep ftp
lftp-3.5.1-2.fc6
ftp-0.17-33.fc6
#
■ 소스 or 패키지 준비
- gcc
- make compiler tools
- proftpd 소스파일
# gcc --version
# make --version
■ 소스 다운로드 및 압축 해제
==================================================
다운로드
# wget ftp://ftp.proftpd.org/distrib/source/proftpd-1.3.1.tar.gz
압축 해제
# tar xvfz proftpd-1.3.1.tar.gz
# cd proftpd-1.3.1
■ 컴파일 및 설치
- 환경 탐색? 을 통해 컴파일 될 목록을 makefile로 만드는 과정이다
- prefix는 설치 위치를 나타내는데 default 위치가 있다.
- configure에서 나온 makefile의 룰에 따라 컴파일 하는 과정
- make에서 만들어진 실행파일을 해당 경로에 이동~!
TIP.
보통
/usr/local/bin or sbin 에 설치가 되며
( 이 위치는 PATH변수에 미리 등록이 되어있어 절대경로 없이 바로 쓸 수 있다.)
/usr/local/etc 에 conf 가 있다.
which 를 통해 path변수에 저장된 실행 파일 위치 찾을 수 있다.
■ 설치와 실행
0 <위 명령어의 실행결과를 보자 0이라면 위 명령이 정상 실행 되었다는 뜻이다.>
/usr/local/sbin/proftpd
< ftp데몬을 실행>
# proftpd
- no such group 'nogroup'
- Fatal: Group: Unknown group 'nogroup' on line 27 of '/usr/local/etc/proftpd.conf'
# /usr/local/sbin/proftpd
- no such group 'nogroup'
- Fatal: Group: Unknown group 'nogroup' on line 27 of '/usr/local/etc/proftpd.conf'
<기본 값으로 설정시 에러 메시지 나올수 있음>
< nogroup 이란 그룹이 없다는 메시지 >
nogroup추가
# groupadd nogroup < 추가 혹은 proftpd.conf 에서 nogroup을 -> nobody 로 수정 >
# /usr/local/sbin/proftpd <정상구동 되었다>
# echo $?
0
# netstat -atpn
Active Internet connections (servers and established)
Proto Recv-Q Send-Q Local Address Foreign Address State PID/Program name
tcp 0 0 0.0.0.0:21 0.0.0.0:* LISTEN 13499/proftpd: (acc
< proftpd 데몬이 구동중인것을 볼 수 있다>
<만약 구동에 실패 한다면 >
# vi /usr/local/etc/proftd.conf
에러를 보면서 conf file을 적당히 수정
■ 간단한 테스트
# useradd user01
# passwd user01
...
#
< windows -> cmd에서 간단히 테스트 정상작동하였다!>

TIP. 테스트 실패시
만약 호스트에 연결 할 수 없다는 메시지가 나온다면
c:\> ping < IP > 확인후
방화벽 설정을 확인해봐야 한다.
보통 기본적인 방화벽으로 < lokkit > , < iptables > 두가지가 있는데
테스트를 위해서 iptables를 수정 하거나 정지
lokkit 설정에서 ftp를 열어주어야 한다.
참고로 직접 iptables를 설정 해주지 않았다면 서비스가 시작 되어 있지 않을것이다!!
# lokkit


■ proftpd.conf 설정
# 현재 운영중인 FTP서비 이름을 설정하는곳
# 데몬 타입
# FTP서버의 primary IP or 가상 FTP 호스트 서비스 설정 블록에서 설정된 IP Address로 부터 연결 요청이 있을 때 기본으로 응답할 서버 설정하는것이며 오직 하나만 기본으로 설정될 수 있다.
# Port 21 is the standard FTP port.
# 기본 포트
# Umask 022 is a good standard umask to prevent new dirs and files
# from being group and world writable.
# 클라이언트 사용자가 ftp로 접속하여 파일 업로드시 생성되는 파일과 디렉토리의 퍼미션 조정값
# proftpd 데몬 실행 할때 최대 자식 프로세서 생성 개수 지정(standalone모드일경우)
Group nogroup
# proftpd 데몬 실행시 어떤 유저와 그룹의 권한으로 실행하겠다라는 설정
# 각 계정의 홈디렉토리를 최상위 ( / ) 로 표시
# 특정 그룹만 최상위 접속 권한 줄려면 DefaultRoot ~ ! anygroup 으로 설정
# Normally, we want files to be overwriteable.
# 이미 업로드된 파일의 덮어 쓰기를 허용 유무
DenyAll
</Limit>
# ftp 사용자가 업로드한 파일에 대해 퍼미션을 조정하지 못하도록 하는 옵션
# 허용은 AllowAll
# A basic anonymous configuration, no upload directories. If you do not
# want anonymous users, simply delete this entire <Anonymous> section.
# anonymous server 설정을 위한 탭 <Anonymous ~ftp> ~~</Anonymous>
Group ftp
# 익명 사용자들이 할당받을 이름 지정
# 익명 ftp 서버의 접속자 유저명을 항상 anonymous로
# Limit the maximum number of anonymous logins
# 익명서버 동시 접속자수
# in each newly chdired directory.
# 익명서버 접속시 보여줄 메시지
DisplayChdir .message
# /var/ftp 하위 디렉토리 접속시 메시지 지정
# Limit WRITE everywhere in the anonymous chroot
DenyAll
</Limit>
# 익명접속자에 대해 쓰기 제한
■ inetd mode 변경
# 서버 타임을 inetd로 변경
ServerType inetd
# vi /etc/xinetd.d/proftpd
{
disable = yes
flags = REUSE
protocol = tcp
socket_type =stream
port = 21
instances = 30
wait = no
user = root
server = /usr/local/sbin/in.proftpd
log_on_success=HOST PID
log_on_failure+=USERID
log_on_failure = HOST RECORD
server_arg= -l -a
}
# pkill -9 proftpd
# /etc/rc.d/init.d/xinetd restart < xinetd 가 없다면 yum으로 설치 >
■ proftpd 로그 파일 관리
# cd /usr/src/proftpd-1.3.1/contrib/dist/rpm
# ls
ftp.pamd proftpd.init.d proftpd.init.d.suse proftpd.logrotate xinetd
# cp proftpd.logrotate /etc/logrotate.d/proftpd
/etc/logrotate.d 디렉토리에 넣어놓면 알아서 작동한다 ㅡㅡ;
■ 부팅시 자동 실행
########### proftpd auto running test###########
/usr/local/sbin/proftpd &
시작스크립트 생성
소스 파일있는곳에서
# pwd
/usr/src/proftpd-1.3.1/contrib/dist/rpm
# vi proftpd.init.d
PATH="$PATH:/usr/local/sbin" < proftpd 위치로 변경 >
# ls
ftp.pamd proftpd.init.d proftpd.init.d.suse proftpd.logrotate xinetd
# cp proftpd.init.d /etc/init.d/proftpd
# /etc/init.d/proftpd stop
# /etc/init.d/proftpd start
# chkconfig --add proftpd
# chkconfig --list proftpd < 원하는 레벨로 변경 >
DefaultRoot ~aaa,bbb,ccc
-> aaa, bbb ,ccc 그룹 사용자 접속시
자신의 홈디렉토리가 / 로 표시된다.
DefaultRoot ~!aaa
-> aaa 그룹제외한 사용자들은
자신의 홈디렉토리가 루트 디렉토리가 된다.
CWD : 디렉토리 이동
MKD : 디렉토리 생성
RNFR, RNTO : 디렉토리 이름 바꾸기
DELE : 파일 삭제 권한
RMD : 디렉토리 삭제
RETR : 파일 전송 ( 서버 - 클라이언트)
STOR : 파일 전송( 클라이언트 -> 서버)
READ : 파일 리스트 확인 ( RETR, STAT)
파일 읽기와 관련된 모든 FTP명령
DIRS : 디렉토리 목록에 관련된 ""
-> LIST, NLST
LOGIN : 서버에 연결하거나 로그인을 제한하고자 할떄
WRITE : 생성에 관련된 모든 FTP명령
예)
<Limit LOGIN> # anonymous 허용
AllowAll
</Limit>
<Limit LOGIN>
Order Allow, Deny
Allow from 192.168.0.100 192.168.0.11
Allow from 203.241.205.,.rootman.co.kr
Deny from all
</Limit>
<Limit Write>
AllowAll
<Limit>
■ DHCP 서버 설정, 운영
0. 설치전 준비 사항
2장의 NIC
1. 패키지 준비
dhcpv6_client-0.10-33.el5
# yum install dhcp
....
# rpm -qa | grep dhcp
dhcp-3.0.5-13.el5
#
2. NIC 카드 준비
# cd /etc/sysconfig/network-scripts
# ls
ifcfg-eth0
ifcfg-eht1 <<.
# vi ifcfg-eth1
# Advanced Micro Devices [AMD] 79c970 [PCnet32 LANCE]
DEVICE=eth1
ONBOOT=yes
BOOTPROTO=dhcp
HWADDR=00:0c:29:25:e1:2d
NETMASK=255.255.255.0
IPADDR=192.168.10.50
gateway 설정 하지 말것
#
3. dhcpd.conf 설정
/etc/dhcpd.conf
# cat /etc/dhcpd.conf
/usr/share/doc/dhcp*/dhcpd.conf.sample 을 쓰라고 한다
# cp /usr/share/doc/dhcp*/dhcpd.conf.sample /etc/dhcpd.conf
# vi /etc/dhcpd.conf
ddns-update-style interim;
ignore client-updates;
# 내부 네트워크의 범위를 지정
option routers 192.168.0.1;
option subnet-mask 255.255.255.0;
option nis-domain "domain.org";
option domain-name "domain.org";
option domain-name-servers 192.168.1.1;
option time-offset -18000; # Eastern Standard Time
# option ntp-servers 192.168.1.1;
# option netbios-name-servers 192.168.1.1;
# --- Selects point-to-point node (default is hybrid). Don't change this unless
# -- you understand Netbios very well
# option netbios-node-type 2;
# 기본 게이트웨이의 ip에 대한 설정, 서브넷 , 네임서버 도메인, 네임서버 ip등을 설정할때 쓴다.
# dhcp ip할당 영역
max-lease-time 43200;
# 할당 받은 ip의 사용시간과 최대 보유시간을 지정
host ns {
next-server marvin.redhat.com;
hardware ethernet 12:34:56:78:AB:CD;
fixed-address 207.175.42.254;
}
# 특별히 고정된 ip를 할당할때
4. 구동 시작
dhcpd (을)를 시작 중: [ OK ]
NIC ip 설정을 dhcp로 설정후 재시작

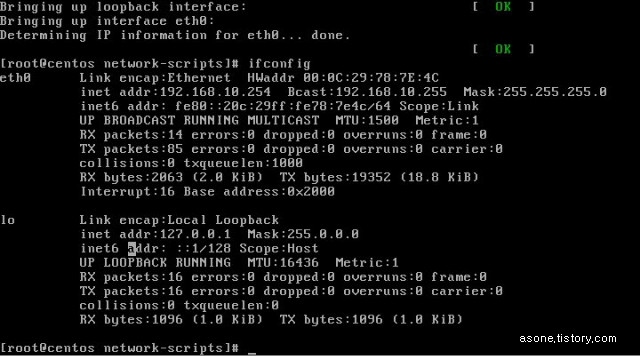
# arp -a
? (192.168.10.254) at 00:0C:29:78:7E:4C [ether] on eth0
254번 ip를 받아 간것을 확인 할 수 있다.
■ CentOS 에서 네임서버 설치 , 운영
Tip .
0. 소스로 설치 할 경우
http:/www.isc.org 에서 소스 다운 받아 설치 하면 된다.
0. bind 9.3 부터는 name.caching-nameserver.conf 사용
1. 필요 패키지
2. 패키지 준비
# rpm -qa | grep bind
bind-libs-9.3.3-10.el5
ypbind-1.19-8.el5
bind-utils-9.3.3-10.el5
# yum install bind
....
Dependencies Resolved
Package Arch Version Repository Size
=============================================================================
Installing:
bind i386 30:9.3.4-6.0.2.P1.el5_2 updates 9
58 k
Updating for dependencies:
bind-libs i386 30:9.3.4-6.0.2.P1.el5_2 updates 8
46 k
bind-utils i386 30:9.3.4-6.0.2.P1.el5_2 updates 1
67 k
=============================================================================
Install 1 Package(s)
Update 2 Package(s)
Remove 0 Package(s)
Is this ok [y/N]: y
....
Installed: bind.i386 30:9.3.4-6.0.2.P1.el5_2
Dependency Updated: bind-libs.i386 30:9.3.4-6.0.2.P1.el5_2 bind-utils.i386 30:9.3.4-6.0.2.P1.el5_2
Complete!
# rpm -qa | grep bind
bind-9.3.4-6.0.2.P1.el5_2
bind-utils-9.3.4-6.0.2.P1.el5_2
ypbind-1.19-8.el5
bind-libs-9.3.4-6.0.2.P1.el5_2
# yum install caching-nameserver
....
installed: caching-nameserver.i386 30:9.3.4-6.0.2.P1.el5_2
Complete!
# rpm -qa | grep caching
caching-nameserver-9.3.4-6.0.2.P1.el5_2
#
3. 운영을 위한 환경 설정 파일
# vi /etc/named.caching-nameserver.conf
// named.caching-nameserver.conf
...
options {
// listen-on port 53 { 127.0.0.1; };
// 기본적으로 port 53 으로 자신만이 접근 가능하게 되어있다.
listen-on port 53 { any; };
// ip v6 에 대한 것으로 차후 서비스를 위해 ~..주석처리.
// zone file에 대한 기본 디렉토리 설정
// 캐쉬 덤프 파일 생성 위치와 파일 이름
// 통계파일 생성 위치와 파일 이름
// 메모리 관련 통계파일 위치 이름
// randomization
// query-source port 53;
// 쿼리를 받아 들일 소스포트
allow-query { any; };
// 쿼리 허용할 ip 대역
channel default_debug {
file "data/named.run";
severity dynamic;
};
};
// 실행에 있어 디버깅시 참고 할 수 있는 로그파일 생성 위치
// match-clients { localhost; };
// match-destinations { localhost; };
match-destinations { any; };
// 로컬 리졸버 허용 클라이언트 지정
recursion yes;
include "/etc/named.rfc1912.zones";
};
4. 구동 시작
named를 시작 중: [ OK ]
[root@fedora ~]# tail /var/named/data/named.run
zone 0.in-addr.arpa/IN/localhost_resolver: loaded serial 42
zone 0.0.127.in-addr.arpa/IN/localhost_resolver: loaded serial 1997022700
zone 255.in-addr.arpa/IN/localhost_resolver: loaded serial 42
zone 0.0.0.0.0.0.0.0.0.0.0.0.0.0.0.0.0.0.0.0.0.0.0.0.0.0.0.0.0.0.0.ip6.arpa/IN/localhost_resolver: loaded serial 1997022700
zone localdomain/IN/localhost_resolver: loaded serial 42
zone localhost/IN/localhost_resolver: loaded serial 42
running
//정상 구동되었다.
#
5. zone 파일 구성
# vi /etc/named.rfc1912.zones
// named.rfc1912.zones:
//
// Provided by Red Hat caching-nameserver package
//
// ISC BIND named zone configuration for zones recommended by
// RFC 1912 section 4.1 : localhost TLDs and address zones
//
// See /usr/share/doc/bind*/sample/ for example named configuration files.
//
zone "." IN {
type hint;
file "named.ca";
};
...
zone "linux.com" IN {
type master;
file "linux.com.zone";
allow-update { none; };
};
//추가
# cd /var/named
# ls
// 기본 포멧 파일을 이용
# cp localdoamin.zone linux.com.zone
# vi linux.com.zone
@ IN SOA ns.linux.com. root.linux.com (
2008121601 ; serial (d. adams)
3H ; refresh
15M ; retry
1W ; expiry
1D ) ; minimum
IN NS ns.linux.com.
IN MX 10 mail.linux.com.
IN A 192.168.10.200
ns IN A 192.168.10.200
www IN A 192.168.10.200
mail IN CNAME www
ftp IN CNAME @
* IN CNAME @
// 생성 후 저장
//zone 파일과 conf 파일 체크
# named-checkconf /etc/named.rfc1912.zones
# named-checkconf /etc/named.caching-nameserver.conf
# named-checkzone linux.com /var/named/linux.com.zone
zone linux.com/IN: loaded serial 2008121601
OK
#
// 모든게 정상으로 나왔다. 서버 재구동
/etc/rc.d/init.d/named restart
named를 정지 중: [ OK ]
named를 시작 중: [ OK ]
# vi /etc/resolv.conf
search localdomain
nameserver 192.168.10.10
nameserver 168.126.63.1
// 기존에 있던 nameserver외에 추가로 자신의 ip로 된 nameserver ip를 추가
// 192.~ 대의 dns를 먼저 검색 하며 검색된 정보가 없을경우 다음 dns에게 물어 본다.
# nslookup
> linux.com
Server: [192.168.10.10]
Address: 192.168.10.10
Address: 192.168.10.100
...
> ftp.linux.com
>q
// 잘나오는것을 확인 할 수 있다.
6. zone file 설명
time to live의 약자 다른 네임서버에서 읽어간 정보가 살아있는 시간이다. 초단위
ORIGIN 의 의미 public domain을 의미 즉 @ = linux.com.
IN 다음 의 설정을 이용
SOA start of authority 해당 도메인의 정보를 가지고 있고 root@linux.com 이 관리자를 나타낸다.
해당 정보의 시리얼 보통 날짜정보 + 카운터로 표시된다.
리프레쉬 타임 주기
M-> S로의 장애 발생시 재 접속 시간
존파일 유효기간, 만약 Expiry 시간안에 M에서 응답을 못받을 경우 S는 데이터에 대한 유효성을 더이상 인정 하지 않겠다는뜻
TTL과 같은 의미 다른 서버에서 zone 데이터를 가져갔을때 그 데이터에 대한 유효기간
// 네임서버 이름 지칭
IN MX 10 mail.linux.com.
// mailserver 이름 지칭
IN A 192.168.10.200
// ip 할당
ns IN A 192.168.10.200
// nameserver의 ip는 ""
www IN A 192.168.10.200
// www.linux.com ip할당
mail IN CNAME www
// mail server의 ip는 www의 설정을 가져온다.
ftp IN CNAME @
// ORIGIN 변수의 값을 그대로 사용
* IN CNAME
www IN A 192.168.10.201
www IN A 192.168.10.202
// A 레코드 여러개 적어 부하 분산!
■ samba 서버 설치 및 설정
설치 전 준비
-------------------------------
# rpm -qa | grep samba
samba-3.2.0-1.pre3.9.fc9.i386
없을 경우 설치 한다
# yum -y install samba
# /etc/init.d/smb start 서비스 시작
# vi /etc/samba/smb.conf
log file = /var/log/samba/log.%m >> %m (접속한 ip)
security = user
server -> smb server인증
share
domain -> NT 계열 인증
share public 공유디렉토리를 접속하려 할때
valid 암호만 물어 본다.
user public 계정 암호 둘다 물어본다.
valid
user 접근시 공유폴더 처음 접근시 계정 비번 물어보며
user와 같은 계정을 가진 디렉토리만 접근 가능
퍼블릭은 제외
smb유저 추가
---------------------
smbuseradd x 로 안되므로
명령어로 포팅
# cat /etc/passwd | mksmbpasswd.sh >
/etc/samba/smbpasswd
# smbpasswd @ID
윈도우 공유폴더 확인
--------------------------
# smbclient -L 192.168.77.1
passwd :
$는 admin은 권한으로만 가지고 있다.
# smbclient //ip
# mkdir /SMBClient
# mount -t smbfs //192.168.77.1/aaa /SMBClient
# cd /SMBClient
프린터 활용
 Prev
Prev
 Rss Feed