'solaris'에 해당되는 글 23건
- 2008.09.23 Solaris Admin I 과정
- 2008.08.11 Chapter 9. 원격 접속과 파일전송
- 2008.08.08 Chapter 8. 프로세스 관리
- 2008.08.08 Chapter 7. Korn Shell Characteristic
- 2008.08.07 Chapter 6. Vi 편집기
- 2008.08.07 Chapter 5. Unix Basic Commands _ 아카이브/압축 관련 명령어
- 2008.08.07 Chapter 5. Unix Basic Commands _ 링크 관련 명령어
- 2008.07.22 Chapter 5. Unix Basic Commands _ 파일/디렉토리 검색 관련 명령어
- 2008.07.22 Chapter 5. Unix Basic Commands _ 자주 사용되지는 않는 명령어
- 2008.07.21 Chapter 5. Unix Basic Commands _ 파일 속성 정보 변경 명령어
- 2008.07.21 Chapter 5. Unix Basic Commands _ 사용자와 통신할때 사용하는 명령어
- 2008.07.21 Chapter 5. Unix Basic Commands _ 기타 관리용 명령어
- 2008.07.20 Chapter 5. Unix Basic Commands _ 파일관리
- 2008.07.20 Chapter 5. Unix Basic Commands _ mkdir , rm dir
- 2008.07.20 Chapter 5. Unix Basic Commands_ls CMD
- 2008.07.19 Chapter 5. Unix Basic Commands
- 2008.07.19 Chapter 4. Solaris 9 Installation
- 2008.07.19 Chapter 3. Solaris Introducing
- 2008.07.19 Chapter 2. OS Overview
- 2008.07.19 Chapter 1. UNIX History
- 2008.07.19 solaris 알림
- 2008.07.15 solaris 설치-2
- 2008.07.15 solaris 설치
|
Solaris Admin I 과정
목차
0. Basic Network Setting 1. Solaris Directory Hierarchy 2. Managing Local Disk Devices 4. Patch Administration 5. BootSequence 6. User Administration 7. Basic System Security 8. Printer Administration 9. Job Scheduling 10.Backup & Recovery |
Remote Connection & File Transfer
INDEX
______________________________________________________
1. Introducing an Example Network
2. Remote Connection History
3. Remote Connection & File Transmission for System V
4. Remote Connection & File Transmission for BSD
5. Remote Connection & File Transmission for Securiy
______________________________________________________
1. 네트워크 관련 용어
■ LAN(Local Area Network)
A network that covers a small area, usually less than a few thousand feet or meters.
■ WAN(Wide Area Network)
A network that can span thousands of miles or kilometers.
[참고] LAN(근거리 통신망, Local Area Network)
LAN[랜]이란 300m 이하의 통신회선으로 연결된 PC, 메인프레임, 워크스테이션 들의 집합을
말한다. LAN은 컴퓨터 사이의 전류나 전파신호가 정확히 전달될 수 있는 거리, 즉 한 기관
의 빌딩 내에 설치된 컴퓨터 장비들을 직원들이 가장 효과적으로 공동 사용할 수 있도록
연결된 고속의 통신망이다.
1970년대 말에서 1980년초 제록스사의 한 연구소에서 LAN에 관한 중요한 업적이 이루어졌
다. 이 연구소에서 이더넷(Ethernet ; 공기가 없는 진공상태의 공간에 전파가 흘러갈 수
있는 물질이 존재한다고 가정하여 지은 독일어 단어 "에테르"에서 따온 말)이라고 이름을
붙인 컴퓨터 연결방법이 처음으로 실용화되었다.
[참고] WAN(광역 통신망, Wild Area Network)
WAN[왠]이란 지리적으로 흩어져 있는 통신망을 의미하는 것으로서 근거리통신망, 즉 LAN과
구별하여 보다 넓은 지역을 커버하는 통신구조를 나타내는 용어로 사용된다. 보통 LAN의
범위는 1개의 빌딩이나 학교, 연구소 및 생산공장 등의 일정 구역내인 것에 반해, WAN은
넓은 지역을 연결하는 네트웍를 지칭하는 것으로 지방과 지방, 국가와 국가, 또는 대륙과
대륙 등과 같이 지리적으로 완전하게 떨어져 있는 장거리 지역 사이를 연결하고 있는 통신
망이다.
광역통신망은 사설망일 수도 있고 임차한 망도 될 수 있지만, 이 용어는 보통 공공망까지
를 포함하는 개념을 내포하고 있다. 지역적으로 LAN과 WAN 사이에 위치하는 중간정도 크기
의 네트웍을 특히 MAN이라고 부른다.
2. 원격접속과 파일전송
Remote Connection & File Transmission History
-----------+----------+--------------+--------------
| System V | BSD | Linux
-----------+----------+--------------+--------------
Remote | telnet | rlogin, rsh | ssh
Connection | | |
| | |
File | ftp | rcp | scp, sftp
Transfer | | |
-----------+----------+--------------+--------------
[참고] 패킷 암호화에 대해서
위의 표에 있는 System V / BSD 계열의 모든 명령어는 패킷을 암호화 시키지 않는 단점을
가지고 있다. 그래서 원격 접속과 파일 전송을 할 때 패킷의 내용을 노출 시킬수 있게 된
다. 그래서 최근에는 ssh, scp, sftp 프로그램과 같이 패킷을 암호화 할수 있는 프로그램
을 권장하고 있다.
[EX] 패킷 암호화 실습
[TERM1] # snoop HOSTA HOSTB
[TERM2] # telnet HOSTB
3. 원격접속 & 파일전송 명령어(System V 계열)
Remote Connection & File Transmission for System V
■ telnet 명령어
■ ftp 명령어
(1). telnet CMD
____________________
telnet - user interface to a remote system using the TELNET
protocol
The telnet utility communicates with another host using the
TELNET protocol. If telnet is invoked without arguments, it
enters command mode, indicated by its prompt, telnet>. In
this mode, it accepts and executes its associated commands.
See USAGE, telnet Commands, below. If it is invoked with
arguments, it performs an open command with those arguments.
If, for example, a host is specified as @hop1@hop2@host, the
connection goes through hosts hop1 and hop2, using loose
source routing to end at host. If a leading ! is used, the
connection follows strict source routing. Note that when
telnet uses IPv6, it can only use loose source routing, and
the connection ignores the !.
Once a connection has been opened, telnet enters input mode.
In this mode, text typed is sent to the remote host. The
input mode entered will be either "line mode", "character at
a time", or "old line by line", depending upon what the
remote system supports.
In "line mode", character processing is done on the local
system, under the control of the remote system. When input
editing or character echoing is to be disabled, the remote
system will relay that information. The remote system will
also relay changes to any special characters that happen on
the remote system, so that they can take effect on the local
system.
In "character at a time" mode, most text typed is immedi-
ately sent to the remote host for processing.
In "old line by line" mode, all text is echoed locally, and
(normally) only completed lines are sent to the remote host.
The "local echo character" (initially ^E) may be used to
turn off and on the local echo. (Use this mostly to enter
passwords without the password being echoed.).
If the "line mode" option is enabled, or if the localchars
toggle is TRUE (the default in "old line by line" mode), the
user's quit, intr, and flush characters are trapped locally,
and sent as TELNET protocol sequences to the remote side. If
"line mode" has ever been enabled, then the user's susp and
eof are also sent as TELNET protocol sequences. quit is then
sent as a TELNET ABORT instead of BREAK. The options toggle
autoflush and toggle autosynch cause this action to flush
subsequent output to the terminal (until the remote host
acknowledges the TELNET sequence); and to flush previous
terminal input, in the case of quit and intr.
While connected to a remote host, the user can enter telnet
command mode by typing the telnet escape character (ini-
tially ^]). When in command mode, the normal terminal edit-
ing conventions are available. Pressing <RETURN> at the
telnet command prompt causes telnet to exit command mode.
(1-1). telnet 명령어 실행 모드
telnet Remote Connection Excution Mode
- 대화형 모드(Interractive Mode)
- 비대화형 모드(Noninterractive Mode)
■ telnet 명령어 실행 모드
(비대화형 모드) # telnet 172.16.8.254
(대화형 모드) # telnet
telnet> open 172.16.8.254
(1-2). 기본사용법
# telnet [호스트이름/아이피] [포트]
(telnet 명령어 사용법)
# telnet 172.16.8.254
# telnet 172.16.8.254 23 (/etc/services 정의)
# telnet solaris254 (/etc/hosts 정의)
[참고] 잘 알려진 서비스 포트(Well-kown Port Number, 0 ~ 1023, 0 ~ 65535)
------------------
포트 서비스명
------------------
20,21 FTP
22 SSH
23 TELNET
25 SMTP
53 DNS
67,68 DHCP(Bootp)
80 WEB
110 POP3
111 sunrpc
123 NTP
143 IMAP
------------------
[참고] telnet 명령어 수행시 암호를 잘못 입력한 경우
# telnet localhost
Trying 127.0.0.1...
Connected to localhost.
Escape character is '^]'.
SunOS 5.9
login: root
Password: <----- 암호 잘못 입력(암호: k)
Login incorrect
login: <Ctrl + ]> <----- Escape Charater 입력
telnet> quit <----- 'quit' 입력
[참고] telnet 연결 화면시 에러 메세지
■ 상대편 서버의 이름을 잘못 지정한 경우
■ 상대편 서버가 정상적으로 동작하지 않는 경우
■ 상대편 서버로 로그인시 암호가 틀린 경우
■ root 사용자로 로그인시 CONSOLE 변수가 지정이 잘못된 경우
■ 상대편 서버에서 TCP_Wrapper로 막고 있는 경우
■ 상대편 서버의 이름을 잘못 지정한 경우
서버의 도메인을 알수 없을 경우
- /etc/hosts 파일의 정의가 되지 않은 경우
- DNS 서버에 도메인 등록이 되어 있지 않은 경우
----------------------메세지----------------------
# telnet solaris250 <----- /etc/hosts 파일에 solaris250 없음
solaris254: Unknown host <----- 메세지 확인
--------------------------------------------------
■ 서버가 정상적으로 동작하지 않는 경우
- 서버의 아이피를 잘못 지정한 경우
- 서버가 Down 되어져 있는 경우
----------------------메세지----------------------
# telnet 172.16.8.250 <----- 172.16.8.250 아이피가 없음
Trying 172.16.8.250...
telnet: Unable to connect to remote host: Connection refused <----- 메세지 확인
--------------------------------------------------
(주의) 메세지를 받기 위해서는 약 10초~20초 정도를 기다려야 한다.
■ 암호가 틀린 경우
- 로그인시 사용자의 암호를 잘못 입력한 경우
----------------------메세지----------------------
# telnet solaris254
Trying 172.16.8.254...
Connected to solaris254
Escape charater is '^]'
SunOS 5.9
login: user01
Password: <----- 틀린 암호 입력(암호: 12345)
Login incorrect <----- 메세지 확인
--------------------------------------------------
■ root 사용자로 로그인시 CONSOLE 변수가 잘못 지정된 경우
----------------------메세지----------------------
# telnet 172.16.8.254
Trying 172.16.8.254...
Connected to 172.16.8.254.
Escape character is '^]'.
SunOS 5.9
login: root
Password: <----- 정상 암호 입력(암호: knit)
Not on system console <----- 메세지 확인
Connection to 172.16.8.254 closed by foreign host.
--------------------------------------------------
# vi /etc/default/login
......
[수정전]
#CONSOLE=/dev/console
[수정후]
CONSOLE=/dev/console
# telnet localhost
root 사용자로 로그인
(복구 작업)
# vi /etc/default/login
(이전 상태로 복원)
■ TCP_Wrapper에 의해 막힌 경우
# vi /etc/default/inetd
.....
[수정전]
ENABLE_TCPWRAPPERS=NO
[수정후]
ENABLE_TCPWRAPPERS=YES
# pkill -1 inetd
# echo "ALL: ALL" > /etc/hosts.deny
----------------------메세지----------------------
# telnet 172.16.8.254
Trying 172.16.8.254...
Connected to solaris254
Escape charater is '^]'
Connection to solaris254 closed by foreign host. <----- 메세지 확인
--------------------------------------------------
(복구 작업)
# vi /etc/default/inetd
-> 이전 상태로 복원
# rm /etc/hosts.deny
# pkill -1 inetd
(2). ftp CMD
____________________
The ftp command is the user interface to the Internet stan-
dard File Transfer Protocol (FTP). ftp transfers files to
and from a remote network site.
The host and optional port with which ftp is to communicate
may be specified on the command line. If this is done, ftp
immediately attempts to establish a connection to an FTP
server on that host. Otherwise, ftp enters its command
interpreter and awaits instructions from the user. When ftp
is awaiting commands from the user, it displays the prompt
ftp>.
-i Turns off interactive prompting during multiple file
transfers.
(2-1). ftp 명령어 사용법
# ftp [옵션] [호스트이름/아이피] [포트]
ftp> help
ftp> bin (solaris9 default)
ftp> ascii(solaris8 default)
ftp> hash
ftp> prompt
ftp> get filename
ftp> put filename
ftp> mget filename
ftp> mput filename
ftp> quit
ftp> bye
[참고] FTP Client Tools(GUI) - gftp
http://www.sunfreeware.com 다운 받아서 설치하면 된다.
(2-2). ftp 명령어 실습 1
=====HOSTA===== ======HOSTB======
/tmp/uploadfile =====> /tmp
/root <===== /tmp/uploadfile
=============== =================
[그림] 파일 업로드 / 다운로드
# mkfile 10m /tmp/test.solarisXXX
# mkdir /root
# ftp 172.16.8.254
root 사용자로 로그인
ftp> help
■ 업로드/다운로드 포인터 맞추기
■ 편리한 기능 설정
■ 업로드/다운로드
■ 확인 접속 해제
(a). 업로드/다운로드 포인터 맞추기(upload/download pointer)
ftp> lcd /tmp
ftp> cd /tmp
ftp> ls
[참고] 업로드/다운로드 포인터
===== HOSTA ===== ===== HOSTB =====
현재 디렉토리 ----------------> 홈디렉토리
(예) /test /
(b). 편리한 기능 설정(FTP function)
ftp> bin // unix 에서는 보통 bin mode로 동작하기 때문 맞추지 않으면 에러발생
ftp> ascii // text 형태로~
ftp> hash // 8k 단위로 # 표시
ftp> prompt // 대화형 모드
[참고] 파일 전송모드 설정(ascii/bin)
===== HOSTA ===== ===== HOSTB =====
전송모드
File(s) ------------------------>
- ASCII ASCII
- BINARY BINARY
* Binary Files
* Compress Files
* Archive Files
* Encyption Files
[참고] 해쉬 설정(hash)
===== HOSTA ===== ===== HOSTB =====
File(s)
500Mbytes ----------------------->
8k단위 #(Pound) 표시
[참고] 대화형 모드 ON/OFF(prompt)
===== HOSTA ===== ===== HOSTB =====
File(s)
file1, file2 ... ----------------->
업로드/다운로드(y/n)?
(c). 업로드/다운로드(upload/download)
ftp> put test.solarisXXX
ftp> get test.solarisXXX
ftp> mput test.*
ftp> mget test.*
ftp> ls [-al]
ftp> dir [-al]
ftp> bye
ftp> quit
[참고] 자동 파일 업/다운로드 스크립트
/root/shell/auto_ftp.sh
# rcp 172.16.8.254:/root/shell/auto_ftp.sh /test
-------------- auto_ftp.sh 설명 -------------------
#!/bin/ksh
#IP=172.16.8.254
IP=172.16.8.1
USERNAME=user01
PASSWD=user01
PORT=2121
#B_FILE=file_`date +'%m%d'`.tar.gz # Backup File
B_FILE=backup.`date +'%m%d'` # Backup File
ftp -n $IP $PORT << EOF // < redirect stdin , << here documentation
user $USERNAME $PASSWD
bin
hash
prompt
cd c:\a
lcd /root/test
put $B_FILE
EOF
----------------------------------------------------
(2-3). ftp 명령어 실습 2
===== Solaris Server ===== ===== Window Server =====
/source (소스)
|
V
/root/test/backup.0723 =========> c:\a
========================== =========================
[그림] Solaris Server에서 Window Server로 자동 백업 설정
Backup File : /root/test/backup.0723
Windows : 172.16.8.1
Solaris : 172.16.8.254
Windows Backup Directory : C:\a
Function 1) Solaris Backup (/source => /root/test/backup.0723)
Function 2) Solaris->Windows Backup(/root/test/backup.0723->C\a)
(Function1)
# tar cvf /root/test/backup.0723 /source
# crontab -e
0 5 * * 0 tar cvf /root/test/backup.`date +'%m%d'` /source
[EX1] 실습
# mkdir /source
# cp /etc/passwd /source
# cp /etc/hosts /source
# cd /test
# tar cvf backup.0121 /source
(Function2)
# crontab -e
0 6 * * 0 /root/shell/auto_ftp.sh
[EX2] 실습
UNIX Server --------> Window Server
# ftp IP 알ftp
|
+--> auto_ftp.sh
Windows) 알ftp 프로그램 실행 > "서버" > 적당한 정보 입력
* 서버 IP : 121.160.70.XXX
* 홈디렉토리 : c:\a
* [ ] ID 없이 접속 허용
* [ ] 읽기만 허용
* 아이디 / 비밀번호 : user01 / user01
* 포트 : 21
* 허용인원 : 5
UNIX )# vi /test/auto_ftp.sh
IP=121.160.70.148 --> 적당한 IP로 수정
.....
lcd /test # 정보 수정(/root/test -> /test)
cd c:\a # Delete a Line --> 라인 삭제
.....
# chmod 755 auto_ftp.sh
# ./auto_ftp.sh
[참고] UNIX <--> Window 서버 동기화
- auto_ftp.sh 스크립트 사용
- SAMBA 서버 이용
- rsync 서버 이용
(2-4). ftp 관련 파일
■ /etc/ftpd/ftpusers
■ /etc/shells
(a). /etc/ftpd/ftpusers
/etc/ftpd/ftpusers 파일안에는 한개의 라인당 한명의 사용자가 등록 될수 있으면 이 파
일에 등록된 사용자는 FTP로 접속할 수 없다. Solaris 9 버전부터 ftpusers 파일은
/etc/ftpd 디렉토리에 존재하지만 이전버전에서는(Solaris 8 버전 이하) /etc 디렉토리
하위에 존재했었다. 기본 설정 파일을 그대로 사용한다면 시스템 사용자(System Account)
는 FTP로 로그인 할 수 없다. 하지만 일반사용자(예: user01, user02...)는 FTP로 로그인
이 가능하다.
(FTP 서버 사용자 기본 정책)
- root 사용자는 FTP 서버에 접속 불가능
- 일반 사용자는 접속 가능(예: user01, user02....)
# cat /etc/ftpd/ftpusers
root
daemon
bin
sys
adm
lp
uucp
nuucp
.....
[EX] /etc/ftpd/ftpusers 파일 예
# vi /etc/ftpd/ftpusers
root <---- ENV_main.sh에 의해 삭제된 라인 등록
daemon
bin
sys
......
# ftp localhost
220 sun99 FTP server ready.
Name (localhost:root): root <----- root 사용자로 로그인
331 Password required for root.
Password: <----- root 사용자 암호 입력
530 Login incorrect. <----- 메세지 확인
Login failed.
# vi /etc/ftpd/ftpusers
daemon <----- root 사용자 라인 삭제
bin
sys
......
# ftp localhost
root 사용자로 로그인 --> 정상적인 접속이 됨
[참고] /etc/ftpd/ftpusers 파일을 사용한 보안 강화
/etc/ftpd/ftpusers 파일 활용 예
# awk -F: '{print $1}' /etc/passwd > /etc/ftpd/ftpusers
# vi /etc/ftpd/ftpusers
root
....
user01
...
user02
....
#ftpuser # FTP Upload User
....
[참고] /root/shell/ftpusers_limit.sh
(b). /etc/shells
/etc/shells 파일은 FTP 서버에 접속하여 명령어를 실행할때 사용할 수 있는 쉘을 정의 할
수 있다. 한개의 라인에 하나의 쉘을 정의한다. 이 파일은 솔라리스 기본 설치시 존재하지
않는다. 따라서 모든 사용자는 /etc/passwd 파일의 마지막 필드에 존재하는 쉘을 사용하여
FTP 작업을 할수 있다.
====== FTP Client ====== ======== FTP Server ========
# ftp Sever ----------------------> ID/PASS(인증)
user01 * /etc/passwd
user01:--------:/bin/ksh
* /etc/shells
/bin/ksh // FTP 로 접속시 할당 받을 쉘
.... // 다른 서비스도 정의한다.
======================== ============================
/etc/shell 파일의 정의 방식
# cat /etc/shells // 한라인에 한 개의 쉘
/bin/ksh
/bin/csh
/bin/sh
/usr/bin/ksh
.....
[EX] /etc/shells 파일 실습
# touch /etc/shells
# ftp localhost
Connected to localhost.
220 solaris254 FTP server ready.
Name (localhost:root): user01 <----- user01 사용자로 로그인
331 Password required for user01.
Password: <----- user01 사용자 암호 입력
530 Login incorrect. <----- 메세지 확인
Login failed.
ftp> quit <----- 'quit' 입력
# vi /etc/shells
/bin/ksh
# ftp localhost
user01 사용자 로그인
===> user01 사용자 로그인 가능
(시스템 복원)
# rm /etc/shells
4. 원격접속 & 파일전송 명령어(BSD 계열)
Remote Connection & File Transmission for BSD
■ rlogin 명령어
■ rsh 명령어
■ rcp 명령어
(1). r 명령어 동작원리
HOSTA ----> HOSTB
# telnet B Auth(ID/PASS)
# rlogin B Auth(/etc/hosts.equiv, ~/.rhosts) // 인증과 관련된 파일
/etc/hosts.equiv System wild Conf. // 전체 사용자
~/.rhosts System specific Conf. // 개인적인~
____________________ // 하지만 root는 둘다 제외된다.
HOSTA
HOSTA user01
+
/etc/hosts.equiv
~/.rhosts
---------------------
HOSTA
HOSTA +
HOSTA user01
+ user01
+ +
HOSTA ----> HOSTB
# rlogin B Auth(~root/.rhosts)
HOSTA
HOSTA user01
+ +
[EX] .rhosts 파일 생성
# cat > /.rhosts
+ +
<CRTL + D>
# cat /.rhosts
(2). rlogin CMD
____________________
rlogin establishes a remote login session from your terminal
to the remote machine named hostname.
Hostnames are listed in the hosts database, which may be
contained in the /etc/hosts and /etc/inet/ipnodes files, the
Network Information Service (NIS) hosts map, the Internet
domain name server, or a combination of these. Each host has
one official name (the first name in the database entry),
and optionally one or more nicknames. Either official host-
names or nicknames may be specified in hostname.
Each remote machine may have a file named /etc/hosts.equiv
containing a list of trusted hostnames with which it shares
usernames. Users with the same username on both the local
and remote machine may rlogin from the machines listed in
the remote machine's /etc/hosts.equiv file without supplying
a password. Individual users may set up a similar private
equivalence list with the file .rhosts in their home direc-
tories. Each line in this file contains two names: a host-
name and a username separated by a space. An entry in a
remote user's .rhosts file permits the user named username
who is logged into hostname to log in to the remote machine
as the remote user without supplying a password. If the name
of the local host is not found in the /etc/hosts.equiv file
on the remote machine, and the local username and hostname
are not found in the remote user's .rhosts file, then the
remote machine will prompt for a password. Hostnames listed
in /etc/hosts.equiv and .rhosts files must be the official
hostnames listed in the hosts database; nicknames may not be
used in either of these files.
For security reasons, the .rhosts file must be owned by
either the remote user or by root.
The remote terminal type is the same as your local terminal
type (as given in your environment TERM variable). The ter-
minal or window size is also copied to the remote system if
the server supports the option, and changes in size are
reflected as well. All echoing takes place at the remote
site, so that (except for delays) the remote login is tran-
sparent. Flow control using <CTRL-S> and <CTRL-Q> and
flushing of input and output on interrupts are handled prop-
erly.
(2.1) 명령어 사용법
// # rcp source destination
# rlogin hostname
# rlogin -l username hostname (-l : login name)
# rlogin username@hostname
[EX] rlogin 실습
# rlogin localhost
# rlogin 172.16.8.254
# exit
# rlogin -l user01 172.16.8.254
user01 사용자의 인증이 되어 있지 않기 때문에 로그인 시에 인증이 되어야 한다.
$ exit
rlogin : 미리 인증(예:~/.rhosts)이 되어 있지 않으면 접속할 당시에 패스워드를 통해
인증하게 된다.
rsh, rcp : 미리 인증이 되어 있지 않으면 명령어 수행이 되지 않는다.
(3). rsh CMD
____________________
rsh connects to the specified hostname and executes the
specified command. rsh copies its standard input to the
remote command, the standard output of the remote command to
its standard output, and the standard error of the remote
command to its standard error. Interrupt, quit, and ter-
minate signals are propagated to the remote command. rsh
normally terminates when the remote command does.
If you omit command, instead of executing a single command,
rsh logs you in on the remote host using rlogin(1).
rsh will not return the exit status code of command.
Shell metacharacters which are not quoted are interpreted on
the local machine, while quoted metacharacters are inter-
preted on the remote machine. See EXAMPLES.
If there is no locale setting in the initialization file of
the login shell (.cshrc, . . .) for a particular user, rsh
always executes the command in the "C" locale instead of
using the default locale of the remote machine.
(3-1). 명령어 사용법
# rsh hostname CMD
# rsh 172.16.8.254 hostname
# rsh 172.16.8.254 ls -l /tmp
# rsh 172.16.8.254 ls -l /root/docs
(4). rcp CMD
____________________
The rcp command copies files between machines. Each filename
or directory argument is either a remote file name of the
form:
hostname:path
or a local file name (containing no ":" (colon) characters,
or "/" (backslash) before any ":" (colon) characters).
The hostname can be an IPv4 or IPv6 address string. See
inet(7P) and inet6(7P). Since IPv6 addresses already contain
colons, the hostname should be enclosed in a pair of square
brackets when an IPv6 address is used. Otherwise, the first
occurrence of a colon can be interpreted as the separator
between hostname and path. For example,
[1080::8:800:200C:417A]:tmp/file
If a filename is not a full path name, it is interpreted
relative to your home directory on hostname. A path on a
remote host may be quoted using \, ", or ', so that the
metacharacters are interpreted remotely.
rcp does not prompt for passwords; your current local user
name must exist on hostname and allow remote command execu-
tion by rsh(1).
rcp handles third party copies, where neither source nor
target files are on the current machine. Hostnames may also
take the form
username@hostname:filename
to use username rather than your current local user name as
the user name on the remote host. rcp also supports Internet
domain addressing of the remote host, so that:
username@host.domain:filename
specifies the username to be used, the hostname, and the
domain in which that host resides. File names that are not
full path names will be interpreted relative to the home
(4-1). 명령어 사용법
# rcp file1 172.16.8.254:/tmp
# rcp 172.16.8.254:/tmp/file1 /tmp
# rcp -r dir1 172.16.8.254:/tmp
# rcp -r 172.16.8.254:/root/shell /root
# rcp 172.16.8.254:/root/* .
# rcp file1 user01@172.16.8.254:/tmp
[EX] rcp 실습
# rcp -r 172.16.8.254:/root/shell /root
# touch /root/test.solarisXXX
# rcp /root/test.solarisXXX 172.16.8.254:/tmp
# rsh 172.16.8.254 ls -l /tmp
[참고] .rhosts 파일 정책(Policy)
(a). 사용자 홈디렉토리에 .rhosts 파일을 정기적으로 지우는 정책
# find /export/home -name .rhosts -type f -exec rm {} \;
# crontab -e
0 6 * * * find /export/home -name .rhosts -type f -exec rm {} \;
(b). 사용자 홈디렉토리에 .rhosts 파일을 못 만들도록 하는 정책
user01 Home Directory : /export/home/user01
# cd /export/home/user01
# mkdir .rhosts (rwxr-xr-x root other)
# touch .rhosts/.notperm (rw-r--r-- root other)
# chmod 000 .rhosts
# chmod 000 .rhosts/.notperm
--------- /export/home/user01 ---------- (user01:other rwxr-xr-x)
.rhosts 디렉토리 생성(관리자) (root:other rwxr-xr-x)
|
+----------------> 디렉토리 삭제(사용자)
| # rmdir .rhosts
|
.rhosts/.notperm 파일생성(관리자) .rhosts (root:other rwxr-xr-x)
| +-- .notperm(root:other rw-r--r--)
|
+----------------> 디렉토리 삭제(사용자)
# rm -r .rhosts
(사용자 테스트)
# telnet localhost
user01 사용자로 로그인
$ touch .rhosts
touch: cannot change times on .rhosts
$ rmdir .rhosts
rmdir: directory ".rhosts": Directory not empty
$ rm -r .rhosts
rm: cannot read directory .rhosts: Permission denied
$ ls .rhosts
.rhosts: Permission denied
$ cd .rhosts
ksh: .rhosts: permission denied
[참고] 사용자의 환경파일의 내용을 수정하지 못하도록 관리자가 설정
사용자의 홈 : /export/home/user02
/export/home/user02 (root other rwxr-xr-x)
|
+--- .profile (root other rw-r--r--)
|
+--- work (user02 staff rwxr-xr-x)
# cd /export/home
# mv user02 user02.old
# mkdir /export/home/user02
# cd ~user02
# vi .profile
PATH=/bin:/sbin:/usr/bin:/usr/dt/bin:/usr/sbin
export PATH
cd work
# mkdir work
# chown user02:staff work
# telnet localhost
user02/user02
$ pwd
$ id
$ echo $PATH
$ vi ~/.profile
수정가능(X)
:wq!
5. 원격접속 & 파일전송 명령어 (암호화 방식)
Remote Connection & File Transmission for Securiy
■ ssh 명령어
■ scp 명령어
■ sftp 명령어
[SSH 에 대해서]
전형적인 TCP/IP Transport Layer 암호화 메커니즘을 사용하며, 이것은 암호화 엔진을 위
하여 대중적인 Blowfish 또는 정부 지원의 tripe-DES(Data Encryption Standard) 알고리
즘을 사용한다. 암호화 기술의 사용은 상호 작용 세션의 내용이 클라이언트 및 서버 이외
에는 누구에게도 알려지지 않게 한다. 세션 데이터 암호화뿐만 아니라, 식별 및 인증 과
정이 RSA 암호화 기술을 사용하여 암호화 된다. 이것은 사용자이름과 패스워드의 조합이
제 3자에 의해 sniff 될수 없음을 의미 한다.
[SSH 클라이언트 연결 수립과정]
(a). 클라이언트 연결을 요청하기 위해 서버 포트로 연결한다.(default port 22)
(b). 서버는 표준 public RSA 호스트 키(1024 bits)와 매시간 변경되는 다른 RSA 서버키
(768 bits)를 가지고 응답한다. 서버 키가 시간마다 변경되기 때문에, 한 세션의 트
래픽에 대한 키가 crack 되어도, historic 데이터는 여전히 암호화되어 이러한 공격
툴를 제한한다.
(c). 서버는 알지 못하는 호스트로부터 연결을 거부하도록 설정될 수 있지만 기본적으로
모든 클라이언트로 부터 연결을 허용한다.
(d). 만약 연결이 수용되면, 클라이언트는 256비트의 임의 번호로 구성되는 세션 키를 생
성하고 서버가 지원하는 암호화 알고리즘(tripe-DES or Blowfish)을 선택한다.
(e). 클라이언트 RSA를 사용하는 세션키를, 호스트 및 서버 키 모두를 사용하여 암호화하
고 암호화된 키를 서버로 돌려보낸다.
(f). 서버는 세션 키를 해독하여 클라이언트와 서버 사이의 암호화가 사용가능하게 된다.
(g). 만약 기본 인증메커니즘이 선택된다면, 클라이언트는 secure channel을 통해 서버에
대한 사용자 이름과 패스워드를 전달한다.
# ssh -l user01 172.16.8.254 sshd(22)
[client] --------- request connection (port 22) -----------> [server]
generate 256bit <-------- send 1024bit host key & server key -----------
client key (public RSA Key) (Time Based)
--------- send new key ----------->
<-------- request username/password ------------ secure channel
established
--------- send username/password ----------->
<-------- accept or reject connection ------------
[그림] ssh 클라이언트/서버 연결과정
다음 그림은 일반적인 암호화 방식을 나타낸다.
---------- HOSTA ----------- ---------- HOSTB -----------
전송
A ---> 암호화알고리즘 ---> " ----------------> " ---> 복호화알고리즘 ---> A
+3 /2 * 2 -3
A A
| |
Key Key
[그림] 일반적인 암호화 방식
(1). ssh CMD
____________________
ssh (Secure Shell) is a program for logging into a remote
machine and for executing commands on a remote machine. It
is intended to replace rlogin and rsh, and to provide secure
encrypted communications between two untrusted hosts over an
insecure network. X11 connections and arbitrary TCP/IP ports
can also be forwarded over the secure channel.
ssh connects and logs into the specified hostname. The user
must prove his or her identity to the remote machine using
one of several methods depending on the protocol version
used:
SSH protocol version 1
First, if the machine the user logs in from is listed in
/etc/hosts.equiv or /etc/shosts.equiv on the remote machine,
and the user names are the same on both sides, the user is
immediately permitted to log in. Second, if .rhosts or
.shosts exists in the user's home directory on the remote
machine and contains a line containing the name of the
client machine and the name of the user on that machine, the
user is permitted to log in. This form of authentication
alone is normally not allowed by the server because it is
not secure.
The second (and primary) authentication method is the rhosts
or hosts.equiv method combined with RSA-based host authenti-
cation. It means that if the login would be permitted by
$HOME/.rhosts, $HOME/.shosts, /etc/hosts.equiv, or
/etc/shosts.equiv, and if additionally the server can verify
the client's host key (see /etc/ssh_known_hosts in the FILES
section), only then is login permitted. This authentication
method closes security holes due to IP spoofing, DNS spoof-
ing, and routing spoofing.
Note to the administrator: /etc/hosts.equiv, $HOME/.rhosts,
and the rlogin/rsh protocol in general, are inherently
insecure and should be disabled if security is desired.
As a third authentication method, ssh supports RSA-based
authentication. The scheme is based on public-key cryptogra-
phy. There are cryptosystems where encryption and decryption
are done using separate keys, and it is not possible to
derive the decryption key from the encryption key. RSA is
one such system. The idea is that each user creates a
public/private key pair for authentication purposes. The
server knows the public key, and only the user knows the
private key. The file $HOME/.ssh/authorized_keys lists the
public keys that are permitted for logging in. When the user
logs in, the ssh program tells the server which key pair it
would like to use for authentication. The server checks if
this key is permitted, and if so, sends the user (actually
the ssh program running on behalf of the user) a challenge
in the form of a random number, encrypted by the user's pub-
lic key. The challenge can only be decrypted using the
proper private key. The user's client then decrypts the
challenge using the private key, proving that he or she
knows the private key but without disclosing it to the
server.
ssh implements the RSA authentication protocol automati-
cally. The user creates his or her RSA key pair by running
ssh-keygen(1). This stores the private key in
$HOME/.ssh/identity and the public key in
$HOME/.ssh/identity.pub in the user's home directory. The
user should then copy the identity.pub to
$HOME/.ssh/authorized_keys in his or her home directory on
the remote machine (the authorized_keys file corresponds to
the conventional $HOME/.rhosts file, and has one key per
line, though the lines can be very long). After this, the
user can log in without giving the password. RSA authentica-
tion is much more secure than rhosts authentication.
The most convenient way to use RSA authentication may be
with an authentication agent. See ssh-agent(1) for more
information.
If other authentication methods fail, ssh prompts the user
for a password. The password is sent to the remote host for
checking. However, since all communications are encrypted,
the password cannot be seen by someone listening on the net-
work.
SSH protocol version 2
When a user connects using the protocol version 2, different
authentication methods are available. At first, the client
attempts to authenticate using the public key method. If
this method fails, password authentication is tried.
The public key method is similar to RSA authentication
described in the previous section except that the DSA
algorithm is used instead of the patented RSA algorithm. The
client uses his private DSA key $HOME/.ssh/id_dsa to sign
the session identifier and sends the result to the server.
The server checks whether the matching public key is listed
in $HOME/.ssh/authorized_keys and grants access if both the
key is found and the signature is correct. The session iden-
tifier is derived from a shared Diffie-Hellman value and is
known only to the client and the server.
If public key authentication fails or is not available, a
password can be sent encrypted to the remote host for prov-
ing the user's identity. This protocol 2 implementation does
not yet support Kerberos or S/Key authentication.
Protocol 2 provides additional mechanisms for confidential-
ity (the traffic is encrypted using 3DES, Blowfish, CAST128
or Arcfour) and integrity (hmac-sha1, hmac-md5). Notice that
protocol 1 lacks a strong mechanism for ensuring the
integrity of the connection.
Login session and remote execution
When the user's identity has been accepted by the server,
the server either executes the given command, or logs into
the machine and gives the user a normal shell on the remote
machine. All communication with the remote command or shell
will be automatically encrypted.
If a pseudo-terminal has been allocated (normal login ses-
sion), the user can disconnect with ~., and suspend ssh with
~^Z. All forwarded connections can be listed with ~#. If the
session blocks waiting for forwarded X11 or TCP/IP connec-
tions to terminate, ssh can be backgrounded with ~&,
although this should not be used while the user shell is
active, as it can cause the shell to hang. All available
escapes can be listed with ~?.
A single tilde character can be sent as ~~ (or by following
the tilde by a character other than those described above).
The escape character must always follow a newline to be
interpreted as special. The escape character can be changed
in configuration files or on the command line.
If no pseudo tty has been allocated, the session is tran-
sparent and can be used to reliably transfer binary data. On
most systems, setting the escape character to "none" will
also make the session transparent even if a tty is used.
The session terminates when the command or shell in the
remote machine exits and all X11 and TCP/IP connections have
been closed. The exit status of the remote program is
returned as the exit status of ssh.
X11 and TCP forwarding
If the user is using X11 (the DISPLAY environment variable
is set), the connection to the X11 display is automatically
forwarded to the remote side in such a way that any X11 pro-
grams started from the shell (or command) will go through
the encrypted channel, and the connection to the real X
server will be made from the local machine. The user should
not manually set DISPLAY. Forwarding of X11 connections can
be configured on the command line or in configuration files.
The DISPLAY value set by ssh will point to the server
machine, but with a display number greater than zero. This
is normal behavior, because ssh creates a "proxy" X server
on the server machine for forwarding the connections over
the encrypted channel.
ssh will also automatically set up Xauthority data on the
server machine. For this purpose, it will generate a random
authorization cookie, store it in Xauthority on the server,
and verify that any forwarded connections carry this cookie
and replace it by the real cookie when the connection is
opened. The real authentication cookie is never sent to the
server machine (and no cookies are sent in the plain).
If the user is using an authentication agent, the connection
to the agent is automatically forwarded to the remote side
unless disabled on the command line or in a configuration
file.
Forwarding of arbitrary TCP/IP connections over the secure
channel can be specified either on the command line or in a
configuration file. One possible application of TCP/IP for-
warding is a secure connection to an electronic purse.
Another possible application is going through firewalls.
Server authentication
ssh automatically maintains and checks a database containing
identifications for all hosts it has ever been used with.
RSA host keys are stored in $HOME/.ssh/known_hosts in the
user's home directory. Additionally, the file
/etc/ssh_known_hosts is automatically checked for known
hosts. Any new hosts are automatically added to the user's
file. If a host's identification ever changes, ssh warns
about this and disables password authentication to prevent a
trojan horse from getting the user's password. Another pur-
pose of this mechanism is to prevent man-in-the-middle
attacks which could otherwise be used to circumvent the
encryption. The StrictHostKeyChecking option (see below) can
be used to prevent logins to machines whose host key is not
known or has changed.
(1-1). ssh 명령어 사용법
# ssh hostname
# ssh -l username hostname
# ssh username@hostname
(2). sftp CMD
_____________________
The sftp utility is an interactive file transfer program
with a user interface similar to ftp(1) that uses the ssh(1)
command to create a secure connection to the server.
sftp implements the SSH File Transfer Protocol as defined in
IETF draft-ietf-secsh-filexfer. There is no relationship
between the protocol used by sftp and the FTP protocol
(RFC959) provided by ftp(1).
(2-1). sftp 명령어 사용법
sftp 명령어는 ftp 명령어를 기반으로 만들어 졌기 때문에 명령어 형식이 거의 흡사하다.
# sftp 172.16.8.254
# sftp user01@solaris254
[EX] sftp 명령어 실습
# sftp 172.16.8.254
Connecting to 172.16.8.254...
The authenticity of host '192.168.1.200' can't be established.
RSA key fingerprint in md5 is: 66:2c:f0:80:41:26:f7:1f:5d:a3:be:8c:0d:9a:e5:e1
Are you sure you want to continue connecting(yes/no)? yes <----- 'yes' 입력
Warning: Permanently added '192.168.1.200' (RSA) to the list of known hosts.
root@192.168.1.200's password: <----- 암호 입력(암호: knit)
sftp > help <----- 'help' 입력
Available commands:
cd path Change remote directory to 'path'
lcd path Change local directory to 'path'
chgrp grp path Change group of file 'path' to 'grp'
chmod mode path Change permissions of file 'path' to 'mode'
chown own path Change owner of file 'path' to 'own'
help Display this help text
get remote-path [local-path] Download file
lls [ls-options [path]] Display local directory listing
lmkdir path Create local directory
lpwd Print local working directory
ls [path] Display remote directory listing
lumask umask Set local umask to 'umask'
mkdir path Create remote directory
put local-path [remote-path] Upload file
pwd Display remote working directory
exit Quit sftp
quit Quit sftp
rename oldpath newpath Rename remote file
rmdir path Remove remote directory
rm path Delete remote file
!command Execute 'command' in local shell
! Escape to local shell
? Synonym for help
sftp > quit <----- 'quit' 입력
(3). scp CMD
_____________________
The scp utility copies files between hosts on a network. It
uses ssh(1) for data transfer, and uses the same authentica-
tion and provides the same security as ssh(1). Unlike
rcp(1), scp will ask for passwords or passphrases if they
are needed for authentication.
Any file name may contain a host and user specification to
indicate that the file is to be copied to/from that host.
Copies between two remote hosts are permitted.
(3-1). scp 명령어 사용법
scp 명령어는 rcp 명령어를 기반으로 만들어 졌기 때문에 명령어의 형식이 거의 흡사하다.
# scp /tmp/file1 172.16.8.254:/tmp
# scp -r /root/test 172.16.8.254:/tmp
# scp -r 172.16.8.254:/tmp /test
# scp -r file1 user01@172.16.8.254:/tmp
(4). ssh 관련 파일들
- $HOME/.ssh/known_hosts
- $HOME/.ssh/identity
- $HOME/.ssh/identity.pub
- $HOME/.ssh/id_dsa.pub
- $HOME/.ssh/config
- $HOME/.ssh/authorized_keys
- /etc/ssh/ssh_known_hosts
- /etc/ssh/ssh_config
- $HOME/.rhosts
- /etc/hosts.equiv
- /etc/ssh/shosts.equiv
- /etc/ssh/sshrc
- $HOME/.ssh/rc
- $HOME/.ssh/environment
$HOME/.ssh/known_hosts
Records host keys for all hosts the user has logged
into that are not in /etc/ssh_known_hosts. See
sshd(1M).
$HOME/.ssh/identity
$HOME/.ssh/id_dsa
Contains the RSA and the DSA authentication identity
of the user. These files contain sensitive data and
should be readable by the user but not accessible by
others (read/write/execute). Notice that ssh ignores a
private key file if it is accessible by others. It is
possible to specify a passphrase when generating the
key. The passphrase will be used to encrypt the sensi-
tive part of this file using 3DES.
$HOME/.ssh/identity.pub
$HOME/.ssh/id_dsa.pub
Contains the public key for authentication, that is,
the public part of the identity file in human-readable
form. The contents of the $HOME/.ssh/identity.pub file
should be added to $HOME/.ssh/authorized_keys on all
machines where you wish to log in using RSA authenti-
cation. The contents of the $HOME/.ssh/id_dsa.pub file
should be added to $HOME/.ssh/authorized_keys on all
machines where you wish to log in using DSA authenti-
cation. These files are not sensitive and can, but
need not, be readable by anyone. These files are never
used automatically and are not necessary. They are
provided only for the convenience of the user.
$HOME/.ssh/config
This is the per-user configuration file. The format of
this file is described above. This file is used by the
ssh client. This file does not usually contain any
sensitive information, but the recommended permissions
are read/write for the user and not accessible by oth-
ers.
$HOME/.ssh/authorized_keys
Lists the DSA keys that can be used for logging in as
this user. This file is not highly sensitive, but the
recommended permissions are read/write for the user
and not accessible by others.
/etc/ssh/ssh_known_hosts
Systemwide list of known host keys.
/etc/ssh_known_hosts contains RSA keys. This file
should be prepared by the system administrator to con-
tain the public host keys of all machines in the
organization and should be world-readable. The file
contains public keys, one per line, in the following
format, with fields separated by spaces: system name,
number of bits in modulus, public exponent, modulus,
and optional comment field. When different names are
used for the same machine, all such names should be
listed, separated by commas. See sshd(1M).
The canonical system name (as returned by name
servers) is used by sshd(1M) to verify the client host
when logging in. Other names are needed because ssh
does not convert the user-supplied name to a canonical
name before checking the key, to prevent someone with
access to the name servers from being able able to
fool host authentication.
/etc/ssh/ssh_config
Systemwide configuration file. This file provides
defaults for those values that are not specified in
the user's configuration file, and for those users who
do not have a configuration file.
This file must be world-readable.
$HOME/.rhosts
This file is used in .rhosts authentication to list
the host/user pairs that are permitted to log in.
(Notice that this file is also used by rlogin and rsh,
which makes using this file insecure.) Each line of
the file contains a host name (in the canonical form
returned by name servers), and then a user name on
that host, separated by a space. On some machines,
this file may need to be world-readable if the user's
home directory is on an NFS partition, because
sshd(1M) reads it as root. Additionally, this file
must be owned by the user and must not have write per-
missions for anyone else. The recommended permission
for most machines is read/write for the user and not
accessible by others.
Notice that, by default, sshd(1M) will be installed so
that it requires successful RSA host authentication
before permitting .rhosts authentication. If your
server machine does not have the client's host key in
/etc/ssh_known_hosts, you can store it in
$HOME/.ssh/known_hosts. The easiest way to do this is
to connect back to the client from the server machine
using ssh. This will automatically add the host key to
$HOME/.ssh/known_hosts.
$HOME/.shosts
This file is used exactly the same way as .rhosts. The
purpose for having this file is to be able to use
rhosts authentication with ssh without permitting
login with rlogin(1) or rsh(1).
/etc/hosts.equiv
This file is used during .rhosts authentication. It
contains canonical hosts names, one per line. (See
sshd(1M) for the full format description.). If the
client host is found in this file, login is automati-
cally permitted, provided that client and server user
names are the same. In addition, successful RSA host
authentication is normally required. This file should
only be writable by root.
/etc/ssh/shosts.equiv
This file is processed exactly as /etc/hosts.equiv.
This file may be useful to permit logins using ssh but
not using rsh or rlogin.
/etc/ssh/sshrc
Commands in this file are executed by ssh when the
user logs in just before the user's shell or command
is started. See sshd(1M) for more information.
$HOME/.ssh/rc
Commands in this file are executed by ssh when the
user logs in just before the user's shell or command
is started. See sshd(1M) for more information.
$HOME/.ssh/environment
Contains additional definitions for environment vari-
ables. See ENVIRONMENT VARIABLES.
Process Administration
INDEX
_______________________________________
1. Process Information
2. Default Process Administration
3. Extenston Process Administration
_______________________________________
프로세스(Process) 란?
- 실행중인 프로그램그램이다.
프로세스는 컴퓨터 내에서 실행중인 프로그램의 인스턴스이다. 이 용어는 몇몇 운영체계에
서 사용되는, "태스크"라는 용어와 의미상으로 가깝다. 유닉스나 몇몇 다른 운영체계에서
는, 프로그램이 시작되면 프로세스도 시작된다. 태스크와 마찬가지로, 프로세스는 그 프로
세스가 추적 관리될 수 있게 하기 위한 특정한 데이터 셋이 관련되어 실행 중인 프로그램
이다. 여러 명의 사용자들에 의해 공유되고 있는 응용프로그램은 일반적으로 각 사용자들
의 실행단계에서 하나의 프로세스를 갖는다.
프로세스는 자프로세스라고도 불리는 서브프로세스를 시작시킬 수 있다. 자프로세스는 부
프로세스의 복제로서 부프로세스의 자원을 일부 공유하는데, 부프로세스가 종료되면 더
이상 존재할 수 없다. 프로세스들은 몇 가지 IPC 방식을 통하여 정보를 교환하거나 그들의
연산을 동기화할 수 있다.
IPC 방식의 대표적인 메쏘드는
(a)Pipes와 named pipes
(b)Message queueing
(c)Semaphores,
(d)Shared Memory
(e)Socket
등이다.
1. 프로세스 정보(Process Information)
ps 명령어를 통해서 프로세스 정보를 확인할 수 있다. 이런 정보는 존재해야만 출력이 될
수 있다. 프로세스의 정보는 /proc 디렉토리에 하위에 프로세스 아이디(PID) 번호와 대응
이 되는 이름을 가진 디렉토리에 존재한다.
다음은 기본적인 프로세스 정보에 대한 내용이다.
- PID(Process Identification)
- PPID(Parent Process ID)
- UID/GID
- EUID/EGID
- Control Terminal
(1). 프로세스 정보가 존재하는 디렉토리
프로세스에 대한 정보는 /proc 디렉토리에 해당 프로세스의 PID 번호 디렉토리안에 정보
가 존재하게 된다. 이 디렉토리 안에 존재하는 파일들은 대부분 텍스트 파일로 되어 있지
않기 때문에 프로세스의 정보를 확인 할때 pCMD(예: pfiles, pstack, ptree, ....)등의 명령
어를 사용해야 한다.
프로세스 정보 디렉토리 : /proc/PID
# admintool &
[1] 479 <----- admintool의 PID 번호 확인(479)
# ps
PID TTY TIME CMD
467 pts/3 0:00 ksh
479 pts/3 0:00 admintoo <----- admintool의 PID 번호 확인(479)
# ls -ld /proc/479
admintool 종료(adminitool exit)
# ls -ld /proc/479
/proc/479: No such file or directory
[참고] procfs 특징
(a). /proc 디렉토리 하위에 PID 번호의 디렉토리가 생성되고 그안에 프로세스 정보가 쌓
이게 된다. /proc/PID 디렉토리 하위에는 프로세스의 정보에 관련한 자세한 내용이
파일과 디렉토리에 존재하게 된다.
(b). /proc/PID 디렉토리의 소유자는 프로세스를 실행시킨 사람의 소유이다.
[참고] 프로세스 정보를 자세하게 보기 위해서는 다음 파일을 참고 한다.
/root/docs/Reference/Process_CMD.txt
- 위의 문서중 pldd, pfiles, pstack, ptree, ptime 명령어는 반드시 알아 두자.
■ pldd : 프로세스가 사용하고 있는 동적 라이브러리 확인
■ pfiles : 프로세스가 사용하고 있는 파일들 확인
■ pstack : 프로세스가 사용하고 있는 stack 공간 확인
■ ptree : 프로세스 tree 구조 확인
■ ptime : 프로세스가 실행된 시간 확인
(2). PID
프로그램을 실행 하면 프로세스가 되며, 각각의 프로세스를 식별하기 위해 할당되는 번호로
서 PID 번호가 할당 된다.
(3). 부모프로세스(PPID)의 의미 확인
- PPID(Parent PID)
# ps
PID TTY TIME CMD
467 pts/3 0:00 ksh
# ksh
# ps
PID TTY TIME CMD
467 pts/3 0:00 ksh
490 pts/3 0:00 ksh
# ps -l
F S UID PID PPID C PRI NI ADDR SZ WCHAN TTY TIME CMD
8 S 0 467 465 0 40 20 d4f1f138 500 d4f1f1a4 pts/3 0:00 ksh
8 S 0 490 467 0 50 20 d4f1e338 500 d4f1e3a4 pts/3 0:00 ksh
PID=467
------------+
|
| PID=490, PPID=467
+----------------------
[그림] 자식프로세스, 부모프로세스
(4). UID/GID, EUID/EGID의 의미 확인
- UID(User Identification)
- GID(Group Identification)
- EUID(Effective UID)
- EGID(Effective GID)
(5). 제어 터미널의 의미 확인
제어 터미널 필드에 올수 있는 정보는 다음과 같다.
제어 터미널(Control Terminal)
■ /dev/pts/5
■ /dev/term/b
■ /dev/console
■ ?
2. 프로세스 관리 (1)
Default Process Administration
- 프로세스 실행(Process Execution)
- 프로세스 확인(Process Verification)
- 프로세스 종료(Process Termination)
(1). 프로세스 실행
하나의 프로그램을 실행하면 하나의 프로세스가 된다. 프로세스는 2가지 방법 형태로 실행
이 가능하며 (a)첫번째 방식은 포그라이운드(fg, foreground)에서의 실행 이고, (b)두번째
방식은 백그라운드(bg, background)에서의 실행이다.
프로세스 실행 방법
(fg) # admintool
(bg) # admintool &
(Foreground Process)
fg ksh
-----------------+ +-----------------
| |
| ksh admintool |
+---------------------+
# admintool
# ls
(Background Process)
bg ksh
-----------------+---------------------+---------------------
| |
| ksh admintool |
+---------------------+
# admintool &
[1] PID
# ls
(2). 프로세스 확인
실행된 프로세스를 확인할 때는 ps 명령어를 사용한다.
# ps -ef | grep inetd
(명령어 옵션 사용법)
# ps
# ps –l // long info
# ps -a // user가 실행 시킨 모든 데몬
# ps -U 100 (# ps -U user01, # ps -U user01,user02,user03)
# ps -t pts/5 // TERM 5에서 실행 중인 프로세스
# ps -ef | grep inetd
[ps 명령어 출력 화면 해석]
# ps
PID TTY TIME CMD
467 pts/3 0:00 ksh
----------------------------------------------------------------------------
종류 설 명
----------------------------------------------------------------------------
PID 프로세스 아이디(식별 번호)
TTY 제어 터미널
TIME CPU 사용 누적 시간(Comunitive Time)
CMD 명령어
----------------------------------------------------------------------------
[ps -l 명령어 출력 화면 해석]
# ps -l
F S UID PID PPID C PRI NI ADDR SZ WCHAN TTY TIME CMD
8 S 0 467 465 0 40 20 d4f1f138 500 d4f1f1a4 pts/3 0:00 ksh
----------------------------------------------------------------------------
종류 설 명
----------------------------------------------------------------------------
F 현재는 의미가 없음
S 프로세스의 상태정보(Process Status)
- S : Sleeping, process is waiting for an event to complete.
- O : Occupy, process is running on a processor.
- R : Runnable, process is on run queue.
- T : Stopped, either by a job control signal or because it is being traced
- Z : Zombie, process terminated and parent not waiting
UID 프로세스 실행 사용자
PID 프로세스 아이디(식별 번호)
PPID 부모 프로세스 아이디(식별 번호)
PRI 프로세스 우선 순위(Prioty)
NI NICE 값, 프로세스의 우선 순위를 조정하는 값
ADDR 프로세스의 메모리상의 주소
SZ 가상 메모리 크기
WCHAN 프로세스 락(lock) 또는 이벤트시에 사용하는 프로세스 휴식(sleep) 주소
TTY 제어터미널
TIME CPU 사용 누적 시간
CMD 명령어
----------------------------------------------------------------------------
-----------------------------------------------------------------------------------
필드 설 명
-----------------------------------------------------------------------------------
UID The effective user ID of the process's owner.
PID The process ID.
PPID The parent process ID.
C The processor utilization for scheduling. This field is not displayed when
the -c option is used.
CLS The scheduling class to which the process belongs:
real-time, system, or timesharing. This field is included only with the -c
option.
PRI The kernel thread's scheduling priority. Higher numbers indicate a higher
priority.
NI The process's nice number, which contributes to its scheduling priority.
Making a process “nicer” means lowering its priority.
ADDR The address of the proc structure.
SZ The virtual address size of the process.
WCHAN The address of an event or lock for which the process is sleeping.
STIME The starting time of the process (in hours, minutes, and seconds).
TTY The terminal from which the process (or its parent) was started. A question
mark indicates that there is no controlling terminal.
TIME The total amount of CPU time used by the process since it began.
CMD The command that generated the process.
-----------------------------------------------------------------------------------
[ps -ef 명령어 출력 화면 해석]
# ps -ef | more
UID PID PPID C STIME TTY TIME CMD
root 0 0 0 10:01:51 ? 0:03 sched
----------------------------------------------------------------------------
종류 설 명
----------------------------------------------------------------------------
UID 프로세스 실행 사용자
PID 프로세스 아이디(식별 번호)
PPID 부모 프로세스 아이디(식별 번호)
STIME 프로세스 시작 시간(Start Time)
TTY 제어 터미널
TIME CPU 실행 누적 시간
CMD 명령어
----------------------------------------------------------------------------
[참고] ps 명령어 옵션
# man ps
.....
The ps command prints information about active processes.
Without options, ps prints information about processes that
have the same effective user ID and the same controlling
terminal as the invoker. The output contains only the pro-
cess ID, terminal identifier, cumulative execution time, and
the command name. Otherwise, the information that is
displayed is controlled by the options.
Some options accept lists as arguments. Items in a list can
be either separated by commas or else enclosed in quotes and
separated by commas or spaces. Values for proclist and
grplist must be numeric.
-e Lists information about every process now running.
-f Generates a full listing. (See below for significance
of columns in a full listing.)
-l Generates a long listing. (See below.)
-a Lists information about all processes most frequently
requested: all those except session leaders and
processes not associated with a terminal.
-t term
Lists only process data associated with term. Terminal
identifiers are specified as a device file name, and
an identifier. For example, term/a, or pts/0.
-u uidlist
Lists only process data whose effective user ID number
or login name is given in uidlist. In the listing, the
numerical user ID will be printed unless you give the
-f option, which prints the login name.
-U uidlist
Lists information for processes whose real user ID
numbers or login names are given in uidlist. The
uidlist must be a single argument in the form of a
blank- or comma-separated list.
......
[참고] 솔라리스 시스템의 모든 프로세스 구분
모든 프로세스 종류(Process Type)
- 데몬 (Daemon Process)
- 사용자 프로세스(User Process)
+-----------+ <-------+
| | |
| Daemon | |
| | |
|-----------| <-+ -e
| | | |
| User Proc.| -a,-t |
| | | |
+-----------+ <-+ <---+
User proc
t : term
u : user
프로세스를 생성하는 것은 2종류가 있다. 사람 즉 유저가 생성하는 프로세스와 데몬이 생성하는 프로세서다.
그중에서 사용자가 생성하는 프로세스의 목록을 알고 싶다면 ps -a 명령어로 확인이 가능하고, 시스템의 모든 프로세스를 확인하고 싶다면 ps -e명령어로 확인이 가능하다.
[참고] Daemon 이란?
시스템을 위해 또는 서비스를 위해 백그라운드에서 동작하는 프로세스이다.
(3). 프로세스 종료
프로세스 종료 방법
# kill PID (# kill -15 PID)
# kill -9 PID
* 시그널(Signal)
___________________________________________
1 SIGHUP 프로세세 재시작(HangUp)
2 SIGINT 인터럽트(Interrupt, <Ctrl + C>)
9 SIGKILL 강제 종료(force exit signal)
15 SIGTERM 정상 종료(exit)
___________________________________________
[참고] 시그널(Signal)이란?
프로세스가 생성하거나 또는 프로세스에게 보내는 비동기적 알림 이벤트이다. 대부분의
동작은 프로세스 종료(Exit), Core 파일 생성(Core), 프로세스 정지(Stop)등이다.
# man -s 3head signal
# kill -l // signal list 확인
# kill -l HUP
# kill -l 1
[참고] kill 명령어 사용법
# kill PID
# kill -15 PID
# kill -TERM PID
# kill -s term PID // -s : 특별히 보낼 시그널을 지정 시그널 이름이나 번호가 온다.
# kill -s TERM PID
[EX] kill -9 명령어 실습
[TERM1] 사용자 윈도우
# telnet localhost
user01 사용자로 로그인
$ id
[TERM2] 관리자 윈도우
# w
5:24오후 up 9:01, 4 users, load average: 0.02, 0.01, 0.01
User tty login@ idle JCPU PCPU what
.....
user01 pts/8 5:24오후 -ksh
.....
# ps -U user01
PID TTY TIME CMD
1185 pts/8 0:00 ksh
# kill -9 1185
[참고] pgrep 명령어
ps + grep
# ps -ef | grep inetd
root 186 1 0 08:24:03 ? 0:00 /usr/sbin/inetd -s
# pgrep -l inetd
186 inetd
# pgrep -lf inetd
186 /usr/sbin/inetd -s
[참고] pkill 명령어
ps + kill
# ps -ef | grep inetd
# kill -1 inetd's PID
or
# pkill -1 inetd
[참고] nice & renice
프로세스의 우선 순위 조정 명령어
- nice : 프로세스의 실행 시킬때 우선 순위를 정의할 수 있다.
- renice : 실행중인 프로세스의 우선 순위를 정의할 때 사용한다.
3. 프로세스 관리 (2)
프로그램을 실행하면 한나의 프로세스가 뜨게 되고, 이것을 하나의 잡(Job)이라고 표시한
다. 다음은 잡 단위로 관리하는 방법에 대한 소개이다.
(1). 잡(Job) 실행
잡 실행 방법
- 포그라운드 실행 방법
- 백그라운드 실행 방법
+-----bg-----+
| |
+-----fg-----+ |
| | |
| | |
| | |
| |--------+
| |
+------------+
[EX] 프로세스 실행
# sleep 500 &
[1] 576
# sleep 600 &
[2] 579
[참고]
[1] : Job ID
576 : Process ID
(2). 잡(Job) 확인 및 작업 이동
Process Verification
[EX] 잡(Job) 작업 이동
# jobs
[2] + Running sleep 600 &
[1] - Running sleep 500 &
# fg %1
sleep 500
<Ctrl + Z>
^Z[1] + Stopped (SIGTSTP) sleep 500 &
# bg %1
[1] sleep 500 &
(3). 잡(Job) 종료
프로세스(잡) 종료(Process Exit)
# kill %1 (Process Termination)
# stop %1 (Process Stop)
- Ctrl+Z (Foreground Process Stop)
- stop %1 (Background Process Stop)
[EX] 프로세스 종료
# kill %1
[1] + Terminated sleep 500 &
# kill %2
[2] + Terminated sleep 600 &
[참고] 솔라3리스에서 실시간 프로세스를 확인하는 명령어
■ sdtprocess (GUI, Graphic User Interface)
■ prstat (CLI, Command Line Interface)
# sdtprocess
or
CDE -> pannel -> Desktop Control -> Find Process
sdtprocess 기능(Function)
- 정열하는 방법(CPU, MEM Sor2ting)
- Refresh 시간 지정 방법(Sampling Time)
- 프로세스 찾기(Find Process)
- 프로세스 종료(Process Kill)
# prstat
[참고] prstat 프로세스 모니터링
http://blog.naver.com/jwsanta?Redirect=Log&logNo=60009529440
http://blog.naver.com/jwsanta?Redirect=Log&logNo=60009529471
http://blog.naver.com/jwsanta?Redirect=Log&logNo=60009529513
[참고] UNIX 실시간 프로세스 확인 명령어
- SUN Solaris : prstat, sdtprocess
- HP HP-UX : glance, top
- IBM AIX : topas, nmon
[참고] 유닉스 성능 점검 툴
- sar system activity reporter
- vmstat report virtual memory statistics
- iostat report I/O statistics
- netstat show network status
- mpstat report per-processor or per-processor-set statistics
[참고] 솔라리스 성능에 관련한 점검 툴
 invalid-file
[참고] 솔라리스 성능에 관련한 점검 툴
/root/docs/Reference/SolarisPerformanceAdminTool.txt
[참고] 시그널
# man -s 3head signal
A signal is an asynchronous notification of an event. A sig-
nal is said to be generated for (or sent to) a process when
the event associated with that signal first occurs. Examples
of such events include hardware faults, timer expiration and
terminal activity, as well as the invocation of the kill(2)
or sigsend(2) functions. In some circumstances, the same
event generates signals for multiple processes. A process
may request a detailed notification of the source of the
signal and the reason why it was generated. See
siginfo(3HEAD).
Signals can be generated synchronously or asynchronously.
Events directly caused by the execution of code by a thread,
such as a reference to an unmapped, protected, or bad memory
can generate SIGSEGV or SIGBUS; a floating point exception
can generate SIGFPE; and the execution of an illegal
instruction can generate SIGILL. Such events are referred to
as traps; signals generated by traps are said to be synchro-
nously generated. Synchronously generated signals are ini-
tiated by a specific thread and are delivered to and handled
by that thread.
Signals may also be generated by calling kill(), sigqueue(),
or sigsend(). Events such as keyboard interrupts generate
signals, such as SIGINT, which are sent to the target pro-
cess. Such events are referred to as interrupts; signals
generated by interrupts are said to be asynchronously gen-
erated. Asynchronously generated signals are not directed to
a particular thread but are handled by an arbitrary thread
that meets either of the following conditions:
o The thread is blocked in a call to sigwait(2) whose
argument includes the type of signal generated.
o The thread has a signal mask that does not include the
type of signal generated. A process responds to sig-
nals in similar ways whether it is using threads or
it is using lightweight processes (LWPs). See
thr_create(3THR). Each process may specify a system
action to be taken in response to each signal sent to
it, called the signal's disposition. All threads or
LWPs in the process share the disposition. The set of
system signal actions for a process is initialized
from that of its parent. Once an action is installed
for a specific signal, it usually remains installed
until another disposition is explicitly requested by a
call to either sigaction(), signal() or sigset(), or
until the process execs(). See sigaction(2) and
signal(3C). When a process execs, all signals whose
disposition has been set to catch the signal will be
set to SIG_DFL. Alternatively, a process may request
that the system automatically reset the disposition of
a signal to SIG_DFL after it has been caught. See
sigaction(2) and signal(3C).
[참고] nice & renice
프로세스의 우선 순위 조정 명령어
- nice : 프로세스의 실행 시킬때 우선 순위를 정의할 수 있다.
(invoke a command with an altered scheduling priorit)
- renice : 실행중인 프로세스의 우선 순위를 정의할 때 사용한다.
(1). nice 명령어
The nice utility invokes command, requesting that it be run
with a different system scheduling priority. The priocntl(1)
command is a more general interface to scheduler functions.
nice 명령어는 다른 시스템 스케줄링 우선순위가 동작을 요청할때
사용하는 명령어이다.
The invoking process (generally the user's shell) must be in
a scheduling class that supports nice.
사용자 쉘에서 사용하는 프로세스 요청은 스케줄링 클래스 중에
존재해야 한다. 이때 nice 명령어를 사용할 수 있다.
If the C shell (see csh(1)) is used, the full path of the
command must be specified; otherwise, the csh built-in ver-
sion of nice will be invoked. See csh Builtin below.
csh을 사용한다면 nice 명령어의 전체 경로를 지정해야 한다. 그
렇지 않으면 csh 내장명령어인 nice가 실행된다.
(명령어 형식)
# nice CMD
# nice -10 CMD
# nice --10 CMD
# nice -n 10 CMD
# nice -n -10 CMD
- 포그라운드로 프로그램을 실행하면 기본적인 NI 값은 20이다.
- 백그라운드로 프로그램을 실행하면 기본적인 NI 값은 24이다.
- "# nice CMD" 실행을 하면 NI 값은 10이 높아진다.
- "# nice --10 CMD" 실행을 하면 NI 값은 10이 낮아진다.
- "# nice -10 CMD" 실행을 하면 NI 값은 10이 높아진다.
NI --> 증가, PRI --> 증가, 우선순위 --> 낮아짐
NI --> 감소, PRI --> 감소, 우선순위 --> 높아짐
[EX] nice 명령어 실습
[TERM1]
# admintool &
# admintool
[TERM2]
# pps admintool
F S UID PID PPID C PRI NI ADDR SZ WCHAN STIME TTY TIME CMD
8 S root 2329 561 0 40 20 d4eb6a50 2284 d5fbc94a 21:25:34 pts/6 0:00 admintool
8 S root 2328 561 0 52 24 d4f57858 2284 d5fb607a 21:25:28 pts/6 0:00 admintool
[TERM1]
admintool 종료 후
# nice admintool &
# nice admintool
[TERM2]
# pps admintool
F S UID PID PPID C PRI NI ADDR SZ WCHAN STIME TTY TIME CMD
8 S root 2340 561 0 70 30 d4f57858 2284 d5fb65ba 21:27:40 pts/6 0:00 admintool
8 S root 2339 561 0 82 34 d4eb6a50 2284 d5fb607a 21:27:31 pts/6 0:00 admintool
[TERM1]
admintool 종료 후
# nice --10 admintool &
# nice --10 admintool
[TERM2]
# pps admintool
F S UID PID PPID C PRI NI ADDR SZ WCHAN STIME TTY TIME CMD
8 S root 2366 561 0 40 10 d4f54e58 2284 d5f7c572 21:34:22 pts/6 0:00 admintool
8 S root 2365 561 0 40 14 d4e64748 2284 d5fb8d32 21:34:13 pts/6 0:00 admintool
[TERM1]
admintool 종료후
# nice -5 admintool &
# nice -5 admintool
[TERM2]
F S UID PID PPID C PRI NI ADDR SZ WCHAN STIME TTY TIME CMD
8 S root 2356 561 0 67 29 d4f54e58 2284 d5f8f14a 21:31:21 pts/6 0:00 admintool
8 S root 2357 561 0 55 25 d4e64748 2284 d5fb8d32 21:31:29 pts/6 0:00 admintool
(2). renice 명령어
The renice command alters the scheduling priority of one or
more running processes. By default, the processes to be
affected are specified by their process IDs.
renice 명령어는 하나 또는 그 이상의 프로세스의 스케줄링 우선
순위를 조정하는 명령어이다.
If the first operand is a number within the valid range of
priorities (-20 to 20), renice will treat it as a priority
(as in all but the first synopsis form). Otherwise, renice
will treat it as an ID (as in the first synopsis form).
만약 첫번째 연산자가 숫자라면(우선순위 범위: -20 ~ 20) renice
명령어는 우선순위를 다루게 된다. 그렇지 않다면, renice 명령어
는 그것을 ID(PID)로 다루게 된다.
Altering Process Priority
Users other than the privileged user may only alter the
priority of processes they own, and can only monotonically
increase their "nice value" within the range 0 to 19. This
prevents overriding administrative fiats. The privileged
user may alter the priority of any process and set the
priority to any value in the range -20 to 19. Useful priori-
ties are: 19 (the affected processes will run only when
nothing else in the system wants to); 0 (the "base" schedul-
ing priority),; and any negative value (to make things go
very fast). 20 is an acceptable nice value, but will be
rounded down to 19.
권한이 있는 사용자들은 단지 자신의 프로세세에 대한 우선순위를
조정할 수 있다. 그리고 "nice value" (value is 0 to 19) 명령어
를 통해서 우선순위를 일정하게 증가만 시킬수 있다. 이것은 관리
자의 명령어 수행과 중첩되는 것을 막아 준다. 권한이 있는 사용
자 어떤 프로세스의 우선순위를 조정할 수 있을 것이다. 그리고
우선순위를 설정하기 위한 값의 범위는 "-20 ~ 19"로 설정 할 수
있다.
19 => 일반적인 우선순위(시스템에서 영향을 받지 않는 경우)
0 => "base" 스케줄링 우선순위
negative value => 더 높은 우선순위를 나타냄
20 => 사용할 수 있는 nice 값이다. 그러나 19로 설정할 수도 있
다.
(명령어 형식)
# renice 15 PID
# renice -15 PID
# renice -n 15 PID
# renice -n -15 PID
- 포그라운드로 프로그램을 실행하면 기본적인 NI 값은 20이다.
- 백그라운드로 프로그램을 실행하면 기본적인 NI 값은 24이다.
- "# renice CMD" 실행을 하면 현재 NI 값에 10이 더 높아진다.
- "# renice 10 CMD" 실행을 하면 NI 값은 기본값(20)에 10이 더 높아진다.
- "# renice -10 CMD" 실행을 하면 NI 값은 기본값(20)에 10이 더 낮아진다.
NI --> 증가, PRI --> 증가, 우선순위 --> 낮아짐
NI --> 감소, PRI --> 감소, 우선순위 --> 높아짐
[EX] renice 명령어 실습
[TERM1]
# admintool &
# admintool
[TERM2]
# pps admintool
F S UID PID PPID C PRI NI ADDR SZ WCHAN STIME TTY TIME CMD
8 S root 2474 561 0 52 24 d4e64748 2284 d5fb607a 22:17:42 pts/6 0:00 admintool
8 S root 2475 561 0 40 20 d4eb6350 2284 d5f61c12 22:17:47 pts/6 0:00 admintool
# renice 5 2474
# renice 5 2475
# pps admintool
F S UID PID PPID C PRI NI ADDR SZ WCHAN STIME TTY TIME CMD
8 S root 2474 561 0 55 25 d4e64748 2284 d5fb607a 22:17:42 pts/6 0:00 admintool
8 S root 2475 561 0 55 25 d4eb6350 2284 d5f61c12 22:17:47 pts/6 0:00 admintool
# renice 10 2474
# renice 10 2475
# pps admintool
F S UID PID PPID C PRI NI ADDR SZ WCHAN STIME TTY TIME CMD
8 S root 2474 561 0 70 30 d4e64748 2284 d5fb607a 22:17:42 pts/6 0:00 admintool
8 S root 2475 561 0 70 30 d4eb6350 2284 d5f61c12 22:17:47 pts/6 0:00 admintool
# renice 40 2474
renice: 40:getpriority: No such process
# renice 40 2475
renice: 40:getpriority: No such process
# pps admintool
F S UID PID PPID C PRI NI ADDR SZ WCHAN STIME TTY TIME CMD
8 S root 2474 561 0 97 39 d4e64748 2284 d5fb607a 22:17:42 pts/6 0:00 admintool
8 S root 2475 561 0 97 39 d4eb6350 2284 d5f61c12 22:17:47 pts/6 0:00 admintool
renice 명령어 다음에 있는 40을 PID 번호로 인식했다. renice 명령어의 최대 범위는 20까
지이다. 이것을 넘으면 renice 명령어를 그냥 실행 한 것과도 같아 진다. renice 명령어를
우선순위 값 없이 사용한다면 이전의 NI 값에 10을 더하게 된다. 하지만 NI의 최대 범위는
39를 넘을 수 없다.
아래와 같이 원래 우선순위로 조정한다.
# renice 4 2474
# renice 0 2475
# pps admintool
F S UID PID PPID C PRI NI ADDR SZ WCHAN STIME TTY TIME CMD
8 S root 2474 561 0 52 24 d4e64748 2284 d5fb607a 22:17:42 pts/6 0:00 admintool
8 S root 2475 561 0 40 20 d4eb6350 2284 d5f61c12 22:17:47 pts/6 0:00 admintool
# renice 2474
# renice 2475
# pps admintool
F S UID PID PPID C PRI NI ADDR SZ WCHAN STIME TTY TIME CMD
8 S root 2474 561 0 82 34 d4e64748 2284 d5fb607a 22:17:42 pts/6 0:00 admintool
8 S root 2475 561 0 70 30 d4eb6350 2284 d5f61c12 22:17:47 pts/6 0:00 admintool
# renice 2474
# renice 2475
# pps admintool
F S UID PID PPID C PRI NI ADDR SZ WCHAN STIME TTY TIME CMD
8 S root 2474 561 0 97 39 d4e64748 2284 d5fb607a 22:17:42 pts/6 0:00 admintool
8 S root 2475 561 0 97 39 d4eb6350 2284 d5f61c12 22:17:47 pts/6 0:00 admintool
renice 명령어 다음에 있는 40을 PID 번호로 인식했다. renice 명령어의 최대 범위는 20까
지이다. 이것을 넘으면 renice 명령어를 그냥 실행 한 것과도 같아 진다. renice 명령어를
우선순위 값 없이 사용한다면 이전의 NI 값에 10을 더하게 된다. 하지만 NI의 최대 범위는
39를 넘을 수 없다.
아래와 같이 원래 우선순위로 조정한다.
# renice 4 2474
# renice 0 2475
# pps admintool
F S UID PID PPID C PRI NI ADDR SZ WCHAN STIME TTY TIME CMD
8 S root 2474 561 0 52 24 d4e64748 2284 d5fb607a 22:17:42 pts/6 0:00 admintool
8 S root 2475 561 0 40 20 d4eb6350 2284 d5f61c12 22:17:47 pts/6 0:00 admintool
# renice -10 2474
# renice -10 2475
# pps admintool
F S UID PID PPID C PRI NI ADDR SZ WCHAN STIME TTY TIME CMD
8 S root 2474 561 0 40 10 d4e64748 2284 d5fb607a 22:17:42 pts/6 0:00 admintool
8 S root 2475 561 0 40 10 d4eb6350 2284 d5f61c12 22:17:47 pts/6 0:00 admintool
# renice -19 2474
# renice -19 2475
# pps admintool
F S UID PID PPID C PRI NI ADDR SZ WCHAN STIME TTY TIME CMD
8 S root 2474 561 0 40 1 d4e64748 2284 d5fb607a 22:17:42 pts/6 0:00 admintool
8 S root 2475 561 0 40 1 d4eb6350 2284 d5f61c12 22:17:47 pts/6 0:00 admintool
# renice -25 2474
# renice -25 2475
# pps admintool
F S UID PID PPID C PRI NI ADDR SZ WCHAN STIME TTY TIME CMD
8 S root 2474 561 0 40 0 d4e64748 2284 d5fb607a 22:17:42 pts/6 0:00 admintool
8 S root 2475 561 0 40 0 d4eb6350 2284 d5f61c12 22:17:47 pts/6 0:00 admintool
renice 명령어를 통해서 NI 값의 최소 범위는 -19이다. 이것보다 더 큰 값을 쓰더라도 모
두 -19로 인식된다.
renice 명령어를 통해서 NI 값의 최소 범위는 -19이다. 이것보다 더 큰 값을 쓰더라도 모
두 -19로 인식된다.
Chapter 7. Korn Shell
Characteristic
_________________________________
■ Redirection
■ Pipe
■ Korn Shell Function
■ Variable
■ Korn Shell Metacharacter
■ History
■ Alias
■ Environment File
■ 커널의 기능
- 하드웨어 자원 관리
- Device 관리
- 메모리 , 가상메모리 관리
■ 쉘의 기능(Shell Function)
- 명령어 해석기(Command Interpreter)
- 프로그램 할수 있는 언어(Programable Language)
(1). 방향 재지정(Redirection)
■ fd(파일 기술자, File Descriptor)
[EX] 프로그램에서의 File Descriptor
main()
{
int fd;
fd=open(......);
}
■ 예약되어진 파일 기술자(File Descriptor)
---------------------------------------
번호
설 명
---------------------------------------
0 표준입력 stdin (Standard Input)
1 표준출력 stdout(Standard Ouput)
2 표준에러 stderr(Standard Error)
---------------------------------------
stdin(Keyboard)======> SHELL
========> stdout(Monitor)
|
|
stderr(Monitor)
[그림] 표준입력, 표준출력, 표준에러
[EX] 표준출력, 표준에러의 예
# ls /var /nodir
[EX] 표준입력, 표준출력의 예
# cat
Hello stdin
Hello stdout
Solaris
Solaris
<Ctrl + D>
# cat < /etc/passwd
# cat > filename
Hello
Solaris
<Ctrl + D>
# cat filename
(1.1) 입력 재지정(Redirection stdin)
[FORMAT]
CMD < filename
CMD 0< filename
CMD << filename(X) => Here Documentation
# mailx -s
"Solaris TEST" root@example.com < mail.txt
[참고] mailx 명령어를 통한 메일 보내기
# mailx root
Subject: Solaris TEST
<---- 메일 제목 입력("Solaris TEST")
test mail for user01
<---- 내용 입력
<ctrl+D>
or . <---- <Ctrl + D> 입력
#
(1.2) 출력 재지정(Redirection stdout)
[FORMAT]
CMD > filename
CMD 1> filename
CMD
>> filename
CMD 1>> filename
# ls -l > file.txt
# cat file.txt
[참고] '>>'(출력 리다이렉션)을 사용한 파일 내용 추가
----file1----
1111
2222
-------------
# echo 1111 > file1
# echo 2222 > file1
# cat file1
# echo 3333 >> file1
(1.3) 에러 재지정(Redirection stderr)
[FORMAT]
CMD 2> filename
CMD 2>> filename
# ls /var /nodir > file.txt
Standard Output
Standard Error
# ls /var /nodir 2> file.txt
Standard Output
Standard Error
# ls /var /nodir > file1.txt 2> file2.txt
Standard Output
Standard Error
# ls /var /nodir > file1.txt 2>&1
// > 로 표준 출력을 file1.txt에 주고 2> 로 표준에러를 &1(표준출력) 로 리디렉션
[참고]
Redirection : CMD > filename
PIPE : CMD | CMD
# ls -l 1> 1
[참고] 터미널 출력이 있는 명령어 수행시
# cmd > file.log (X)
# cmd > file.log 2>&1 (0)
[참고] CMD
2>/dev/null
일반사용자 전체 시스템의 파일과 디렉토리 목록중에 core 파일을
찾을려고 할때 검색할려고
하는 내용보다 권한이 되지 않아서 'Permission
Denied' 에러 메세지가 더 많이 출력되는 경
우가 존재할 수 있다. 이런 경우 명령어의 마지막에 '2>/dev/null'을 붙여서 에러메세지는
보지 않고 정상적인 출력 결과만 보는 경우가 있다.
$ find / -name core -type f 2>/dev/null
[참고] confiugre
--prefix=/usr/local/apache 2> apache.log
# ./configure --prefix=/usr/local/apache 2>
apache.log
# ./configure --prefix=/usr/local/apache >
apache.log 2>&1
(2). pipe
앞의 CMD의 출력 결과가 뒤의 CMD 입력값으로
들어간다.
[FORMAT] CMD
| CMD
-------
-------
Kernel Buffer
# ls -l | grep Error (X)
# ls -l > file.txt
# grep Error file.txt
ls -l grep Error file.txt
file.txt
# ls -l | grep Error
----------
----------
Kernel
Buffer
[EX] pipe 활용 예
# ps -ef | more (# CMD | more) 한페이지가 넘는 페이지 출력 방법 지정
# ps -ef | grep inetd (# CMD | grep inetd) 앞단의 명령어의 출력 결과 중 패턴 검색
[참고] tee 명령어
# ps -ef | grep inetd > file.log
------- A
------------+
-------
# ps -ef | grep inetd | tee file.log
----------
---+ +----
| |
file.log
EX) tee 명령어 실습
■ CMD > file.log
■ CMD | tee file.log
# cal 2002 > file1.log
# cal 2002 | tee file2.log
tee 입력값을 화면과 파일에 동시에 출력 시켜줌
(3) 콘셀의 기능(Korn Shell Function)
# set -o
....
ignoreeof
off
....
markdirs off
....
noclobber
off
....
vi
on
....
# set -o vi
# set +o vi
(3.1) 파일 덮어쓰기 방지 기능
set -o noclobber
# set -o noclobber
# set -o | grep noclobber
# echo 1111 > file1
# echo 2222 > file1
ksh: file1: file already exists <----- 메세지 확인
[참고] CMD >| file1
# echo 3333 >| file1
(3.2) 파일 이름 자동 완성 기능 & 명령행 편집
Filename Completion & Command Line Edit
set -o vi
set -o emacs
# set -o vi
# export EDITOR=vi
# export VISUAL=vi
(a). 명령행 편집(Command Line Edit)
k (pre-CMD)
j (back-CMD)
h(<-), l(->)
w, b, dd, d$, d0
[EX] Command Line Edit
# find / -name core -type f
<Ctrl + C>
# <ESC><K>
# find / -name file1 -type f
(b). 파일 이름 자동 완성 기능(Filename Completion)
(실습 준비)
# cd /test
# rm -r *
# mkdir dirname1
# touch file.log
(자동 완성 기능 실습)
# cd dir<ESC><\>
# cd /test
# mkdir dir2
# cd dir<ESC><\>
<ESC><=>
1) dir2/
2) dirname1/
# cd dirn<a><ESC><\>
[참고] 와일드
카드(Wild Card)
# cd dirn*
dirname1
dir1
[참고]
Copy & Paste
(1). Select, Drag & Drop
(2). Mouse Right Button Click & Edit Menu Selection
(3). Ctrl + Insert, Shift + Insert
[정리] 긴 이름을 가진 파일/디렉토리 다루기
(a). 파일이름자동 완성 기능 사용
(b). 와일드 카드 사용
(c). 복사 & 붙이기
(3.3) 로그 아웃 방지 기능
set -o ignoreeof
EOF(End Of File)의 의미를 갖는
<Ctrl + D>가 존재한다.
<Ctrl + D>의 의미는?
(a). 파일의 끝을 알려 주는 기능
(b). 현재 프로그램 종료(쉘)의
기능
갖는다.
(a). 파일의 끝 의미를 갖는 <Ctrl + D>
# mailx root
> Subject : TEST
hello
<Ctrl + D>
(b). 현재 프로그램(쉘) 종료의
의미를 갖는 <Ctrl + D>
# telnet 172.16.8.254
root 사용자로 로그인
# <Ctrl + D> => 로그아웃된다.
# telnet 172.16.8.254
root 사용자로 로그인
# set -o ignoreeof
# <Ctrl + D> => 로그아웃 되지 않는다.
# exit
(4) 변수(Variable)
- 지역 변수(Local Variable)
- 환경 변수(Global Variable, Environment
Variable)
- 특수 변수(Special Variable)
// 지역변수와 환경변수의 차이는 export 되었는지에 따라 다르다.
(4.1) 변수 선언(Variable Define)
sh ------> ksh ------> zsh ------> bash
(본쉘 스타일)
(a). 변수를 선언하는 방법
# VAR=5 (변수의 값으로는 숫자나 문자 구별하지 않는다.)
# VAR=hello
# export VAR
(b). 변수의 내용을 확인하는 방법
# echo $VAR
(c). 변수의 내용을 초기화 하는 방법
# unset VAR
■ (콘쉘 스타일)
(a). 변수를 선언하는 방법
# export VAR=hello
(b). 변수의 내용을 확인하는 방법
# print $VAR
(c). 변수의 내용을 초기화 하는 방법
# unset VAR
[EX] 변수 선언 테스트
# VAR=hello
# echo $VAR
# unset VAR
# echo $VAR
(4.2) export의 의미
# ps
PID TTY TIME CMD
408
pts/3 0:00 ksh
# VAR1=5
# VAR2=10
# export VAR2
# ksh
# ps
PID TTY TIME CMD
408
pts/3 0:00 ksh
994
pts/3 0:00 ksh
# echo $VAR1
# echo $VAR2
# exit
# echo $VAR1
# echo $VAR2
VAR1=5, VAR2=10
-----------------+ +-----------------
| |
| VAR1=?, VAR2=? |
+-------------------+
(4.3) EDITOR, VISUAL
기본적인 편집기를 선언할 때 사용.
# EDITOR=vi
# EDITOR=/usr/bin/vi
# export EDITOR
or
# VISUAL=vi
# VISUAL=/usr/bin/vi
# export VISUAL
or
# set -o vi
[참고] 기본적인 편집기 선언
OS(썬 개발 프로그램) : Default Editor (set -o vi)
Oracle DB
: EDITOR
[참고] set / env
set : 모든 변수(지역변수 + 환경변수)
env : 환경변수
# VAR1=ITBANK => 지역변수
# VAR2=SOLARIS => 환경변수
# export VAR2
# set | grep VAR1 (0)
VAR1=ITBANK
# set | grep VAR2 (0)
VAR2=SOLARIS
# env | grep VAR1 (X)
# env | grep VAR2 (0)
VAR2=SOLARIS
0: View
X: Not View
(4.4) PS1
쉘 프롬프트를 정의할 때 사용하는 변수
- root 사용자의 쉘프롬프트 : #
- 일반 사용자의 쉘프롬프트 : $
# PS1=[solarisXXX]#
# export PS1
# PS1='$PWD> '
# PS1='[$PWD]# '
# export PS1
[참고] Bash Shell에서의 PS1 정의 방법
쉘프롬프트: [solaris254@root:/]#
(ksh ) # PS1=[`hostname`@$LOGNAME:'$PWD]# '// 명령어+자신의이름+현재폴더
(bash) # PS1='[\h@\u:\w]$$'
(4.5) PATH
명령어 검색 위치 지정 변수
#
PATH=/bin:/sbin:/usr/bin:/usr/sbin:/usr/dt/bin:/usr/ccs/bin:/usr/openwin/bin:/usr/ucb
# export PATH
EX) ls 명령어 수행
# ls -l
# /usr/bin/ls -l
# cd /usr/bin
# ./ls -l
[참고] 스크립트 디렉토리
/root/bin, /root/shell : 스크립트 디렉토리
# PATH=$PATH:/root/shell
# export PATH
# script.sh
[참고] 명령어 실행시 에러 메시지
# cmd
......
ksh: command: not found
......
# find / -name cmd -type f
- 1> 명령어가 없는 경우(->
명령어 설치)
- 2> PATH 변수에 명령어의 경로가 정의가 않은 경우(-> PATH 변수에 경로 추가)
EX) ethereal & printmgr
# ethereal (ksh : ethereal: not found) => 프로그램이 설치 안된 경우
# printmgr (ksh : printmgr: not found) => PATH 변수에 경로가 추가 되지 않은 경우
(4.6) MANPATH
매뉴얼 페이지 검색 경로를 지정할 때 사용
# MANPATH=/usr/man:/usr/dt/man:/usr/local/man
# export MANPATH
# man ls
(매뉴얼 페이지가 보인다.)
# echo $MANPATH
......:/usr/man:...... (/usr/man --->
/usr/share/man)
[참고] 매뉴얼 페이지 디렉토리 확인
# cd /usr/share/man
# ls
(4.7) LD_LIBRARY_PATH
라이브러리의 경로를 검색할때 사용하는 변수
#
LD_LIBRARY_PATH=/usr/lib:/usr/local/lib:/usr/local/lib
# export LD_LIBRARY_PATH
라이브러리
- 동적 라이브러리(Dynamic Lib.) : XXXXXX.so
- 정적 라이브러리(Static Lib.) : XXXXXX.a
EX) ls 명령어의 동적 라이브러리 확인
# ldd /usr/bin/ls
libc.so.1 =>
?
libdl.so.1
=> /usr/lib/libdl.so.1
/usr/platform/SUNW,Ultra-5_10/lib/libc_psr.so.1
......
ld.so.1: gs: fatal error: libpng.so.2 : open fail :
no such file or directory
......
# find / -name "libpng.so.2" -type f
2>/dev/null
- libpng.so.2 라이브러리를 찾은 경우
- libpng.so.2 라이브러리를 찾을 수 없는 경우
(a). 라이브러리 파일을 찾은 경우
# export
LD_LIBRARY_PATH=$LD_LIBRARY_PATH:/usr/local/lib
(b). 라이브러리 파일을 못 찾은 경우
http://docs.sun.com -> 검색창 -> "libpng.so.2"-> SUNWxxx
http://www.sunfreeware.com
# export LD_LIBRARY_PATH=$LD_LIBRARY_PATH:/usr/local/lib
[참고] 솔라리스 패키지 설치시 고려해야 하는 변수
패키지(Package)
-----------------------
Binary Command(Daemon) =>
/usr/local/bin
Configuration File
Library =>
/usr/local/lib
Manual =>
/usr/local/man
Documentation
-----------------------
- PATH
- MANPATH
- LD_LIBRARY_PATH
(4.8) 기타 환경 변수
HOME / PWD / LOGNAME
# echo $HOME
/
# echo $PWD
/test
# echo $LOGNAME
root
EX) $HOME의 활용
# cd
# cd $HOME
(4.9) 특수 변수(Special Variable)
- $ : 현재 쉘의 PID 번호를 저장하고 있다.
- ? : 바로 이전 명령어의 정상 실행 여부에 대한 결과 값이 들어 있다.
- ! : 바로 이전 백그라운드 프로세스에 대한 PID 번호를 저장하고 있다.
- 인자변수($0, $1, $2, ....)
# echo $$
450
# ps
# cal
# echo $?
# ls /nodir
# echo $?
# sleep 200 &
[1] 450
# echo $!
[참고] Login
Variables
---------------------------------------------------------------
변수이름 선언주체 설명
---------------------------------------------------------------
LOGNAME login 사용자 로그인 이름 정의
HOME login 사용자의 홈디렉토리 정의
SHELL login 사용자의 기본 쉘 정의
PATH login 사용자의 명령어 검색 경로 정의
MAIL login 사용자의 mailbox 경로 정의
TERM login 사용자의 사용 터미널 정의
LPDEST 기본 선언 아님 기본 프린터 정의
PWD shell 현재 작업 디렉토리 정의
PS1 shell 쉘 프롬프트 정의(sh, ksh)
prompt shell 쉘 프롬프트 정의(csh)
---------------------------------------------------------------
[정리] 변수(Variable)
- 변수 선언 방법(Variable Definition)
- export 의미?
- 쉘 환경 변수(Shell Environment Variable)
EDITOR,
PATH, MANPATH, LD_LIBRARY_PATH
- 지역변수(Locale Variable)
- 환경변수(PATH, MANPATH, LD_LIBRARY_PATH,
etc)
- 특수변수(Special Variable)
$$, $?,
$!
(5) Korn Shell Metacharater
- ' ' : 작은 따옴표(single quote)
- " " : 큰 따옴표(double quote, $, ` `, \)
- ` ` : 역 따옴표(back quote)
- \ : 역 슬래쉬(back
slash)
- ; : 세미콘론(semicolon)
[EX] 작은 따옴표 실습(single quote)
// 작은 따옴표는 안에 들어 있는 모든 것들의 쉘 해석을 막는다. 특별한 의미가 없이 그냥 하나의
문자로 인식이 된다. 문자는 공백을 포함한다.
# echo $HOME
# echo '$HOME'
[EX] 큰 따옴표 실습(double quote)
// 큰 따옴표는 작은 따옴표와 같은 동작을 하지만 $ , ``, \ 문자의 해석은 제외한다.
# echo "$HOME"
# echo "$HOME is my directory."
[EX] 역 따옴표 실습(back quote)
// 쉘은 역따옴표 안에 있는 것을 명령어로 생각 하고 실행하게 된다.
# hostname
# echo `hostname`
# echo `date`
# echo "`hostname` is my hostname.!!!"
# echo "$(hostname) is my hostname.!!!"
[EX] 역 슬래쉬 실습(back slash)
// 쉘은 역 슬래쉬 뒤에 오는 것의 의미를 제한하도록 한다.
# echo $HOME
# echo \$HOME
# echo "\$HOME is my directory"
# find / -name core -type f -exec rm {} \;
# find / -name core -type f -exec rm {} ';'
(참고) \
-> `명령어` : 명령어 실행 결과 출력 표시
-> 명령어 \ : 명령어가 아직 끝나지 않음을 표시
# ls -l
# ls \
> -l
[EX] 세미콜론 테스트(semicolon)
excution mutliple command a line
# date ; cal ; ls -l
# date
# cal
# ls -l
(6) history
| |
STACK
| |
| |
+--------+
# history
# history -r (reverse)
# history -n (not number)
# history -5
[참고] 히스토리 참고 파일 및 변수
■ ~/.sh_history 히스토리 내용을 지속적으로 저장하는 파일
■ HISTSIZE 히스토리를
기록하는 Stack의 크기를 지정하는 파일
■ HISTFILE 히스토리
내용을 지속적으로 저장하는 파일 이름 지정
[EX] HISTSIZE, HISTFILE 변수 지정
# HISTSIZE=128 ; export HISTSIZE
# HISTFILE=~/.sh_history ; export HISTFILE
HISTSIZE
If
this variable is set when the shell
is invoked,
then the number
of previously entered commands that
are accessible by this shell will be
greater than or
equal to this number. The default
is 128.
HISTFILE
If
this variable is set when the shell
is invoked,
then the value is the pathname of the file that will
be
used to store the command history.
(See Command
re-entry below.)
[참고] r (re-excution)
# history
# r
# r 450
# r vi
# r etc=var 450 ( 450 #
vi /etc/dir1/dir2/dir3/filename)
(7) alias
선언 방법 # alias cp='cp
-i'
선언 확인 방법 # alias
# alias cp
선언 해제 방법 # unalias cp
[참고] unalias & Backslash
# \rm -r dir1
EX) \rm -r dir1 실습
# cd /test
# mkdir dir1
# cd dir1
# touch file1 file2 file3 file4
# cd ..
# alias rm='rm -i'
# rm -r dir1
rm: examine files in directory dir1 (y/n)? <Ctrl +
C> <----- '<Ctrl + C> 입력
# \rm -r dir1
(참고) rm -f (force)
# rm -rf dir1 (일부 유닉스)
[정리] 콘쉘의
특징
- Redirection
- Pipe
- Korn Shell Function
- Variable
- Metacharacter
- history
- alias
(8) 환경 파일
사용자 로그인시 적용되는 환경파일
■ /etc/profile : 전체 사용자 환경 설정 파일
■ ~/.dtprofile : CDE 환경 사용자 환경 설정 파일 (DTSROUCEPROFILE=true)
■ ~/.profile : 개인
사용자 환경 설정 파일
(ENV=/.kshrc)
■ ~/.kshrc : 개인
사용자 환경 설정 파일
사용자가 CDE 환경으로 로그인하게 되는 경우
/etc/profile
~/.dtprofile
~/.profile
~/.kshrc
파일들이 읽혀 진다.
사용자가 Command Line Login을 하는 경우
/etc/profile
~/.profile
~/.kshrc
파일들이 읽혀 진다.
/etc/profile과 ~/.dtprofile,
~/.profile은 로그인시에 한번 읽혀 지고, ~/.kshrc 파일은 콘
쉘이 실행될때 마다 실행이 된다.
(8.1) /etc/profile
* ~/.profile과 ~/.kshrc 파일에
정의 될수 있는 모든것들에 대해 정의 가능
* 시스템의 모든 사용자에게
적용할 것에 대한 정의
(8.2) ~/.profile
* 변수 선언
- PATH
- ENV
- EDITOR
- 기타
(8.3) ~/.kshrc
* 특정 변수 선언(PS1)
* set -o 설정
* alias 설정
[참고] 솔라리스 기본 환경 파일 해석
■ /etc/profile
■ ~/.profile (-> ENV_main.sh)
■ ~/.kshrc (-> ENV_main.sh)
(a). /etc/profile 파일의 해석
---------------- /etc/profile 해석-------------------------------
trap ""
2 3 -----> /etc/profile 파일을 실행하는 동안(로그인시) 2번 시그널,
3번 시그널을 받아도 종료하지 않는다.
export LOGNAME PATH
-----> 변수
export(/usr/bin/login)
if [ "$TERM" = "" ] -----> $TERM 변수가 선언 안되어 있으면
then
if
/bin/i386 -----> i386(32bits) 일반운영체제
then
TERM=sun-color
else
TERM=sun
fi
export
TERM
fi
# Login
and -su shells get /etc/profile services.
# -rsh is
given its environment in its .profile.
case "$0" in -----> -ksh /etc/profile
-sh | -ksh | -jsh | -bash) A
+----- $0
if [ !
-f .hushlogin ] -----> ~/.hushlogin 파일이 존재하지 않으면
then
/usr/sbin/quota -----> Quota 실행
# Allow the user to break
the Message-Of-The-Day only.
trap "trap '' 2" 2
/bin/cat -s /etc/motd -----> 로그인시 /etc/motd 내용 출력
trap "" 2
/bin/mail -E -----> 새로운 메일이 존재 하면
case $? in
0)
echo "You have new
mail."
;;
2)
echo "You have
mail."
;;
esac
fi
esac
umask 022
-----> UMASK 설정
trap 2 3
--------------------------------------------------------------------
(b). ~/.profile 해석
------------------------ ~/.profile 해석 ----------------------------
# (1). stty erase ^H
stty erase ^H
# <Backspace>
# stty erase ^?
# <Delete>
-----> Set Terminal Type
# tty
# stty
# stty
-a
.....
erase = ^h .....
# stty
erase <DELETE>
# (2). ENV Variable
ENV=~/.kshrc
-----> 추가적인 환경 파일 정의
# (3). EDITOR Variable
EDITOR=/usr/bin/vi
-----> 기본적인 편집기 선언 변수
# (4). PATH Variable
PATH=/bin:/sbin:/usr/bin:/usr/sbin:/usr/ucb
PATH=$PATH:/usr/dt/bin:/usr/ccs/bin:/usr/openwin/bin
PATH=$PATH:/usr/lib/netsvc/yp:/usr/apache/bin
PATH=/usr/sfw/bin:/usr/sfw/sbin:/usr/local/sbin:/usr/local/bin:$PATH
PATH=/usr/local/ssl/bin:$PATH
-----> 명령어의 실행 위치 정의 변수
PATH=/bin:/sbin:/usr/bin:/usr/sbin:/usr/ucb\
:/usr/dt/bin:/usr/ccs/bin:/usr/openwin/bin\
:/usr/lib/netsvc/yp:/usr/apache/bin\
:/usr/sfw/bin:/usr/sfw/sbin:/usr/local/sbin:/usr/local/bin\
:/usr/local/ssl/bin
# (5). MANPATH Variable
MANPATH=/usr/share/man:/usr/man:/usr/openwin/share/man
MANPATH=/usr/sfw/share/man:/usr/local/man:/usr/local/ssl/man:$MANPATH
# (6) LD_LIBRARY_PATH Variable
LD_LIBRARY_PATH=/usr/lib:/usr/secure/lib:/usr/local/lib
LD_LIBRARY_PATH=$LD_LIBRARY_PATH:/usr/local/ssl/lib:/usr/sfw/lib
export ENV EDITOR PATH MANPATH LD_LIBRARY_PATH
---------------------------------------------------------------------------
(c). ~/.kshrc 파일의 해석
------------------------ ~/.kshrc 파일 해석 -------------------------------
# (1). set -o
set -o vi
set -o trackall -----> Tracked
Alias // 사용된 명령어를 PATH를 뒤지지 않고 기억하고 있다 (빠른검색)
# set -o ignoreeof
# set -o noclobber
# (2). PS1 Variable
-----> 쉘 프롬프트 정의 변수
# PS1=[$LOGNAME@`hostname`:'$PWD]# ' # EX) [root@solaris254:/]#
# PS1=[`hostname`@'$PWD]# ' # EX) [solaris254@/]#
# PS1='$PWD'"[`hostname`]# " # EX) /etc[sun02]#
# PS1='$PWD> ' # EX)
/etc>
PS1=['$PWD]# ' # EX) [/]#
export PS1
# (3). alias
# (a). 기본적인 alias
alias c='clear'
alias h='history'
alias cp='cp -i'
alias mv='mv -i'
alias rm='rm -i'
alias ls='ls -hF'
alias llt='ls -aihlF'
alias ll='ls -ailhF | more'
# (b). 필요한 경우 선언하는
alias
alias lsf='ls -al | grep ^-'
alias lsd='ls -al | grep ^d'
alias dir='ls -ailhF | more' -----> 윈도우즈 명령어 실행
alias
alias ipconfig='ifconfig -a' -----> 윈도우즈 명령어 실행
alias
#alias cat='cat -n'
alias df='df -h'
alias nslookup='/usr/sbin/nslookup'
# (c). 편리한 기능의 alias
/*
Webserver(Apache)
/etc/apache/httpd.conf
-----> Configuration File
/var/apache/htdocs -----> Source Directory
/var/apache/logs -----> Log Directory
설정 파일을 빨리 편집하도록 하는 기능
*/
alias fconfig='vi /etc/ftpd/ftpaccess'
alias hconfig='vi /etc/apache/httpd.conf'
# 소스디렉토리 이동
alias hdir='cd /var/apache/htdocs'
# 로그파일 모니터링
alias mlog='tail -f /var/adm/messages'
alias slog='tail -f /var/adm/sulog'
alias sslog='tail -f /var/log/syslog'
# (4). Function
-----> alias pps='ps -ef | head -1 ; ps -ef | grep
$1' 같은 기능 제공
pps () {
if [ $# -ne
1 ] ; then
echo
Usage : $0 Process
fi
/usr/bin/ps
-elf | head -1
/usr/bin/ps
-elf | grep $1 | grep -v grep
}
ppss () {
if [ $# -ne
1 ] ; then
echo
Usage : $0 Process
fi
/usr/ucb/ps
-aux | head -1
/usr/ucb/ps
-aux | grep $1 | grep -v grep
}
-------------------------------------------------------------------------
(8.4) 쉘별 환경 파일(sh/ksh/csh User Initialization File)
_______________________________________________________________________________
Shell User Description
Initialization
File
_______________________________________________________________________________
sh /etc/profile Defines system wild environment at login
$HOME/.profile Defines user's environment at login
csh /etc/.login Defines system wild environment at login
$HOME/.cshrc Defines user's environment for all C shells
invoked
after login shell
$HOME/.login Defines user's environment at login
ksh /etc/profile Defines system wild environment at login
$HOME/.profile Defines user's environment at login
$HOME/$ENV Defines user's environment at login in the
file
specified by
the Korn shell's ENV environment variable
_______________________________________________________________________________
[참고] 배쉬쉘 환경
파일(Bash Shell User Initialization Files)
■ /etc/profile
전체 사용자 환경 파일
■ ~/.bash_profile
사용자 개인 환경 파일
■ ~/.bashrc
사용자 개인 환경 파일
(8.5) 사용자 기본 환경 파일(Default User
Initialization Files)
■ /etc/skel (skelton)
_________________________________________
Shell Default File
_________________________________________
csh
/etc/skel/local.login
/etc/skel/local.cshrc
ksh
/etc/skel/local.profile
_________________________________________
[EX] /etc/skel 디렉토리
# useradd -m -d /export/home/user03 -s /bin/ksh
user03
# passwd user03
# ls -al /export/home/user03
# ls -al /etc/skel
# cat > /etc/skel/.exrc
set showmode
set number
<Ctrl + D>
# useradd -m -d /export/home/user04 -s /bin/ksh
user04
# passwd user04
# ls -al /export/home/user04
# ls -al /etc/skel
[참고] 관리자가 사용자의 환경 초기화하는 방법
- /etc/profile 사용하는 방법
- /etc/skel 사용하는 방법
(8.6) 사용자 변수 선언(User Variable Definition)
사용자 변수 선언시 sh 계열과 csh 계열은 차이점이 존재한다.
(a). csh 계열(csh/tcsh
style)
변수 선언 방법 # setenv VAR 5
변수 확인 방법 # echo $VAR
변수 해제 방법 # unset VAR
(b). sh 계열(sh/ksh/zsh/bash
style)
변수 선언 방법 # VAR=5
# export VAR
변수 확인 방법 # echo $VAR
변수 해제 방법 # unset VAR
Chapter 6. Vi Editor
________________________
screen-oriented(visual) display editor based on ex
(1). vi 편집기의 특징(Visual
Editor Characteristic)
- 전체 화면 모드 편집기(Full Screen Editor, Visual Editor)
- ex 편집기의 기능 확장 편집기(vi editor based on ex.)
[참고]
/root/docs/Fundamental/Ref_vi_example.txt
(2). vi 편집기 실행하기
# vi (: w
filename)
# vi filename
# vi -r filename
(recovery) // 복구 모드
# vi –L //
리스트 찾기 , 에러난 파일
# vi +38 filename // 수정 작업을 38(특정)라인에서 바로 시작할 때!
-L Lists the name of all files saved as the
result of an
editor or system crash.
-r
filename
Edits filename after
an editor or
system crash.
(Recovers the version
of filename that was in the
buffer when the crash occurred.)
[EX] vi -r filename 형식의 예
# mailx
..... (중략) .....
A copy of an editor buffer of your file
"/etc/vfstab" was saved on solaris254
when the system went down.
This buffer can be retrieved using the
"recover" command of the editor.
An easy way to do this is to give the command
"vi -r /etc/vfstab".
This works for "edit" and "ex"
also.
[EX] vi -L 형식의 예
# vi -L
/usr/preserve/root:
On 목
1월 01 at 09:00, saved 0 lines of file ""
On 목
1월 17 at 12:27, saved 61 lines of file
"/.kshrc"
On 금
2월 15 at 10:13, saved 21 lines of file
"/etc/dfs/dfstab"
On 목
1월 31 at 19:48, saved 11 lines of file
"/tmp/crontabVwaWPh"
/var/tmp:
No files saved.
(3). vi Mode 변경
- Command Mode (ESC Mode), Edit Mode
- Input/Insert Mode
- Last Line Mode(Ex Mode)
<Command Mode>
----- (i, a, o, I, A, O) -----> <Input Mode>
A |
<---- ( ESC ) ------
| |
| |
| +------------- (<Shift+:>, /, ? ) -----> <Last Line Mode>
+----------------- ( Enter ) ------
* insert, append, open line
[그림] vi 편집기 모드 변환
(4). Command Mode
(4.1) Move
- h, j, k, l
// 상하좌우 커서이동
- b, w // b : back word 이동 , w : word 이동
- 0(^), $ // $ : 라인끝 이동 0(^) : 현재행의 처음으로~
- Ctrl+F / Ctrl+B //
페이지단위 이동
- G, 1G, 10G //
nG : n행으로 이동
- :5, :10 // n : n행으로 이동
(4.2) Delete
- x, dd(=D), 3dd(=3D) //
x : 현재커서의 한글자 삭제
- :1,3d //
1 ~ 3 라인 삭제
- dw //
한 단어 삭제
- d0, d$ //
d0 : 현재커서에서 라인 처음까지 삭제 , d$ : 현재커서에서 라인 끝가지 삭제
- dG //
dG : 현재커서에서 문서의 마지막까지 삭제
- 3dd //
현재에서 3라인 삭제
- d1G //
현재에서 1라인까지 삭제
(4.3) Copy(Yank)
& Paste
- yy(=Y), 3yy(3Y), p or P // yy : 1라인 복사
- :1,3 co 5 //
1라인부터 3라인 까지 복사 5라인아래에 paste
- :1,3 m 5 //
1~ 3 까지 5라인 밑으로 move
(4.4) Search
- /New, n or N // 탐색 결과에서 n -> 정방향 탐색 N -> 역방향
탐색
- ?New, n or N // /pattern -> 현재에서 정방향탐색
//
?pattern -> 현재에서 역방향 탐색
(4.5) Search
& Replace
- :%s/Old/New/g // %s : search
, /g : gloval
문서전체의~
// old 를 찾아 new로 치환
- :5,10s/Old/New/g // 5~ 10 라인 ~ "
EX) : %s/Hello/HELLO/g
1,$ => 5,10s/Hello/HELLO/g
search
globally => %s/Hello/HELLO/
, %s/Hello/HELLO/g
EX) :5,10s/^/#/
:5,10s/^#//
:5,10s/^/ / (4 blank character)
(4.6) Undo
- u, U //실행 취소
(4.7) Join
Line
- J //
아래 라인을 현재 라인으로 붙여 준다.
(4.8) Replace
- r, R //
r : 현재커서의 한문자를 치환 , R : 현재커서부터 치환상태로
(4.9) Save
& Quit
- :w //
저장
- :w filename //
filename으로 저장
- :w! //
강제저장
- :q //
종료
- :q! //
강제 종료
- :wq //
저장 후 종료
- :wq!(root Use) //
강제 저장 종료
- :!CMD //
vi 편집기 에서 쉘 명령어 실행
[참고] Save & Quit
- :x
- :wq
- ZZ
(5). vi 편집기의 환경 설정
(5.1). vi 편집기 사용시 환경설정
# vi filename
.....
: set //
현재 setting 목록
: set all //
설정할수 있는 모든 목록
: set number
(or :set nu) // 라인넘버 부여
: set nonumber (or :set nonu) // 번호 없앰
[EX] vi 편집기의 기능(:set
all)
+- 기능이름---+--- number --> : set number
|
+--- nonumber --> : set
nonumber
+- 기능이름=값 --> : set 기능이름=값
(5.2). vi 편집기 환경파일
* ex editor => vi editor
=> vim editor (iMprove vi)
~/.exrc ~/.vimrc
# vi ~/.exrc
set nu showmode sm ai
or
# vi ~/.exrc
set number //
편집기의 라인번호
set showmode //
편집기의 모드 표시
set showmatch //
편집기 작업시 매칭되는 문자들을 표시한다.
set autoindent //
자동 들여쓰기
[참고] set list, set ic
set list - Display invisible charaters, such as ^I
for a Tab and as $ for end-of-line
set ic - Instructs searches to ignore case
출처 : http://cafe.daum.net/bscsolaris
압축(Compress)
■ compress / uncompress CMD
■ gzip / gunzip CMD
아카이브(Archive)
■ tar CMD
■ cpio CMD
압축 + 아카이브
■ zip CMD
■ jar CMD
compress/uncompress CMD
___________________________
compress, uncompress, zcat - compress,
uncompress files or display expanded files
[compress]
The
compress utility will attempt to reduce the size of the
named
files by using adaptive Lempel-Ziv coding. Except when
the output
is to the standard output, each
file will be
replaced by one
with the extension .Z, while
keeping the
same
ownership modes, change times and
modification times.
If appending
the .Z to the
file pathname would make the
pathname
exceed 1023 bytes, the command will fail.
If no
files are
specified, the standard input will be compressed
to the
standard output.
[uncompress]
The
uncompress utility will restore files to their
original
state after
they have been compressed using the compress
utility.
If no files are specified, the standard input
will
be
uncompressed to the standard output.
[zcat]
The zcat
utility will write
to standard output
the
uncompressed form of files that have been compressed using
compress.
It is the equivalent of uncompress -c. Input files
are not
affected.
---- file1 -----
aaaaa a(addr1,addr2,addr3,....)
bbbbb
====Compress===>
b(addr1,addr2,addr3,....)
ccccc .......
----------------
[그림] 압축의 원리
(압축에 대한 예1)
- 똑같은 페이지 수를 가지고 있는 두개의 파일을 압축하더라도 압축 효율은 서로 틀리다.
이유는 반복되는 글자 수가 서로 틀리기 때문이다.
(압축에 대한 예2)
- 압축된 파일을 다시 압축하거나 바이너리 파일을 다시 압축하는 경우는 압축효율이 떨어
질수 있다. 이유는 반복되는 글자가 많지 않고 글자 종류의 수가 증가 하기 때문이다.
Compress File
--- Compress ---> size(?)
Binary
File --- Compress ---> size(?)
■ (파일 압축)
# compress file
file.Z
■ (파일 압축 확인)
# zcat file.Z
# uncompress -c file.Z
■ (파일 압축 해제)
# uncompress file.Z
file
[EX] compress 명령어 실습
# cd /test
# cp /etc/inet/inetd.conf file1
# compress file1
file1.Z
# ls -l (File Size)
# zcat file1.Z (0)
# cat file1.Z
(X)
# uncompress file1.Z
# ls -l (File Size)
gzip/gunzip CMD
____________________
gzip, gunzip, gzcat - compress or expand files
[gzip]
Gzip
reduces the size of the named files using
Lempel-Ziv
coding (LZ77). Whenever possible, each file is replaced by
one with
the extension .gz, while keeping the same ownership
modes, access and modification times. (The default exten-
sion is
-gz for VMS, z for MSDOS, OS/2 FAT, Windows
NT FAT
and
Atari.) If no files are specified, or if
a file name is
"-", the standard input is compressed to the standard
out-
put. Gzip will only attempt to compress regular
files. In
particular, it will ignore symbolic links.
[gunzip]
gunzip
takes a list of
files on its
command line and
replaces
each file whose name ends with .gz, -gz, .z, -z, _z
or .Z and
which begins with the correct magic number with an
uncompressed file without
the original extension. gunzip
also
recognizes the special extensions .tgz
and .taz as
shorthands for .tar.gz
and .tar.Z respectively. When
compressing, gzip uses the
.tgz extension if
necessary
instead of
truncating a file with a .tar extension.
[gzcat]
gzcat is
identical to gunzip -c. (On some systems, zcat
may
be installed
as gzcat to
preserve the original link to
compress.)
gzcat uncompresses either a list of files on
the
command line or
its standard input
and writes the
uncompressed data on standard output.
gzcat will uncompress
files that
have the correct magic number whether they have a
.gz suffix
or not.
■ (파일 압축)
# gzip file
file.gz
■ (파일 압축 확인)
# gzcat file.gz
or
# gunzip -c file.gz
■ (파일 압축 해제)
# gzip -d file.gz (-d : decompress)
file
or
# gunzip file.gz
file
[EX] gzip 명령어 실습
# cp /etc/inet/inetd.conf file2
# gzip file2
file2.gz
# ls -l (파일의 크기 점검)
# gzcat file2.gz (0)
# cat file2.gz
(X)
# gzip -d file2.gz
file1
# ls -l (파일의 크기 점검)
tar CMD
____________________
create tape archives and add or extract files
(명령어 형식)
# tar cvf file.tar file1 file2 file3 (c: create)
# tar tvf file.tar (t: contents)
# tar xvf file.tar (x: extract)
[참고] 테이프 백업 방법(Tape Device Backup)
# tar cvf /dev/rmt/0n /export/home
# tar cvf /dev/rmt/0n file1 file2 file3
[참고] 디렉토리 마이그레이션(Migration)
Directory Copy using tar CMD.
작업 내용: /test1 => /test2
# cd /test1
# tar cvf - . | (cd /test2 ; tar xvf -)
[EX] tar 명령어 실습
(실습 준비)
# cd /test
# rm -r *
# cp /etc/passwd file1
# cp file1 file2
# cp file1 file3
# ls -l file*
(tar 명령어를 사용한 실습)
# tar cvf file.tar file1 file2 file3
# ls -l file*
# rm file1 file2 file3
# tar tvf file.tar
# tar xvf file.tar
# ls -l file*
(tar 명령어를 사용한 디렉토리 마이그레이션)
# mkdir -p /test1
# mkdir -p /test2
# cp /etc/default/* /test1
# ls /test1
# cd /test1
# tar cvf - . | (cd /test2 ; tar xvf -)
# ls /test1
# ls /test2
cpio CMD
____________________
copy file archives in and out
The cpio
command copies files
into and out
of a cpio
archive.
The cpio archive may span multiple volumes. The -i,
-o, and -p
options select the action to be performed.
The
following list describes each of
the actions. These actions
are
mutually exclusive.
Copy In Mode
cpio -i
(copy in) extracts files from the standard
input,
which is
assumed to be the product of a previous cpio -o
command.
Only files with names that match one
of the pat-
terns are
selected. See sh(1) and OPERANDS for more informa-
tion about
pattern. Extracted files are conditionally copied
into the
current directory tree,
based on the options
described
below. The permissions of the files will be
those
of the
previous cpio -o command. The owner and group will be
the same
as the current user, unless the current user is the
super-user. If this is the case, owner and group will be the
same as
those resulting from the previous cpio
-o command.
Notice that if cpio -i tries to create a file that
already
exists and
the existing file is the same
age or younger
(newer), cpio will output a
warning message and not replace
the file.
The -u option can
be used to
unconditionally
overwrite
the existing file.
Copy Out Mode
cpio -o
(copy out) reads a list of file path names from
the
standard input and copies those files to the standard out-
put,
together with path name and status information
in the
form of
a cpio archive. Output is padded to an 8192-byte
boundary
by default or to the
user-specified block size
(with the
-B or -C
options) or to some device-dependent
block size
where necessary (as with the CTC tape).
Pass Mode
cpio -p
(pass) reads a list of file path
names from the
standard
input and conditionally copies those files into the
destination directory tree, based on the
options described
below.
-i (copy in) Reads an archive from the
standard input and
conditionally extracts the files contained in it and
places them into the current directory tree.
-o (copy out) Reads a list of file path names
from the
standard input and copies those
files to the standard
output in the form of a cpio archive.
-p (pass) Reads a list of file path names from
the stan-
dard input and conditionally copies those files into
the
destination directory tree.
-c Reads or writes header information in
ASCII character
form
for portability. There are no UID or GID restric-
tions associated with this
header format. Use
this
option between SVR4-based
machines, or the -H odc
option between unknown machines. The -c option implies
the use of
expanded device numbers, which
are only
supported on SVR4-based systems.
When transferring
files between SunOS
4 or Interactive UNIX and the
Solaris 2.6 Operating environment or
compatible ver-
sions,
use -H odc.
-v Verbose. Prints a list of file and
extended attribute
names. When used with the -t option, the table of con-
tents looks like the output of an ls -l
command (see
ls(1)).
-b Reverses the order of the bytes within each
word. Use
only
with the -i option.
-B Blocks input/output 5120 bytes
to the record.
The
default buffer size is 8192 bytes when this and the -C
options are not used. -B does
not apply to
the -p
-d Creates directories as needed.
-m Retains previous file modification
time. This option
is
ineffective on directories that are being copied.
-I file
Reads the contents of
file as an
input archive,
instead of the standard input. If
file is a character
special device, and the current medium has been
com-
pletely read, replace the medium and press <RETURN> to
continue
to the next medium. This option is used
only
with
the -i option.
-O file
Directs the output of cpio to
file, instead of the
standard output. If file is a character special device
and
the current medium is full, replace the medium and
type
a carriage return to continue to the next medium.
Use
only with the -o option.
cpio는 표준 입력으로부터 파일의 이름을 입력받고, 표준출력으로
목록명을 얻어서
하나 또는 복수개의 파일을 압축하는데 사용된다. cpio는 3개의 다름 모드가 존재
한다.
● Copy In Mode : cpio -i, 표준 입력으로 들어온 파일들을 extract 한다.
● Copy Out Mode : cpio -o, 표준 입력으로 부터 파일을 얻어서 이들 파일을
가지고
그들의 pathname과 함께, 새로운 파일을 생성한다.
● Pass Mode : cpio -in, copy-out 모드와 같다. 다만 새로운 파일이 생기는 것이
아니라 디렉토리 구조를 그대로 copy 한다는 것만 다르다.
(명령어 형식 예)
# find . -print | cpio -o[aBcv] > file.list
# cpio -ivt < file.list
# cpio -i[cdlmv] < file.list
# find . -print | cpio -p[adlmuv] directory
[EX1] 현재 디렉토리를 tape에 Backup
# find . -print | cpio -ocvB > /dev/rmt/0
[EX2] Tape의 목차를 출력
# cpio -iBtv < /dev/rmt/0
[EX3] Backup 받은 tape로부터 restore
# cpio -iBvd < /dev/rmt/0
[EX4] 특정 파일을 find 명령어로 출력하여 archive file로 restore
# find . -name 'file*' -print | cpio -ocvB >
file.list
[EX5] 디렉토리 /export/home/user01 디렉토리를 /export/home/user02로 backup
# cd /export/home/user01
# find . -print | cpio -pdmv /export/home/user02
[EX6] 현재 디렉토리 파일들을 새로운 파일(newfile)로
아키이빙
# ls | cpio -ocv > /test/newfile
[EX7] 디렉토리 안에서 파일 풀기
# cd /test
# cat newfile | cpio -icd "memo/a1"
"memo/b*"
zip CMD
____________________
zip, zipcloak, zipnote, zipsplit - package and
compress (archive) files
zip is a
compression and file packaging
utility for Unix,
VMS, MSDOS,
OS/2, Windows NT, Minix, Atari
and Macintosh,
Amiga and
Acorn RISC OS.
It is
analogous to a combination of the UNIX commands tar(1)
and compress(1)
and is compatible with PKZIP
(Phil Katz's
ZIP for
MSDOS systems).
# man zip
.....
-r Travel the directory structure
recursively; for exam-
ple:
zip -r foo foo
In
this case, all the files and directories in foo
are
saved in a zip archive named foo.zip, including files
with
names starting with ".", since the recursion does
not use the shell's file-name substitution mechanism.
If
you wish to include only a specific
subset of the
files in directory foo and its
subdirectories, use the
-i
option to specify
the pattern of
files to be
included. You should
not use -r with the name ".*",
since
that matches ".." which will
attempt to zip up
the
parent directory (probably not what was intended).
.....
# man unzip
.....
-c extract files to stdout/screen
(``CRT''). This option
is similar to
the -p option except that the
name of
each
file is printed as it is extracted, the -a
option
is allowed, and
ASCII-EBCDIC conversion is automati-
cally
performed if appropriate. This option
is not
listed in the unzip usage screen.
.....
■ (파일 압축)
# zip file.zip file1 file2 file3
■ (파일 압축 확인)
# unzip -c file.zip
■ (파일 압축 해제)
# unzip file.zip
[참고] 명령어 호환
Unix zip 명령어<->
Unix jar 명령어
Unix zip 명령어<->
Window zip 명령어
jar CMD
____________________
archive tool
for Java archives
# jar cvf file.jar file1 file2 file3
# jar tvf file.jar
# jar xvf file.jar
dd CMD
---------------------
convert and copy a file
The dd
utility copies the specified input file to the speci-
fied output
with possible conversions. The
standard input
and output
are used by default. The input and
output block
sizes may
be specified to take advantage of raw physical
I/O. Sizes
are specified in bytes; a number may end with
k,
b, or
w to specify
multiplication by 1024, 512, or 2,
respectively. Numbers may also be separated by x to indicate
multiplication.
The dd
utility reads the input one block at
a time, using
the specified input block size. dd then processes
the block
of data
actually returned, which could be smaller
than the
requested block size. dd applies any conversions that have
been
specified and writes the resulting data to
the output
in blocks
of the specified output block size.
# man dd
.....
if=file
Specifies the input
path. Standard input
is the
default.
of=file
Specifies the output path. Standard
output is the
default. If the
seek=expr conversion is not
also
specified, the output file will
be truncated before
the copy begins, unless conv=notrunc
is specified. If
seek=expr is specified, but conv=notrunc is not,
the
effect of the copy will be to preserve the blocks in
the
output file over which dd seeks, but no other por-
tion
of
the output file will be preserved. (If the
size
of the seek plus the size of the
input file is
less than the
previous size of the output file, the
output file is shortened by the copy.)
bs=n Sets both input and output block sizes
to n bytes,
superseding ibs= and obs=. If no conversion other than
sync, noerror, and notrunc is
specified, each input
block is copied
to the output
as a single block
without
aggregating short blocks.
skip=n
Skips n input blocks (using the specified input block
size) before starting to copy. On
seekable files, the
implementation reads the blocks or seeks past them. On
non-seekable files,
the blocks are read and the data
is
discarded.
seek=n
Skips n blocks (using the specified output block size)
from beginning of output file
before copying. On non-
seekable files, existing blocks
are read and
space
from the current end-of-file to
the specified offset,
if
any, is filled with null bytes. On seekable
files,
the implementation seeks
to the specified offset or
reads the blocks as described for non-seekable files.
count=n
Copies only n input blocks.
.....
(명령어 형식)
# dd if=filename of=filename bs=n seek=n skip=n
count=n
(if : Input File, of : Output File, bs : Block Size)
[EX1] 큰 파일 생성(Big File creation)
# dd if=/dev/zero of=/swap/swapfile bs=1024
count=102400
[EX2] VTOC/Super Block 삭제
# dd if=/dev/zero of=/dev/rdsk/c0t0d0s4 bs=512
count=1
# dd if=/dev/zero of=/dev/rdsk/c0t0d0s4 bs=512
count=32
# dd if=/dev/zero of=/dev/rdsk/c0t0d0s1 bs=512
skeep=11 count=1
[EX3] 디스크 마이그레이션(Disk Migration)
# dd if=/dev/dsk/c0t0d0s2 of=/dev/dsk/c0t1d0s2
# dd if=/dev/rdsk/c0t0d0s2 of=/dev/rdsk/c0t1d0s2
bs=4096
# dd if=/dev/rdsk/c0t0d0s2 of=/dev/rdsk/c0t1d0s2
bs=128k
[EX4] 테잎 장치에 백업
# dd if=/dev/rdsk/c0t0d0s7 of=/dev/rmt/0
# dd if=/dev/rmt/0 of=/dev/rmt/1
[참고문서] /root/docs_html/Reference/DiskMigration.txt
 invalid-file
출처 : http://cafe.daum.net/bscsolaris
ln CMD
__________
make hard or symbolic links to files
The ln
utility may be used to create both hard
links and
symbolic links. A hard
link is a pointer to a file and is
indistinguishable from the
original directory entry.
Any
changes to
a file are effective independent of the name used
to
reference the file. Hard links may not span file systems
and may
not refer to directories.
■ 하드 링크(Hard Link)
■ 심볼릭 링크(Symbolic Link, Soft Link)
(1) 하드 링크(Hard Link)
# ln file1 file2
- file1, file2의 용량은 같은가?
- file1, file2의 inode number는 같은가?
- file1을 편집하면 file2의
내용은 어떤가?
- "ls -li file*"하면 특이한 변화는 있는가?
- When Original File
Delete!!
- filesystem을 넘어서 링크를 걸수 있는가?
(2) 십볼릭 링크(Symbolic Link)
# ln -s file1
file2
- file1, file2의 용량은 같은가?
- file1, file2의 inode number는 같은가?
- file1을 편집하면 file2의
내용은 어떤가?
- "ls -li file*"하면 특이한 변화는 있는가?
- When Original File
Delete!!
- filesystem을 넘어서 링크를 걸수 있는가?
(기본 설정 점검)
- 파일에 관련한 하드 링크는 1이다.
- 디렉토리 관련한 하드 링크는 2이다.
(실습 준비)
# mkdir /test
# cd /test
# rm -r *
(기본 설정 점검 실습)
# touch file1
# ls -l file1
-rw-r--r-- 1
root other 0
2월 5 15:42 file1
Hard Link Count : 1
# mkdir dir1
# ls -l
drwxr-xr-x 2
root other 512
1월 8 20:47 dir1
Hard Link Count : 2
[EX] 하드 링크 실습
# echo 111 > file1
# cat file1
# ln file1 file2
# ls -l
(파일의 크기 점검, 링크 카운트)
# ls -li
(Inode 번호 점검)
# echo 2222 >> file2
# cat file2
# cat file1
(파일의 내용 확인)
# rm file1
(원본 파일(Original File)을 지우면!!)
# cat file2
[EX] 심볼릭 링크 실습
# ln -s file2 file3
# ls -l
(파일의 크기 점검, 링크 카운트 점검)
# ls -li
(Inode 번호 점검)
# echo 3333 >> file3
# cat file2
(파일의 내용 점검)
# rm file2
(원본 파일(Original File)을 지우면!!)
# cat file3
[참고] 일반 파일의 하드 링크 확인 방법(링크 카운트 값을 확인한다.)
file1에 file2가 하드링크가 되어 있는지 확인 하는 방법
- ls 명령어의 -i 옵션을 사용하여 Inode 번호를 확인 한다.
# ls
-li file*
- find 명령어의 -inum 옵션을
사용한다.
# find . -inum 450 -type f
심볼릭 vs 하드 링크
다른 파티션or 슬라이스를 넘어서 링크를 걸 수 있다.
하드링크에서는 모든게 원본 파일이 된다.
출처 : http://cafe.daum.net/bscsolaris
검색에 관련한 명령어
■ grep 명령어
■ find 명령어
grep CMD
__________________
search a file for a pattern
globally/regular/expression
The grep utility searches text files for a pattern and
prints all lines that contain that pattern. It uses a com-
pact non-deterministic algorithm.
Be careful using the characters $, *, [, ^, |, (, ), and \
in the pattern_list because they are also meaningful to the
shell. It is safest to enclose the entire pattern_list in
single quotes '...'.
If no files are specified, grep assumes standard input. Nor-
mally, each line found is copied to standard output. The
file name is printed before each line found if there is more
than one input file.
(명령어 형식)
grep OPTION(s) PATTERN filename
(기본 사용법)
# grep root /etc/passwd
[참고] 실무 사용예
# CMD | grep inetd
# cat /etc/passwd | grep root (# grep root /etc/passwd)
# ps -ef | grep inetd
# pkginfo | grep Apache
# patchadd -p | grep 115158-10
# cat /var/adm/messages | grep 'Jan'
# cat /var/adm/messages | grep 'Jan 15'
# cat /var/adm/messages | grep 'Jan 15 14:'
# cat /var/adm/messages | grep 'Jan 15 14:26:'
# cat /var/adm/messages | grep warn
# cat /var/adm/messages | grep inetd
(옵션 사용법)
# grep -c root /etc/passwd (-c : count) // -c : 개수
# grep -n root /etc/passwd (-n : number line) // -l : 찾은 라인 넘버
# grep -l root /etc/hosts /etc/passwd /etc/group (-l : list files) // -ㅣ : 찾은 파일 list
# grep -v root /etc/passwd (-v : inVerse, except) // -v : 제외
# grep -i root /etc/passwd (-i : ignore case, 대문자/소문자) // -I : 대소문자 구분 없이
[참고] -c, -n 옵션
쉘 스크립트에서 많이 활용하고 있다.
[참고] grep -v 명령어 실습
# prtconf
# prtconf | grep -v not
Not attached devide
[참고] grep -l 명령어 실습
부팅과정(Boot Sequence)
Server PowerON => POST => Boot Program => Kernel => init process
......
Server Error
......
# grep -l "Server Error" /etc/rc?.d/* // “Sever Error” 메시지를 나타낸 파일 리스트를 보여줌
/etc/rcS.d/S30network.sh
# vi S30network.sh
....
/Server Error
....
if [ Condition ] ; then
Statement(Action)
else
echo "Server Error"
fi
(패턴 사용법)
정규화된 표현식(Regular Expression)
. no...y //임의의 문자 1개 대용
[ab] [Rr]oot // [Rr] oot고정 R or r 매치
[a-c] [a-c]bc // [a-c] bc고정 a,b,c 에서 매치
[^a] [^a]bc // [^a] bc고정 첫글자 a를 제외한 한 개 글자 ?????????????
? /etc/rc?.d/ // ? 한 개의 모든 문자
* file* // file 뒤에 모든 것 1나 이상의
^root ^root // 라인의 처음이 root로 시작
root$ root$ // 라인의 끝이 root로
# grep 'PATTERN(s)' filename
# grep 'no...y' /etc/passwd
# grep '[Rr]oot' /etc/passwd
# grep 'r*t' /etc/passwd
# grep '^root' /etc/passwd
# grep 'root$' /etc/group
[참고] egrep / fgrep
- egrep 명령어(Extended grep)
- fgrep 명령어(Fixed grep)
# egrep '(Network|uucp) Admin' /etc/passwd
# fgrep '*' /etc/system
find CMD
__________________
find files
The find utility recursively descends the directory hierar-
chy for each path seeking files that match a Boolean expres-
sion written in the primaries given below.
find will be able to descend to arbitrary depths in a file
hierarchy and will not fail due to path length limitations
(unless a path operand specified by the application exceeds
PATH_MAX requirements).
(1). find / -name core -type f
d
(2). find / -user user01 -group staff -type f
(3). find / -atime -7 -type f (atime : access time)
-mtime 7 (mtime : modify time)
+7
(4). find / -perm -4000 -o -perm -2000 -type f
-perm 755
-755
(5). find / -size 3000c -type f
+3000c
-3000c
(6). find / -name core -type f -exec rm {} \;
(EX) find CMD 실습
(실습 준비)
# cd /test
# rm -r *
# touch file1 file2
# mkdir dir1 dir2
# touch dir1/file1
# touch dir2/file3
/ - test -+- dir1 - file1
+- dir2 - file3
+- file1
+- file2
[그림] 실습 환경
(첫번째 형식) find / -name core -type f
# cd /test
# find . -name file1 -type f
./dir1/file1
./file1
[참고] # find . -name "*.log" -type f
(두번째 형식) find / -user user01 -group staff
# ls -l file1 (file1: root other)
# chown user01 file1
# ls -l file1 (file1: user01 other)
# find . -user user01 -type f
./file1
(세번째 형식) find / -mtime 7 -type f
# cd dir2
# touch file1 file2 file3 file4 file5 file6
# date
현재 시간: 12월6일 11시11분 (2월3일 17시50일)
# touch -t 12051111 file2
# touch -t 12041111 file3
# touch -t 12031111 file4
# touch -t 12021111 file5
# touch -t 12011111 file6
파일은 미래에 만들었다는 것은 없다
아래와같이 된다.
mtime +3
+----+
mtime -3
20 21 22+----+----+
19 mtime 3
----+----+----+----+----+----+----+----+----+----+
17 18 19 20 21 22
now
# ls -l file*
# find . -mtime 3 -type f
./file4
# find . -mtime -3 -type f
./file3
./file1
./file2
# find . -mtime +3 -type f
./file5
./file6
(4번째 형식) find / -perm -4000 -o -perm -2000 -type f
-perm 644 (rw-r--r--)
-perm -644 (rw-r--r--)
-6XX rw-
rwx
-4XX r--
r-x
rw-
rwx
-perm -4000 (최소한 SetUID bit 인것)
# find /test -perm 644 -type f
# find /test -perm -644 (rw-r--r--)
(rwxr-xr-x)
# cd /test
# mkdir dir3
# cd dir3
# touch file1 file2 file3 file4 file5 file6 file7 file8
# chmod 000 file1 (---)
# chmod 100 file2 (--x)
# chmod 200 file3 (-w-)
# chmod 300 file4 (-wx)
# chmod 400 file5 (r--)
# chmod 500 file6 (r-x)
# chmod 600 file7 (rw-)
# chmod 700 file8 (rwx)
# find . -perm 600 -type f -ls (rw-) // 딱 600
# find . -perm -400 -type f -ls (r--) // 400 이상
(다섯번째 형식) find / -size 500c -type f
# cd /test/dir2
# cp /etc/passwd file10
# ls -l file10 (size : 560 bytes)
# cp /etc/inet/inetd.conf file11
# ls -l file11 (size : 6961 bytes)
# find . -size 560c -type f // size 가 딱 560c
# find . -size +560c -type f // size 가 560c 초과
# find . -size -560c -type f // size 가 560c 미만
(여섯번째 형식) find / -name core -type f -exec rm {} \;
# cd /test
# find . -name file1 -type f
# find . -name file1 -type f -exec rm {} \;
# ls -R
[참고] find 명령어 활용예
■ 로그 파일 정책(Log Policy)
- 로그 디렉토리 안에 로그 파일이 최근 30일 로그 기록만 남기도록 한다.
# crontab -e
Mi Ho Da Mo We CMD
0 5 1 * * find /Log_Dir -name "*.log" -type f -mtime +30 -exec rm {} \;
분 시 일 월 주
■ find 명령어의 다른 옵션들
# find / -nouser -type f
# find / -nogroup -type f
# find / \( -type f -o -type d \) -perm -0002 -ls
# find / -perm -o=w -type f -print
■ find 명령어를 통한 퍼미션 변경
/test/dir01 -+- file1
+- file2
+- dir02 - file3
+- dir03
file* => 640(rw-r-----)
# find /test/dir01 -type f -exec chmod 640 {} \;
# find /test/dir01 -type f -name "*.log" -exec chmod 640 {} \;
[EX] find 명령어를 활용한 퍼미션 변경
# find /test/dir01 -type f -ls
# find /test/dir01 -type f -exec chmod 640 {} \;
# find /test/dir01 -type f -ls
[참고] 로그 파일이 너무 많다면 !!!!!
- Log_Dir/* (100만개 이상의 로그파일)
# cd /Log_Dir
# rm *
로그 파일을 지울수 없거나 혹은 지우것을 확인하기 어렵다.
# cd ..
# ls
Log_Dir
# rm -r Log_Dir
# ps
# rm -r Log_Dir &
# while [ 1 ]
> do
> ps | grep rm | grep -v grep
> sleep 2
> done
[참고] 서버 해킹을 당한 경우의 간단한 처리
(1). 로그 백업
# cp -r /var /backup/var.20060816
# cd /var/adm/"logfile"
(2). 히스토리 확인
# history > /backup/history.20060816
# cat ~/.sh_history
(3). 프로세스 확인
# ps -ef | more
(4). find 명령어 활용
# find / -mtime -7 -type f 2>/dev/null
# find / -nouser -type f
# find / -perm -2 -type f
출처 : http://cafe.daum.net/bscsolaris
자주 사용되지는 않는 명령어
■ cmp CMD / diff CMD
■ sort CMD
■ file CMD
cmp CMD / diff CMD
__________________
compare two files // 텍스트 비교
The cmp utility compares two files. cmp will write no output
if the files are the same. Under default options, if they
differ, it writes to standard output the byte and line
numbers at which the first difference occurred. Bytes and
lines are numbered beginning with 1. If one file is an ini-
tial subsequence of the other, that fact is noted. skip1 and
skip2 are initial byte offsets into file1 and file2 respec-
tively, and may be either octal or decimal; a leading 0
denotes octal.
The diff utility will compare the contents of file1 and
file2 and write to standard output a list of changes neces-
sary to convert file1 into file2. This list should be
minimal. Except in rare circumstances, diff finds a smallest
sufficient set of file differences. No output will be pro-
duced if the files are identical.
(명령어 형식)
# cmp file1 file2 두개의 파일에 대한 간략한 차이점 확인
# diff file1 file2 두개의 파일에 대한 자세한 차이점 확인
# diff -c file1 file2 // -c : 좀더 디테일하게
[EX] cmp 명령어 실습
# cd /test
# cat > file1
1111
2222
3333
<CTRL + D>
# cat file1
# cp file1 file2
# cat > file3
1111
2222
4444
<CTRL + D>
# cat file3
file1 <------> file2 : 같은 파일
file1 <------> file3 : 다른 파일
# cmp file1 file2
# cmp file1 file3
file1 file3 differ: char 11, line 3
# diff file1 file2
# diff file1 file3
# diff -c file1 file3
[참고] cmp 명령어를 사용한 백업 파일과 원본 파일 비교
원본 DISK 백업 테이프
-------------- ----------------
설정파일
/etc/ftpd/ftpaccess /etc/ftpd/ftpacess
A |
--|------------ --------|-------
| |
+---> 원본 파일과 비교 <--------+ 복구
# cd /test
# cp /etc/ftpd/ftpaccess /test
# cp ftpaccess ftpaccess.orig
# vi ftpaccess
......
[수정 전]
chmod no anonymous
delete no anonymous
[수정 후]
chmod yes anonymous
delete yes anonymous
# diff ftpaccess ftpaccess.orig
(출력 결과 분석)
[참고] cmp 명령어를 통한 파일의 무결성 점검(File Consistency Check)
파일 무결성 점검 스크립트 파일의 원리(File Check Principle)
(1). /etc/passwd => /etc/passwd.old
(2). cmp /etc/passwd /etc/passwd.old
cmp /etc/passwd /etc/passwd.old > file.txt
if [ -s file.txt ] ; then
Action1
else
Action2
fi
[참고] 172.16.8.254:/root/shell/check_file.sh
# mkdir /root
# rcp -r 172.16.8.254:/root/shell /root
sort CMD
______________________
sort, merge, or sequence check text files
The sort command sorts lines of all the named files together
and writes the result on the standard output.
Comparisons are based on one or more sort keys extracted
from each line of input. By default, there is one sort key,
the entire input line. Lines are ordered according to the
collating sequence of the current locale.
(명령어 형식) // separate default : 스페이스 , 탭
# sort /etc/passwd
# sort -r /etc/passwd (-r : reverse , 거꾸로 내림차순)
# sort -t : -k 3 -n /etc/passwd (-t : seperate, -k : key, -n : number)
# sort -k 3 filename // -f # : 필드 구분, # 은 구분자
# sort -k 3,5 filename // -k 필드 3,5 로 sort
[참고] 많이 실행되는 sort 명령어 실행 방법
# CMD | sort
# CMD | sort -r
# CMD | sort -k 3
[EX] sort 명령어 실습
# rcp 172.16.8.254:/root/conf_sample/DB.txt /test
# cat DB.txt
Chan1 10 20 30 50
Chan2 20 25 31 20
Chan3 30 20 30 40
Chan4 50 20 30 80
# sort DB.txt
# sort -r DB.txt
# sort -k 3 -n DB.txt
# sort -k 3,5 -n DB.txt
[EX] sort 명령어 활용 예
(윈도우 컴퓨터의 예)
c:\ 9.9G/10G
# cd /var
# df –h // -h : human
# du -sk /var
# du -sk * | sort
# du -sk * | sort -n
# du -sk * | sort -nr | more
- s : sum
- k : kbytes
file CMD
____________________
determine file type
The file utility performs a series of tests on each file
supplied by file and, optionally, on each file listed in
ffile in an attempt to classify it. If the file is not a
regular file, its file type is identified. The file types
directory, FIFO, block special, and character special are
identified as such. If the file is a regular file and the
file is zero-length, it is identified as an empty file.
(명령어 형식)
# file /etc/passwd
[EX] 파일의 종류 확인
# file /etc/passwd
/etc/passwd: ascii text (ASCII 파일)
# file /usr/bin/ls
/usr/bin/ls: ELF 32-bit MSB executable SPARC Version 1, dynamically linked, stripped (Binary 파일)
# file /var/adm/utmpx
/var/adm/utmpx: data (Data 파일)
# file /etc/hosts /etc
/etc/hosts: ascii text
/etc: directory (Directory 파일)
[참고] 특정 디렉토리 하위의 많은 파일들의 형식
# cd /var
# file *
Windows -> 파일.확장자(0)
Unix -> 파일.확장자(X)
[EX] file 명령어의 활용예
Internet File : file.tar.gz -> file.tar (Modification)
# mv file.tar.gz file.tar
# ls -l file.tar
# tar xvf file.tar
# file file.tar
# mv file.tar file.tar.gz
# gzip -d file.tar.gz
# tar xvf file.tar
출처 : http://cafe.daum.net/bscsolaris
■ 파일의 속성 정보 변경(File Attribution Chaging)
■ chown CMD
■ chgrp CMD
■ chmod CMD
# ls -l filename
-rw-r--r-- 1 user01 staff size mtime filename
Filetype :
Mode/Perm : chmod
Link Count : ln
Ownership : chown
Groupship : chgrp
Filesize :
mtime : touch
filename : mv
chown CMD
__________________
change file ownership // 소유권 변경
The chown utility will set the user ID of the file named by
each file to the user ID specified by owner, and, option-
ally, will set the group ID to that specified by group.
If chown is invoked by other than the super-user, the set-
user-ID bit is cleared.
Only the owner of a file (or the super-user) may change the
owner of that file.
# ls -l filename
-rw-r--r-- 1 user01 staff ..... filename
(명령어 형식)
# chown user02 filename (# chown UID filename)
# chown user02:other filename (# chown user02.other filename: X)
# chown -R user02 dir01
// -R recursive : 하위로~부터
[EX] chown 명령어 실습
(실습 준비)
# cd /test
# rm -r *
# touch file1
# ls -l file1
-rw-r--r-- 1 root other ..... file1
(chown user01 filename 형식 실습)
# chown user01 file1
# ls -l
(chown user01:staff filename 형식 실습)
# chown user02:staff file1
# ls -l
[EX] chown -R 명령어 실습
(실습 준비)
# cd /test
# mkdir dir1
# mkdir -p dir1/dir2/dir3
# touch dir1/file1
# touch dir1/file2
(chown -R user01:other dir 형식 실습)
# chown -R user01:other dir1
# ls -lR
chgrp CMD
__________________
change file group ownership // 파일의 소유 그룹권을 변경
The chgrp utility will set the group ID of the file named by
each file operand to the group ID specified by the group
operand.
# ls -l filename
-rw-r--r-- 1 user01 staff ..... filename
(명령어 형식)
# chgrp other filename (# chgrp GID filename)
[EX] chgrp 명령어 실습
# cd /test
# ls -l file1
-rw-r--r-- 1 user02 staff ..... file1
# chgrp other file1
# ls -l
chmod CMD
__________________
change the permissions mode of a file // 파일의 권한을 변경
The chmod utility changes or assigns the mode of a file. The
mode of a file specifies its permissions and other attri-
butes. The mode may be absolute or symbolic.
# ls -l filename
-rw-r--r-- 1 user01 staff ..... filename
- : file type (-, d, l)
rw- : owner perm.
r-- : group perm.
r-- : other perm.
1 : link count(hard link)
user01 : ownership
staff : groupship
size : bytes
mtime : modify time
[참고] rw-r--r-- : 퍼미션 모드(Permission Mode)
퍼미션 변경 방법
■ 심볼릭 모드 방법(Symbolic Mode)
■ 옥탈 모드 방법(Octal Mode, Absolute Mode)
(1) 심볼 모드 방법(Symbolic Mode)
심볼들의 정의
-> u(user), g(group), o(other), a(all)
-> +(plus), -(minors), =(equal)
-> r(read), w(write), x(eXcution)
chmod u + r filename
g - w
o = x // other 권한을 기존의 값과 상관없이 x만으로 셋팅이 된다.
a
[EX] 심볼 모드를 사용한 퍼미션 변경 실습
# touch file1
# ls -l file1
-rw-r--r-- 1 root other 0 mtime file1
# chmod u+x file1
# chmod g-r file1
# chmod a=rwx file1
# chmod u-r,g+x file1
(2) 옥탈 모드 방법(Octal Mode)
rwx : 7
rw- : 6
r-x : 5
r-- : 4
-wx : 3
-w- : 2
--x : 1
--- : 0
chmod 755 filename (rwxr-xr-x)
[EX] 옥탈모드(Octal Mode)를 사용한 퍼미션 변경 방법 실습
# touch file1
# ls -l file1
-rw-r--r-- 1 root other 0 mtime file1
# chmod 744 file1
# chmod 754 file1
[참고] chmod -R (Recusive)
chmod 명령어에 -R 옵션을 사용하는 경우는 잘 사용되지 않는 경우이며 반드시 사용해야 하
는 경우 ls 명령어의 -lR 옵션을 통해서 백업을 받아 두어야 한다.
(특정 디렉토리 하위의 모든 퍼미션 변경의 경우)
# ls -lR > perm.txt
# chmod -R 755 dir01
(특정 디렉토리 하위의 특정 파일 퍼미션 변경의 경우)
/test/dir01
- file1
- file2
- dir02 - file3
- dir03
file* => 640(rw-r-----)
# cd /test
# find /test/dir01 -type f -exec chmod 640 {} \;
# find /test/dir01 -type f –name “*.log” -exec chmod 640 {} \;
[참고] File & Directory permission 의미
___________________________________________________________________________________
file r read 파일의 read권한은 파일안을 볼 수 있거나 복사할 수 있음
w write write 권한은 파일안의 내용을 추가 하거나 삭제, 변경 가능
x execution execution 권한은 파일을 실행할 수 있다는 의미
Dir. r ls read 권한은 디렉토리 하위 내용을 ls 할 수 있음
w add, delete write 권한은 디렉토리 하위의 내용을 삭제, 추가, 변경 가능
x cd execution 권한은 디렉토리 하위로 cd 할 수 있음
___________________________________________________________________________________
[EX] 파일 퍼미션 실습
반드시 user01, user02 사용자가 존재해야 한다.
[TERM1] user01 사용자 윈도우
# telnet localhost
user01 사용자로 로그인
$ touch file1
$ ls -l
-rw-r--r-- 1 user01 staff 0 mtime file1
[TERM2] user02 사용자 윈도우
# telnet lcoalhost
user02 사용자로 로그인
$ cd ~user01
$ vi file1
Test for user02
:wq! (파일의 내용을 넣을 수 없다.)
-rw-r--r-- 1 user01 staff 0 mtime file1
A A
| |
V |
user02 V
user02's group
[EX] 디렉토리 퍼미션 실습
[TERM1] user01 사용자 윈도우
$ mkdir dir1
$ ls -ld dir1 (rwxr-xr-x user01 staff)
$ chmod 775 dir1
$ ls -ld dir1 (rwxrwxr-x user01 staff)
$ touch dir1/file2
[TERM2] user02 사용자 윈도우
$ cd ~user01
$ cd dir1
$ rm file2 (파일을 지울수 있다.)
$ mkdir dir2 (디렉토리를 지울수 있다.)
umask CMD
__________________
get or set the file mode creation mask
# touch file1
# mkdir dir1
# ls -l file1 (644,rw-r--r--)
# ls -ld dir1 (755,rwxr-xr-x)
* 002, 022, 027
* default permission
file : 666 (Max Perm)
dir : 777 (Max Perm)
# umask
# umask 002
# umask
# touch file2
# ls -l file2 (664, rw-rw-r--)
# mkdir dir2
# ls -ld dir2 (775, rwxrwxr-x)
# umask 027
# umask
# touch file3
# mkdir dir3
# ls -l
---------------------------
File Dir.
---------------------------
666 777
umask 022 022
---------------------------
644 755
---------------------------
비트의 and 연산 è - 연산과 같음
비트의 or 연산 è 특정비트 mask 할시
[참고] /etc/profile의 umask 정의
umask 022
(3). 특수 퍼미션(SetUID, SetGID, Sticky Bits)
■ SetUID, SetGID 의미(SetUID, SetGID Means)
■ Sticky Bits 의미(Sticky Bits Means)
■ 특수 퍼미션 설정(Special Permission configuration)
(3-1) SetUID, SetGID 의미(SetUID, SetGID Means)
일반 사용자가 자신의 패스워드를 변경하기 위해 passwd 명령어를 사용할 수 있다. 하지만 passwd 명령어의 원 권한자는 root인데 파일을 실행 하는 동안 setuid를 가짐으로서 root의 역할을 가질 수 있는 것이다.
$ passwd
$ ls -l /etc/passwd (r--r--r-- root sys, 444)
r--r--r--
$ ls -l /etc/shadow (r-------- root sys, 400)
r--------
$ ls -l /usr/bin/passwd
r-sr-sr-x root sys
[user01]
$ passwd
===================
[root] /etc/passwd (root, sys)
/etc/shadow
===================
$ id
[user01]
$ ls -l /usr/bin/su
r-sr-xr-x root sys
[user01]
$ su -
====================
....
ksh(fork) (root)
....
====================
$ id
[user01]
ksh (user01)
-------------------+ +-----------------
| |
| ksh(root) |
+----------------------+
[참고] 해킹 기법(Hacking Tech.)
// 임시파일 추적할 때 pfiles 를 이용 프로세스가 생성 시킨 file을 추적할 수 있다.
- Stack Buffer Overflow
- Heap Buffer Overflow
- Race Condition
- IP Spoofing
- etc
[Race Condition]
- SetUID filename
- tmp file make
- Hacker known a tmp filename
$ ./su.sh (user01, SetUID root)
---- su.sh --------- ------ crack.sh ------
(root)
/tmp/.tmp1
----------------------
------ test.sh -------
--------------------- ----------------------
[Backdoor]
# cp /usr/bin/ksh /tmp
# chmod 4755 /tmp/ksh
(-rwxr-xr-x 1 root other 209268 3월 15 10:37 /tmp/ksh*)
(-rwsr-xr-x 1 root other 209268 3월 15 10:37 /tmp/ksh*)
# telnet localhost
user01 사용자로 로그인
$ cd /tmp
$ ./ksh
# id -a
- File Name for Backdoor
# touch " " (blank :4)
# touch ". "
# touch /dev/rdsk/c0t0d0p7
# touch /tmp/.Rx2Pailb
(3-2). Sticky Bits 의미(Sticky Bits Means)
Sticky bit는 일반적으로 디렉토리에 주어지는 의미이다. 디렉토리에 sticky bits가 주어지면 그 디렉토리 하위의 모든 파일과 디렉토리들은 다른 사용자가 볼 수 있지만 지우거나 수정을 할 수 없다.
예로 게시판을 들 수 있다.
# ls -ld /tmp
drwxrwxrwt 7 root sys 336 1월 14 19:35 /tmp
/export/home/user01 <=======> /tmp
user02
......
(3-3). 특수 퍼미션 설정(Sfecial Permission Configuration)
SetUID : 4 r
SetGID : 2 w
Sticky Bits : 1 x
(a). SetUID 설정 방법
# chmod 4755 filename
rwxr-xr-x => rwsr-xr-x
# chmod 4100 filename(Min Permission) --x------ -> --s------
# chmod 4655 filename(-rwSr-xr-x) rw-r-xr-x -> rwSr-xr-x
(b). SetGID 설정 방법
# chmod 2755 filename
rwxr-xr-x => rwxr-sr-x
# chmod 2010 filename(Min Permission) -----x--- -> -----s---
# chmod 2765 filename(-rwxrwlr-x) rwxrw-r-x -> rwxrwlr-x
[참고] Solaris(Public Writable Directory)
디렉토리에 관련해서 SetGID를 설정하는 것은 Symbolic Mode 방식으로만 가능하다.
# chmod g+s dirname (# chmod u+s filename)
g+s
o+t
======= dirname ========== (rwxrwsr-x) root class1
user01 make -> file1 (user01:class1)
user02 make -> file2 (user02:class1)
==========================
======== dirname ========== (root class2) rwxrwxr-x
user01 make -> file1 (user01:staff1)
user02 make -> file2 (user02:staff2)
===========================
# groupadd class2
# usermod -G class2 user01
# usermod -G class2 user02
(d). Sticky Bits 설정 방법
# chmod 1777 dirname
rwxrwxrwx -> rwxrwxrwt
# chmod 1001 dirname(Min Permission) --------x -> --------t
# chmod 1776 dirname(drwxrwxrwT) rwxrwxrw- -> rwxrwxrwT
(e). SetUID / SetGID 파일 검색(SetUID/SetGID Search)
# find / -perm -4000 -type f
# find / -perm -2000 -type f // -2000 : 최소 2000을 만족하는~
# find / ( -perm -4000 -o -perm -2000 ) -type f (올바른 형식 X)
# find / \( -perm -4000 -o -perm -2000 \) -type f (올바른 형식 0)
[참고] -o : OR, -a : AND
[EX] SetUID / SetGID 관리자의 정책
- 홈디렉토리(/export/home) 하위에는 SetUID, SetGID는 존재하면 안된다.
- 홈디렉토리(/export/home) 하위에 SetUID, SetGID 파일 존재 유무를 정기적으로 찾아서
점검한다.
사용자 홈디렉토리 : /export/home/user01......
(정책1) SetUID, SetGID 검색하는 경우
# find /export/home \( -perm -4000 -o -perm -2000 \) -type f
(정책2) SetUID, SetGID 검색하고 삭제하는 경우
# find /export/home -perm -4000 -exec rm {} \;
(정책3) SetUID, SetGID 생성시키는 사용자 경고 메세지 출력
- 사용자(user01)가 현재 로그인 되어 있는 상태 (who, w, talk 명령)
- 사용자(user01)가 현재 로그인 되어 있지 않은 상태 (/etc/profile)
# cat /etc/warnning.txt
Warnning
# vi /etc/profile
.....
if [ $LOGNAME = user01 ] ; then # # echo $LOGNAME
/bin/cat -s /etc/warnning.txt
fi
.....
[EX] WAS(Web Application Server)
- 상용 : Tmaxsoft JEUS, BEA Web Logic, IBM WebSphere, Oracle WAS, Sun WAS, .....
- 무료 : Jserv, Tomcat, Resin
Webserver (80, 8080) -> root 권한 필요
-> UNIX Port 번호 : Well-known Port(~1024)
Web Daemon(Example : httpd)
PORT 1 ~ 1023 : 반드시 root 권한 필요
PORT 1024 ~ : 일반사용자 권한으로도 가능
httpd (80) : 반드시 root 권한 필요
httpd (8080) : 일반사용자 권한으로도 가능
위의 경우 문제가 생길수 있다. 실제 실무에서는 서버 시스템에 root 사용자와 WAS 서비스
사용자가 구분되어 있는 경우가 많다. 일반사용자인 wasuser로서 WAS 프로그램을 설치하고
운용하기 때문에 데몬을 시작하는 스크립트가 wasuser 사용자의 권한으로 되어 있어서 이
사용자가 웹 데몬을 띄우게 되면 "Permission Denied"가 발생한다.
WAS -> wasuser 사용자
-------------------------
OS -> root 사용자
데몬 : httpd
데몬 띄우는 스크립트 : startup (예: # service httpd restart)
* wasuser가 httpd(80) 데몬을 띄울수 있도록 설정하는 관리자의 설정이 필요
# chown root:sys /was/bin/startup (root sys rwxr-xr-x -> rws-----x)
# chmod 4701 /was/bin/startup (root sys rwx-----x -> rws-----x)
or
# vi startup.c
main()
{
system(/was/bin/startup);
}
# gcc -o startup_C startup.c
# chmod 4701 startup_C
출처 : http://cafe.daum.net/bscsolaris
Chapter 5. Unix Basic Commands _ 사용자와 통신할때 사용하는 명령어
사용자와 통신(Communication) 할수 있는 명령어
■ mailx CMD
■ write CMD
■ talk CMD
mailx CMD
__________________
interactive message processing system
The mail utilities listed above provide a comfortable, flex-
ible environment for sending and receiving mail messages
electronically.
(명령어 형식)
# mailx
# mailx -H -u user01
# mailx -s "Test Mail" root@example.com < mailx.txt
[EX] 메일 보내기 / 받기 실습
# mailx user01
Subject : Test Mail <----- "Test Mail" 입력
Hello Test <----- 메일 내용 입력
<Ctrl + D> or <.>
# su - user01
$ mailx
.....
>N 2 Super-User Mon Jan 14 19:32 17/722 Mail for TEST
? 2 <----- '2' 입력
Message 2:
From root@solaris254.example.com Mon Jan 14 19:32:53 2008
Date: Mon, 14 Jan 2008 19:32:53 +0900 (KST)
From: Super-User <root@solaris254.example.com>
To: user01@solaris254.example.com
Subject: Mail for TEST
Hello, user01
? q <----- 'q' 입력
#
# man mailx
.....
-H Print header summary only.
-u user
Read user's mailbox. This is only effective if user's
mailbox is not read protected.
-s subject
Set the Subject header field to subject. subject
should be enclosed in quotes if it contains embedded
white space.
.....
[주의] mailx 명령어를 통해서 메일을 보내기 위해서는 다음과 같이 호스트의
이름의 설정이 메일 주소를 쓰는 형식과 같이 선언 되어 있어야 한다. 선언이
되어 있지 않다면 "solaris254.example.com" 같은 부분을 선언해 줘야 한다.
# vi /etc/hosts
......
[수정 전]
172.16.8.254 solaris254 loghost
[수정 후]
172.16.8.254 solaris254 solaris254.example.com loghost
...... A
|
+---- 새로 입력
write CMD
__________________
write to another user
The write utility reads lines from the user's standard input
and writes them to the terminal of another user.
user01 -----> user02
user01 <----- user02
(명령어 형식)
# write user01
talk CMD
__________________
talk to another user
The talk utility is a two-way, screen-oriented communication
program.
user01 <-----> user02 (메신저 기능)
# talk user01@localhost
[참고] user01 <==> user02 talk
user01 Window) # talk user02@localhost
user02 Window) # talk user01@localhost
[EX] root 사용자가 user01 사용자에게 talk 신청
[TERM1] user01 사용자 윈도우
# telnet localhost
user01 사용자로 로그인
[TERM2] root 사용자 윈도우
# who -----> user01 사용자 로그인 확인
# w -----> user01 사용자 활동량 점검
# talk user01@localhost
[TERM1] user01 사용자 윈도우
# talk root@localhost
출처 : http://cafe.daum.net/bscsolaris
기타 관리용 명령어
■ wc CMD
■ su CMD
■ id CMD
■ groups CMD
■ last CMD
■ who CMD
■ w CMD
■ rusers CMD
wc CMD
_________________
display a count of lines, words and characters in a file
The wc utility reads one or more input files and, by
default, writes the number of newline characters, words and
bytes contained in each input file to the standard output.
# wc /etc/passwd
# wc -l /etc/passwd // line count
# wc -w /etc/passwd // word count
# wc -c /etc/passwd // character count
[참조] wc -l 명령어 응용예
# cat /etc/passwd | wc -l
# pkginfo | wc -l
# patchadd -p | wc -l
# ps -ef | wc -l
(시스템 성능/사용량 카운트 수집)
(첫번째 예) Apache Webserver
- apache 1.3.X (Process 방식)
- apache 2.X (Thread 방식)
Web Client -----------------> Web Server
http://Server httpd
# ps -ef | grep httpd | wc -l > httpd.count
// process counting
(두번째 예)
# df -k
# df -k / | tail -1 | awk '{print $5}' > df.count
(세번째 예)
# ftpcount | grep realuser | awk '{print $5}' > ftp.count
su CMD
__________________
become super user or another user
The su command allows one to become another user without
logging off or to assume a role. The default user name is
root (superuser).
(명령어 형식)
su [user]
su - [user]
■ End User => root (O) EX) user01 => root
■ End User => End User (O) EX) user01 => user02
■ root => End User (O) EX) root => user01
■ root => root (X)
Becoming User bin While Retaining Your Previously
Exported Environment
To become user bin while retaining your previously exported
environment, execute:
example% su bin
Example 2: Becoming User bin and Changing to bin's Login
Environment
To become user bin but change the environment to what would
be expected if bin had originally logged in, execute:
example% su - bin
su 명령어에 "-"(Dash) 기호가 없는 경우에는 사용자의 EUID/EGID 값을 받게 되지만 사용자의 환경 변수들은 이전 사용자의 환경변수값을 받는다. 사용자만 전환하게 되는 것이다. su 명령어에 "-" 기호가 있는 경우에는 사용자의 EUID/EGID 값을 받게 되는 것 뿐만 아니라원본 사용자가 새로 로그인 한것 처럼 해준다. 사용자가 로그인을 하게 되면 홈디렉토리로 로그인 하게 되고 사용자의 환경 파일들을 읽어 들이기 때문에 사용자의 환경으로 적용되게 된다.
[EX] "su bin / su - bin" 명령어 실습
# cd /etc
# pwd
# su user01
(a). shell prompt (# echo $PS1)
(b). current directory (# pwd)
(c). echo $PATH
# id
# exit
# cd /etc
# pwd
# su - user01
(a). shellp prompt (# echo $PS1)
(b). current directory (# pwd)
(c). echo $PATH
$ id
$ exit
[참고] 오라클 사용자로 전환(When Oracle User Switching)
(시나리오) root 사용자로 작업을 하다가 oracle 사용자로 전환 해야 하는 경우 다음과 같
이 명령어를 사용하지 않는다면 문제가 발생할 수 있다. 이것은 oracle 사용자의 홈디렉토
리에 존재하는 환경파일(예: ~/.profile)의 변수 설정이 되지 않는다면 oracle 사용자가
정상적으로 작업을 할수 없기 때문이다.
[EX] 쉘 스크립트에서 많이 사용되는 su 명령어의 예
To execute command with the temporary environment and permissions of user bin
# su - bin -c "command args"
id CMD
__________________
return user identity
If no user operand is provided, the id utility writes the
user and group IDs and the corresponding user and group
names of the invoking process to standard output. If the
effective and real IDs do not match, both are written. If
multiple groups are supported by the underlying system,
/usr/xpg4/bin/id also writes the supplementary group affili-
ations of the invoking process.
(명령어 형식)
# id
# id -a
# id user01
[참고] root 사용자의 UID, GID
UID=0(root), GID=1(other)
[참고] UID, GID, EUID, EGID
- UID/GID - who am i // login 당시 !!!
- EUID/EGID - id, whoami // 현재 내가 누구인지
- UID (User Identification)
- EUID(Effective UID)
- GID (Group Identification)
- EGID(Effective GID)
[EX] UID, GID, EUID, EGID 개념의 이해
# telnet localhost
user01 사용자로 로그인
$ id
uid=100(user01) gid=100(class1)
$ /usr/ucb/whoami
user01
$ who am i
user01 pts/9 Feb 2 01:48 (localhost)
$ su - root
Password: <----- root 사용자 암호 입력
# id
uid=0(root) gid=1(other)
# /usr/ucb/whoami
root
# who am i
user01 pts/9 Feb 2 01:48 (localhost)
===== HOSTA ===== ===== HOSTB ======
# telnet HOSTB ------------> user01 사용자로 로그인
$ id
$ whoami
$ who am i
$ su - root
# id
# whoami
# who am i
----------------------------
UID EUID
----------------------------
500 500 --> user01 사용자로 로그인 했을때
500 0 --> "su - root" 명령어 수행 후
----------------------------
groups CMD
__________________
print group membership of user
The command groups prints on standard output the groups to
which you or the optionally specified user belong. Each user
belongs to a group specified in /etc/passwd and possibly to
other groups as specified in /etc/group. Note that
/etc/passwd specifies the numerical ID (gid) of the group.
The groups command converts gid to the group name in the
output.
(명령어 형식)
# groups
# groups user01
# groups user01 user02
[참조] /etc/group에 그룹 정의
[EX] groups 명령어 실습
# groups
other root bin sys adm uucp mail tty lp nuucp daemon
# groups user01
staff
# groups user01 root
user01 : staff
root : other root bin sys adm uucp mail tty lp nuucp daemon
last CMD
-------------
display login and logout information about users and terminals
The last command looks in the /var/adm/wtmpx file, which
records all logins and logouts, for information about a
user, a terminal, or any group of users and terminals. Argu-
ments specify names of users or terminals of interest. If
multiple arguments are given, the information applicable to
any of the arguments is printed. For example, last root con-
sole lists all of root's sessions, as well as all sessions
on the console terminal. last displays the sessions of the
specified users and terminals, most recent first, indicating
the times at which the session began, the duration of the
session, and the terminal on which the session took place.
last also indicates whether the session is continuing or was
cut short by a reboot.
The pseudo-user reboot logs in when the system reboots.
Thus, # last reboot
(명령어 형식)
# last
# last user01
# last reboot
+----------+
| |
| User |
| |
+----------+
| |
| reboot |
| |
+----------+
(명령어 출력 화면 해석)
# last user01
.....
user01 pts/11 localhost Sat Jan 12 14:51 - 15:29 (00:38)
----------------------------------------------------
필드 설명
----------------------------------------------------
user01 사용자의 이름
pts/11 제어 터미널(가상 터미널)
localhost 원격 호스트
Sat Jan 12 14:51 로그인 시간
15:29 로그아웃 시간
(00:38) 총 사용한 시간
----------------------------------------------------
# last reboot
......
reboot system boot Thu Jan 10 15:39
----------------------------------------------------
필드 설명
----------------------------------------------------
reboot 가상사용자
system boot 상태정보
Thu Jan 10 15:39 리부팅 시간
----------------------------------------------------
[참고] wtmpx, utmpx 파일
/var/adm/utmpx - who 명령어 참조
/var/adm/wtmpx - last 명령어 참조
at linux
/var/adm/utmp – who
/var/adm/wtmp - last
[EX] /var/adm/utmpx & /var/adm/wtmpx
# cd /var/adm
# mv wtmpx wtmpx.old
# last
# who
# mv wmtpx.old wtmpx
exit CMD
--------------
End the application
Terminate the process, returning returnCode to the system as
the exit status. If returnCode isn't specified then it
defaults to 0.
(명령어 형식)
# exit [Number]
[참고] exit Number
0 : 정상 종료(Normal Termination)
1 ~ 255 : 비정상 종료(Abnormal Termination)
[EX1] 현재 터미널 종료
# exit
[EX2] 로그 아웃
# telnet 172.16.8.254
root 사용자로 로그인
# hostname
# exit
[EX3] 서브 쉘 종료
# bash
# ps
# exit
who CMD
__________________
who is on the system // 현재 로그인된 사용자 정보 확인
The who utility can list the user's name, terminal line,
login time, elapsed time since activity occurred on the
line, and the process-ID of the command interpreter (shell)
for each current UNIX system user. It examines the
/var/adm/utmpx file to obtain its information. If file is
given, that file (which must be in utmpx(4) format) is exam-
ined. Usually, file will be /var/adm/wtmpx, which contains a
history of all the logins since the file was last created.
(명령어 형식)
# who
# who -r (현재 Runlevel 확인)
# whoami (현재 사용자 정보 확인)
# who am i (로그인한 사용자 정보 확인)
# who -H (Headline, 헤드라인 정보 표시)
(명령어 출력 화면 해석)
# who
root pts/4 1월 14 09:57 (192.168.222.1:0.0)
----------------------------------------------------
필드 설명
----------------------------------------------------
root 사용자 정보
pts/4 제어 터미널
1월 14 09:57 로그인 시간
192.168.222.1 원격호스트
----------------------------------------------------
[참고] /var/adm/utmpx
# mv /var/adm/utmpx /var/adm/utmpx.old
# who
# mv /var/adm/utmpx.old /var/adm/utmpx
[EX] 172.16.8.254 login Test
# telnet 172.16.8.254
user01 사용자로 로그인
$
(At solaris254)
# who
whodo / w CMD
__________________
who is doing what // 현재 로그인한 사용자가 수행중인 명령어 확인
The whodo command produces formatted and dated output from
information in the /var/adm/utmpx and /proc/pid files.
The display is headed by the date, time, and machine name.
For each user logged in, device name, user-ID and login time
is shown, followed by a list of active processes associated
with the user-ID. The list includes the device name,
process-ID, CPU minutes and seconds used, and process name.
(명령어 형식)
# whodo
# whodo user01
# whodo -l (w CMD 명령어 출력 형태로 출력)
# man whodo
.....
-l Produce a long form of output. The fields displayed
are: the user's login name, the name of the tty the
user is on, the time of day the user logged in (in
hours:minutes), the idle time - that is, the time
since the user last typed anything (in hours:minutes),
the CPU time used by all processes and their children
on that terminal (in minutes:seconds), the CPU time
used by the currently active processes (in
minutes:seconds), and the name and arguments of the
current process.
.....
(명령어 출력 화면 해석)
# w
.....
user01 pts/8 7:16오후 -ksh
----------------------------------------------------
필드 설명
----------------------------------------------------
user01 사용자이름
pts/8 제어터미널
7:16오후 명령어 수행시간
-ksh 수행 명령어
----------------------------------------------------
[EX] 악의적인 사용자 로그아웃 시킴
[TERM1] 사용자 윈도우
# telnet localhost
user01 사용자로 로그인
$ vi /etc/passwd
[TERM2] 관리자 윈도우
# w
# w user01 (# w | grep user01)
[참고] 사용자 활동 모니터링
# while [ 1 ]
> do
> w user01
> sleep 2
> done
[TERM3] 관리자 윈도우
# ps -U user01
ksh's PID(450)
# kill -9 450
rusers CMD
__________________
who is logged in on remote machines
The rusers command produces output similar to who(1), but
for remote machines. The listing is in the order that
responses are received, but this order can be changed by
specifying one of the options listed below.
A remote host will only respond if it is running the rusersd
daemon, which may be started up from inetd(1M) or
listen(1M).
(명령어 형식)
# rusers -a
# rusers -h
# rusers -l
# rusers 172.16.8.202
# man rusers
.....
-a Give a report for a machine even if no users are
logged on.
-h Sort alphabetically by host name.
-l Give a longer listing in the style of who(1).
.....
출처 : http://cafe.daum.net/bscsolaris
파일 관리
■ touch CMD 파일 생성
■ cp CMD 파일 복사
■ mv CMD 파일 이동
■ rm CMD 파일 삭제
touch CMD
________________
touch, settime - change file access and modification times
The touch utility sets the access and modification times of
each file. The file operand is created if it does not
already exist.
빈 파일을 만들때 사용
- if file1 existed
- if file1 not existed
(명령어 형식)
# touch file1
# touch file1 file2
[참고] touch 명령어
만약 ex1.txt 파일이 존재하는 경우 "# touch ex1.txt" 사용하였다면 ex1.txt 파일의
mtime을 현재 시간으로 변경한다.
[참고] 해커(Cracker)들의 touch 명령어 사용
# ls -l file3 > file.txt
# cat file.txt
# vi file3
# touch -t 12061223 file3 (12월 6일 12:23, 파일의 mtime을 원래대로 돌린다.)
cp CMD
________________
copy files
(명령어 형식)
# cp file1 file2
# cp file1 dir1
# cp -r dir1 dir2 (if dir2 exist - dir2/dir1 생성) 기존 dir2가 있다면 dir2/dir1생성
(if dir2 not exist - dir2 생성) 기존 dir2이 없다면 생성
// mkdir –p와 비슷
# cp -i file1 file2 // -i : interactive (대화모드)
OPTIONS
-i Interactive. cp will prompt for confirmation whenever
the copy would overwrite an existing target. A y
answer means that the copy should proceed. Any other
answer prevents cp from overwriting target.
-r Recursive. cp will copy the directory and all its
files, including any subdirectories and their files to
target.
[참고] "cp -i" alias 설정
# vi ~/.kshrc(ksh인 경우)
......
alias cp='cp -i'
......
[EX] cp 명령어 실습
(실습 준비)
# cd /test
# rm -r *
# cp /etc/passwd file1
(cp file1 file2 형식 실습)
# cp file1 file2
(cp file1 dir1 형식 실습)
# mkdir dir1
# cp file1 dir1
# ls dir1
(cp -r dir1 dir2 형식 실습)
# cp -r dir1 dir2
# cp -r dir1 dir2
# ls -R
[EX] 큰 로그 파일 삭제 방법
# cp /dev/null server.log
[EX] cp 명령어에 대한 inode 변화 과정 // 원본 파일이 지워지지 않고 생기기때문
# cd /test
# touch file1
# ls -li file1 (Inode : 109326)
# cp file1 file2
# ls -li file1 file2 (file1 Inode : 109326, file2 Inode : 109341)
mv CMD
_________________
move files (rename)
(명령어 형식)
# mv file1 file2
# mv file1 dir1
# mv dir1 dir2 (if dir2 exist - dir1을 dir2로 move)
(if dir2 not exist - dir1을 dir2/dir1으로 move)
# mv -i file1 file2
[참고] mv => rename
[EX1] mv 명령어 실습
(실습 준비)
# cd /test
# rm -r *
# touch file1
# mkdir dir1
# touch dir1/file2
(mv file1 file2 형식 실습)
# mv file1 file3
(mv file1 dir1 형식 실습)
# mv file3 dir1
(mv dir1 dir2 형식 실습)
# mv dir1 dir2
# cp -r dir2 dir1
# mv dir1 dir2
[EX2] mv 명령어에 대한 inode 변화 과정 // 원본 데이터의 이름만 바뀜
# cd /test
# touch file1
# ls -li file1 (Inode : 109326)
# mv file1 file3
# ls -li file3 (file3 Inode : 109326)
rm CMD
_________________
(명령어 형식)
# rm file1
# rm file1 file2
# rm -r dir1
# rm -i file1
[참고] rm -i & rm -f
# alias rm='rm -i'
# rm -r /test/dir1
# \rm -r /test/dir1
[EX] \rm -i 명령어 실습
(실습 준비)
# cd /test
# rm -r *
# mkdir dir1
# touch dir1/file1
# touch dir1/file2
(\rm -i 옵션 실습)
# alias rm='rm -i'
# rm -r dir1
rm: examine files in directory dir1 (yes/no)? <----- <Ctrl + C> 입력
# \rm -r dir1
[참고] 역슬래쉬(Backslash)의 사용
# echo $HOSTNAME
# echo \$HOSTNAME
# find / \( -perm -4000 -o -perm -2000 \) -type f
# find / -name core -type f -exec rm {} \;
[참고] 파일 생성 및 삭제 과정
● 파일 생성시
1) 슈퍼 블럭에서 하나의 Inode를 할당한다.
2) Inode의 내용들을 초기화한다.
3) Inode-Number와 파일시스템을 해당 상위 디렉토리에 기록한다.
4) Inode-List(Inode Table)에 있는 한 엔트리를 할당한다.
5) 사용자 영역의 파일 지시자(File Descriptor)에 한 엔트리를 할당한다.
6) 파일 지시자를 프로세스에게 반환한다.
● 파일 삭제시
1) 주어진 경로명을 Inode-List(Inode Table)의 포인터로 바꾼다.
2) 주어진 파일이 마운트되었으면 삭제 못하고 반환한다.
3) 주어진 파일이 공유된 텍스트이고 링크 수가 1이면 반환한다.
4) 파일의 링크 수를 하나 감소 시키고, 상위 디렉토리에서 그 파일의 Inode Number를
0으로 설정한다.
clear CMD
_________________
clear the terminal screen
clear clears your screen if this is possible. It looks in
the environment for the terminal type and then in the ter-
minfo database to figure out how to clear the screen.
화면의 내용을 지우고 커서를 화면의 최 상단으로 이동시킴
# clear
파일 내용 관리
■ cat CMD
■ more CMD
■ haed CMD
■ tail CMD
cat CMD
_________________
concatenate and display files
(명령어 형식)
# cat file1
# cat -n file1 (-n : Number Line)
# cat file1 file2 > file3
[EX] cat 명령어 실습
# cat /etc/passwd
# cat -n /etc/passwd
# cat /etc/passwd | grep user01
[EX] file1, file2 두개의 파일을 하나의 file3으로 합치기
Concatenates file1 and file2, and writes the result in file3
# echo 1111 > file1
# echo 2222 > file2
# cat file1 file2
# cat file1 file2 > file3
# cat file3
more CMD
_________________
browse or page through a text file
The more utility is a filter that displays the contents of a
text file on the terminal, one screenful at a time. It nor-
mally pauses after each screenful. /usr/bin/more then prints
--More-- and /usr/xpg4/bin/more then prints file at the bot-
tom of the screen. If more is reading from a file rather
than a pipe, the percentage of characters displayed so far
is also shown.
파일의 내용을 한 화면 단위로 봄.
# more file1
----------------------------------------
기능 설명
----------------------------------------
space key 한화면 앞으로
enter key 한라인 앞으로
/찾을문자열 빠른 찾기
q more 화면에서 빠져나옴
----------------------------------------
[EX] more 명령어 실습
# CMD | more
# cat /etc/inetd.conf | more
# more /etc/inetd.conf
haed CMD
__________________
display first few lines of files
The head utility copies the first number of lines of each
filename to the standard output. If no filename is given,
head copies lines from the standard input. The default value
of number is 10 lines.
# head /etc/passwd
# head -5 /etc/passwd
[EX] head 명령어의 활용 예
# ps -ef // -e : every , -f : full list
# ps -ef | more
# ps -ef | grep inetd
# ps -ef | head -1
UID PID PPID C STIME TTY TIME CMD
# ps -ef | head -1 ; ps -ef | grep inetd
UID PID PPID C STIME TTY TIME CMD
root 185 1 0 10:25:16 ? 0:00 /usr/sbin/inetd -s
# alias pps='ps -ef | head -1 ; ps -ef | grep $1'
# pps inetd
tail CMD
__________________
deliver the last part of a file
The tail utility copies the named file to the standard out-
put beginning at a designated place. If no file is named,
the standard input is used.
Copying begins at a point in the file indicated by the
-cnumber, -nnumber, or +number options (if +number is speci-
fied, begins at distance number from the beginning; if
-number is specified, from the end of the input; if number
is NULL, the value 10 is assumed). number is counted in
units of lines or byte according to the -c or -n options,
or lines, blocks, or bytes, according to the appended option
l, b, or c. When no units are specified, counting is by
lines.
# tail /etc/passwd // default view -10 line
# tail -5 /etc/passwd
# tail -f /var/adm/sulog // -f : file moniter view option
< Q & A >
[질문] 파일이 30 라인으로 되어져 있는데 파일 중간의 10라인만 프린터로 출력해 볼수
있나요?
[답변] 다음과 같은 명령어를 통해 가능합니다.
# head -20 filename | tail -10 | lp
[EX1] tail -1
# useradd -m -d /export/home/user02 -s /bin/ksh user02
# passwd user02
# tail -1 /etc/passwd
or
# cat /etc/passwd | grep user02
[EX2] 로그 모니터링
[TERM1] 관리자 윈도우
# tail -f /var/adm/sulog
[TERM2] 사용자 윈도우
# su - user01
$
디렉토리 관리
■ mkdir CMD
■ rmdir CMD
mkdir CMD
________________
make directories
The mkdir command creates the named directories in mode 777
(possibly altered by the file mode creation mask umask(1)).
Standard entries in a directory (for instance, the files
".", for the directory itself, and "..", for its parent) are
made automatically. mkdir cannot create these entries by
name. Creation of a directory requires write permission in
the parent directory.
The owner-ID and group-ID of the new directories are set to
the process's effective user-ID and group-ID, respectively.
mkdir calls the mkdir(2) system call.
빈 디렉토리 생성
(명령어 형식)
# mkdir dir1
# mkdir dir1 dir2
# mkdir -p dir1/dir2/dir3 // -p : 기존에 폴더가 있으면 만들지 않고 없으면 만든다.
# man mkdir
.....
OPTIONS
-p With this option, mkdir creates dir by creating
all the non-existing parent directories first.
The mode given to intermediate directories will
be the difference between 777 and the bits set in
the file mode creation mask. The difference, how-
ever, must be at least 300 (write and execute
permission for the user).
.....
[EX] mkdir -p 명령어 실습
# cd /test
# rm -r *
# mkdir dir1
# mkdir -p dir1/dir2/dir3
# ls -lR
rmdir CMD
________________
remove directory entries
The rm utility removes the directory entry specified by each
file argument. If a file has no write permission and the
standard input is a terminal, the full set of permissions
(in octal) for the file are printed followed by a question
mark. This is a prompt for confirm!ation. If the answer
begins with y (for yes), the file is deleted, otherwise the
file remains.
빈 디렉토리 삭제
(명령어 형식)
# rmdir dir1
# rmdir dir1 dir2
OPTIONS
-p Allows users to remove the directory dirname and its
parent directories which become empty. A message is
printed to standard error if all or part of the path
could not be removed.
[참고] 비어있지 않은 디렉토리 삭제시
# rm -r dir2 (recusive) // 비어있지 않을경우 파일 삭제후 폴더 삭제 !!! recusive!
출처 : http://cafe.daum.net/bscsolaris
ls CMD
_____________
list contents of directory
For each file that is a directory, ls lists the contents of
the directory. For each file that is an ordinary file, ls
repeats its name and any other information requested. The
output is sorted alphabetically by default. When no argument
is given, the current directory is listed. When several
arguments are given, the arguments are first sorted
appropriately, but file arguments appear before directories
and their contents.
(기본 사용 방법)
# ls -l
# ls -l dirname
# ls -ld
# ls -ld dirname // -d : direct 정보 -l : list
(옵션 사용 방법)
# ls
# ls -l
# ls -al
# ls -alF | more
# ls -ld /work
# ls -lR /work
# ls -li file1
# ls –altr // -t : sort by time stamp -r : reverse alphabetic
OPTIONS
-d If an argument is a directory, lists only its name
(not its contents). Often used with -l to get the
status of a directory.
-F Marks directories with a trailing slash (/), doors
with a trailing greater-than sign (>), executable
files with a trailing asterisk (*), FIFOs with a
trailing vertical bar (|), symbolic links with a
trailing 'at' sign (@), and AF_UNIX address family
sockets with a trailing equals sign (=).
-i For each file, prints the i-node number in the first
column of the report.
-l Lists in long format, giving mode, ACL indication,
number of links, owner, group, size in bytes, and time
of last modification for each file (see above). If the
file is a special file, the size field instead con-
tains the major and minor device numbers. If the time
of last modification is greater than six months ago,
it is shown in the format `month date year' for the
POSIX locale. When the LC_TIME locale category is not
set to the POSIX locale, a different format of the
time field may be used. Files modified within six
months show `month date time'. If the file is a sym-
bolic link, the filename is printed followed by "->"
and the path name of the referenced file.
-r Reverses the order of sort to get reverse alphabetic
or oldest first as appropriate.
-t Sorts by time stamp (latest first) instead of by name.
The default is the last modification time. (See -u and
-c.)
[참고] ls -l filename 명령어로 보여지는 출력화면 해석
# ls -l file1
-rw-r--r-- 1 user01 staff 432 시간 file1
- : d(directory), - (Regular File), s(Socket File), p(Pipe File),
l(Link File), b(block device file), c(character device file)
rw- : user01 사용자가 file1에 대한 퍼미션 설정(read, write)
r-- : staff이라는 그룹에 속한 사용자들이 file1에 대한 퍼미션 설정(read)
r-- : user01도 아니고 staff이라는 그룹에도 속하지 못한 사용자들이 file1에
대한 퍼미션(read)
1 : Hard Link Count
user01 : file1에 대한 소유권(Ownership)
staff : file2에 대한 그룹권(Groupship)
432 : 파일의 크기(File Size, bytes)
시간 : 파일이 수정되었거나 생성된 시간(mtime, Modify Time)
(mtime: Modify Time, ctime: Change Time, atime: Access Time) // ctim : 속성정보
file1 : 파일의 이름(Filename)
[참고] 파일 또는 디렉토리만 출력
# alias lsf='ls -l | grep "^-"'
# alias lsd='ls -l | grep "^d"'
# lsf
# lsd
[EX] lsf, lsd 실습
# alias lsf
# alias lsd
# cd /etc
# lsf
# lsd
[참고] 변환된 파일 사이즈 출력
alias ls='ls -hF' (-h : human) // -F 읽기 편한 형태로 변형
ls -l /etc/passwd
[참고] ls alias 선언
alias ls='ls -hF'
alias ll='ls -ailF | more'
alias lsf='ls -l | grep "^-"' // 일반 파일만 검색 할시 ls 정보에서 – 으로 시작하는경우
alias lsd='ls -l | grep "^d"' // directory 만 보고 싶을경우 ls 정보에서 d 로 시작하는경우
[참고] DOS / UNIX 명령어 비교
_________________________________________________________________
DOS UNIX
_________________________________________________________________
display list of files dir/w dir ls
dir ls -l
display contents of file type cat
display file with pauses type filename | more more
copy file copy cp
find string in file find grep
fgrep
compare files comp diff
rename file rename OR ren mv
delete file erase OR del rm
delete directory rmdir OR rd rmdir
change file protection attrib chmod
create directory mkdir OR md mkdir
change working directory chdir OR cd cd
get help help man
apropos
display date and time date, time date
display free disk space chkdsk df
print file print lpr
display print queue print lpq
_________________________________________________________________
Chapter 6. Unix Basic Commands
________________________________
■ UNIX 명령어 형식
# command [option(s)] [argument(s)]
(명령어)
# ls
# cal
# uname
(명령어 + 옵션)
# uname -s
# uname -a
# ls -l
(명령어 + 인자)
# ls /var
# cal 2002
(명령어 + 옵션 + 인자)
# ls -l /var
[참고] 옵션에 대한 설명
# ls -a -l -F
# ls -al -F
# ls -alF
# ls -aFl // F : 파일 성격에 따른 / * @ 표시된다 디렉토리 실행파일 심볼릭 등등.
[참고] 옵션의 인자가 존재하는 경우의 예
# cmd -f arg1 -i (0)
# cmd -if arg1 (0)
# cmd -fi arg1 (X)
운영체제의 기본적인 정보 확인
- uname CMD
- date CMD
- cal CMD
uname CMD // 현 시스템의 정보
______________
print name of current system
The uname utility prints information about the current sys-
tem on the standard output. When options are specified, sym-
bols representing one or more system characteristics will be
written to the standard output. If no options are specified,
uname prints the current operating system's name. The
options print selected information returned by uname(2),
sysinfo(2), or both.
- 커널 패치 버전 확인(Kernel Patch Version, Kernel ID)
SunOS nara 5.9 Generic_118559-11 i86pc i386 i86pc
# uanme -s
SunOS //os
# uname -r
5.9 //release level
# uname -sr
SunOS 5.9
# uname -n //hostname
nara
# uname -i //architecture or platform
i86pc
# uname -p // process type
i386
# uname -X // 확장된 정보
System = SunOS
Node = nara
Release = 5.9
KernelID = Generic_118559-11
Machine = i86pc
BusType = <unknown>
Serial = <unknown>
Users = <unknown>
OEM# = 0
Origin# = 1
NumCPU = 2
(출력화면 해석) Solaris 9 x86 on VMWare
# uname -a
SunOS solaris254 5.9 Generic_118559-11 i86pc i386 i86pc
----------------------------------------------------------------
종류 설명
----------------------------------------------------------------
SunOS : 운영체제 종류
solaris254 : 호스트 이름
5.9 : 운영체제 릴리즈
Generic_118559-11 : 커널 아이디(커널 식별자)
i86pc : 머신아키텍쳐 (예: sun4u, sun4m, sun4c, ...)
i386 : 프로세스 종류(예: sparc, i386, i686, .....)
i86pc : 하드웨어 구현 플랫폼
----------------------------------------------------------------
(출력화면 해석) Solaris 9 Sparc (Ultra 10)
# uname -a
SunOS sun99 5.9 Generic sun4u sparc SUNW,Ultra-5_10
(출력화면 해석) Sun Enterprise 3500
# uname -a
SunOS sun02 5.9 Generic_118558-11 sun4u sparc SUNW,Ultra-Enterprise
# man uname
.....
OPTIONS
-a Prints basic information currently available from the
system.
-i Prints the name of the hardware implementation (platform).
-m Prints the machine hardware name (class). Use of this
option is discouraged; use uname -p instead. See NOTES
section below.
-n Prints the nodename (the nodename is the name by which
the system is known to a communications network).
-p Prints the current host's ISA or processor type.
-r Prints the operating system release level.
-s Prints the name of the operating system. This is the
default.
-X Prints expanded system information, one information
element per line, as expected by SCO UNIX. The
displayed information includes:
o system name, node, release, version, machine,
and number of CPUs.
o BusType, Serial, and Users (set to "unknown" in
Solaris)
o OEM# and Origin# (set to 0 and 1, respectively)
.....
[참고] 호스트 이름 변경
호스트이름은 부팅시에 /etc/rcS.d/S30network.sh 스크립트안에서 uname 명령어를 사
용하여 설정되고, 이때 /etc/nodename 파일의 내용을 호스트 이름으로 설정한다.
솔라리스 호스트 이름 변경 형식
# uname -S knitXXX (/etc/rcS.d/S30network.sh)
# hostname knitXXX
[EX] Hostname Change
# hostname
# hostname knitXXX
# uname -n
# uname -S solarisXXX
[참고] 프로세서(CPU)에 대한 정보
psrinfo
- displays information about processors
[EX] 프로세스 정보 확인
# psrinfo
# psrinfo -p // process #
# psrinfo -v // verbose
# psrinfo -pv
[참고] 서버의 운영체제 종류와 버전 확인
# cat /etc/release (Intel Platform on VMWare)
Solaris 9 9/05 s9x_u8wos_05 x86
Copyright 2005 Sun Microsystems, Inc. All Rights Reserved.
Use is subject to license terms.
Assembled 01 August 2005
# cat /etc/release (E3500)
Solaris 9 9/05 s9s_u8wos_05 SPARC
Copyright 2005 Sun Microsystems, Inc. All Rights Reserved.
Use is subject to license terms.
Assembled 04 August 2005
[참고] 운영체제의 전반적인 정보를 확인
/root/docs/Reference/SolarisSystemInformation.txt
/root/docs/Reference/SystemInformationVerification.txt
dtterm CMD
______________
emulate a terminal window
The dtterm utility provides runtime support of legacy appli-
cations written for terminals conforming to ANSI X3.64-1979
and ISO 6429:1992(E), such as the DEC VT220.
# echo $TERM
dtterm
# dtterm &
[참고] 실행이 안되는 경우(PATH 변수 확인)
# /usr/dt/bin/dtterm &
or
# export PATH=$PATH:/usr/dt/bin
# dtterm &
netscape CMD
________________
start Netscape Communicator for Solaris
Netscape Communicator for Solaris is comprised of a
comprehensive set of components that integrates browsing,
email, web-based word processing, chat, and group scheduling
to allow users to easily communicate, share, and access
information.
# sun_netscape &
# netscape &
[참고] 모질라 / 파이어폭스(http://www.sunfreeware.com)
firefox - 172.16.8.254:/root/packages/firefox
mozilla - 172.16.8.254:/root/packages/mozilla
firefox, mozilla가 필요한 경우 172.16.8.254 서버에서도 다운로드 받을수 있다.
# rcp -r 172.16.8.254:/root/packages/firefox .
oclock CMD
_____________
round X clock
Oclock simply displays the current time on an analog
display.
The xclock program displays the time in analog or digital
form. The time is continuously updated at a frequency which
may be specified by the user.
# oclock & (# /usr/openwin/bin/oclock &)
# xclock & (# /usr/openwin/bin/xclock &)
[참고] oclock & xclock
date CMD
_____________
write the date and time
The date utility writes the date and time to standard output
or attempts to set the system date and time. By default, the
current date and time will be written.
Specifications of native language translations of month and
weekday names are supported. The month and weekday names
used for a language are based on the locale specified by the
environment variable LC_TIME. See environ(5).
운영체제의 시간을 확인하거나 설정할수 있다.
- root 사용자: 현재 시간을 설정 및 확인 할 수 있다.
- 일반사용자 : 현재 시간만 확인 할 수 있다.
# date
# date 08161300 (8월 16일 13:00)
[참고] 소프트웨어 클락 & 하드웨어 클락
시간의 종류(Clock Type)
- Software Clock (운영체제의 시간)
- Hardware Clock (펌웨어의 시간)
[EX] 운영체제 시간 변경 예
# date 08201300 (예: 08201300, 운영체제 시간을 root 사용자가 바꾼다.)
# rdate 172.16.8.254 (운영체제 시간을 다른 서버에 동기화 시킨다.)
or
# rdate time.bora.net(NTP-Network Time Protocol)
[참고] date 명령어의 출력 형태 변경
# date +'%m%d'
# date +'%m%d_%H%M'
[EX] 로그 파일 이름 형식(Log Filename Format)
유닉스에서의 대부분의 프로그램은 하루에 한번씩 로그 파일을 만들도록 하는 경우가 많이
존재한다. 이런 경우 date 명령어를 아래와 같이 응용하여 사용하는 경우가 많다.
로그 파일 이름 형식: file_1211.log
# touch file_`date +'%m%d'`.log
cal CMD
_____________
display a calendar
The cal utility writes a Gregorian calendar to standard out-
put. If the year operand is specified, a calendar for that
year is written. If no operands are specified, a calendar
for the current month is written.
# cal
# cal 2004
# cal 8 2004
디렉토리 이동 관련 명령어
■ pwd CMD
■ cd CMD
pwd CMD
_____________
return working directory name
Returns the path name of the current working directory.
# pwd
[참고] PS1 변수설정
pwd 명령어를 디렉토리 변경할때 마다 치는 것은 불편하다. 따라서 PS1 변수를 환경변수에
선언하여 사용하면 pwd 명령어를 궂이 사용하지 않아도 된다.
# PS1='[$PWD]# '
# export PS1
[EX] PS1 실습
# PS1='a '
# PS1='[$PWD]# '
cd CMD
_____________
Change Directory
Change the current working directory to dirName, or to the
home directory (as specified in the HOME environment vari-
able) if dirName is not given. Returns an empty string.
cd 명령어는 디렉토리를 변경하는 명령어이다. cd 명령어를 사용하여 디렉토리 경로를 변
경하는 경우 상대경로(Relative Path)나 절대경로(Absolute Path)를 사용할수 있다.
경로(PATH)
- 상대경로 (Relative Path, 현재디렉토리를 기준)
- 절대경로 (Absolute Path, / 디렉토리를 기준)
/
|
----+----------+----------+-----------+-----
| | | |
data1 export etc .......
|
home
|
user01
[EX] 상대경로 사용 예제
# pwd
# cd export
# cd ..
# cd export/home
# cd ../../
[EX] 절대경로 사용 예제
# cd /etc
# cd /export/home
# cd /usr
[참고] /export/home/user01
A A A
| | |
(a) (b) (c)
(a) => /(root) 디렉토리
(b),(c) => 디렉토리의 구분자
[참고] user01 사용자의 홈디렉토리로 이동하는 방법
root 사용자의 홈디렉토리 : /(root)
일반 사용자의 홈디렉토리 : /export/home/user01
Home Directory Changing for user01
$ ksh
$ cd
$ cd ~
$ cd ~user01 ($ cd ~/user01)
$ cd $HOME ($ echo $HOME)
$ cd /export/home/user01
[참고] 편리한 기능(Tip)
# cd -
# cd ../dir2
[EX]
"cd - " 사용한 이전 디렉토리로 이동
(시나리오) 사용자가 /etc 디렉토리에서 작업을 하다가 /export/home/user01 디렉토리로
이동하는 경우 상대경로나 절대경로를 사용하는 경우는 불편하게 된다. 이런 경우 이전
디렉토리로 바로 이동하기 위해서 "cd - " 명령어를 사용한다.
/etc <------> /export/home/user01
# cd /etc
작업
# cd /export/home/user01
작업
# cd /etc
작업
# cd -
# cd -
# cd -
/
|
------------+------+-------+--------+------
.... | ..... export etc
test
|
---+----+----+-------
| | .....
dir1 dir2
현재 디렉토리 : dir2
목적 디렉토리 : dir1
# cd ..
# cd dir1
# cd ../dir1
[EX] ../dir1 활용 예
# cd /
# cd /export
# cd ../etc
파일의 종류(File Types)
------------------------
■ 일반 파일(Regular File)
■ 디렉토리 파일(Directory File)
■ 링크 파일(Link File : Hard Link File, Symbolic Link File)
■ 디바이스 파일(Device File : Block Device File, Charater Device File)
[참고] 기타 파일의 종류(Other File Types)
- Pipe, Socket, Door
+-------------------+
filename ====> | Inode |
+-------------------+
| |
| Data Block |
| |
+-------------------+
[그림] 파일의 기본 구조
(1). 일반 파일(Regular File)
+-------------------+
file1 ====> | inode(450) |
+-------------------+
| |
| Data Block |
| |
+-------------------+
Data : Text, Binary data, Images, Application data, Databases
Creation Methods : Text editors, Compilers, Application programs,
Database programs, Command(EX: touch, cat, vi)
(2). 디렉토리 파일(Directory File)
+-------------------+
dir1 ====> | inode(451) |
+-------------------+
| .(451) |
| ..(440) |
| file1(452) |
| dir2(453) |
| ..... |
| |
+-------------------+
Data : Directory information
Creation Methods : mkdir dirname
(3). 링크 파일(Link File)
"ln CMD" 참고
(4). 디바이스 파일(Device File)
+-------------------+
dad@0,0:a ====> | inode(451) |
+-------------------+
| |
| 136, 0 |
| |
+-------------------+
Data : Major/Minor device number
Creation Methods : mknod, drvconfig, devfsadm
주 디바이스 번호(Major Device Number) : 136 (/etc/name_to_major)
부 디바이스 번호(Minor Device Number) : 0 (Slice Number) //?
[EX] Intel Platform(VMWare)
# grep cmdk /etc/name_to_major
cmdk 102
# ls -l /devices/pci@0,0/pci-ide@7,1/ide@0/cmdk@0,0:a
brw-r----- 1 root sys 102,0 1월 7 12:22 /devices/pci@0,0/pci-ide@7,1/ide@0/cmdk@0,0:a
[EX] Sparc Platform(Ultra 10)
# grep dad /etc/name_to_major
dad 136
# ls -l /devices/pci@1f,0/pci@1,1/ide@3/dad@0,0:a
brw-r----- 1 root sys 136, 0 2월 2 16:05 /devices/pci@1f,0/pci@1,1/ide@3/dad@0,0:a
<Disk Structure> <Operating System>
| DISK Device | <=== Device Driver ===> dad@0,0:a | kernel |
| - Sector | Device File | |
| - Track | | |
| - Cylinder | | |
디스크 디바이스 파일(Disk Device File, Special Device File)
- Charater Device File : I/O : 512bytes
= Raw Device File
- Block Device File : I/O : 8Kbytes (512 * 16)
| DISK Device | <=== Device ===> Block Device File | OS(kernel) |
| - Sector | Driver Charater Device File | |
| - Track | | |
| - Cylinder | | |
[EX] 블럭디바이스 사용예제
# mount /dev/dsk/c0t0d0s7 /export/home
[EX] 캐릭터디바이스 사용예제
# newfs /dev/rdsk/c0t0d0s7
# fsck /dev/rdsk/c0t0d0s7
[EX] 블럭 / 캐릭터디바이스 사용예제
# prtvtoc /dev/rdsk/c0t0d0s2
# prtvtoc /dev/dsk/c0t0d0s2
// 저수준의 whole 작업인경우에 쓰인다 예로 filesystem create or check
파일/디렉토리 이름 규칙(Filename Convention)
____________________________________________
Filename / Directory Name Length : 1-255 char(s)
(1). 파일의 이름에 "-"(Dash), "_"(Underbar), "."(Dot) 사용가능
# touch file1_1202.log
# touch dir-file.sh
(2). 파일이름에 공백, 점(Dot)는 되도록 사용하지 말자.
이런 파일 이름들은 주로 해커들에 의해 악의적으로 사용되는 경우가 많다.
# touch " "
# touch ". "
# touch /dev/rdsk/c0t0e0s0
(3). 파일이름에 대문자와 소문자는 구별한다.(Case Sensitive)
# touch file1
# touch FILE1
(4). 파일이름에 앞에 .(Dot)으로 시작하는 파일은 환경파일이다.
# touch .filename
# ls -l /.profile
# ls -l /.kshrc
Wild Card(Special Character) // 하나의 문자가 여러개의 문자를 포함하는 문자.
______________________________
(1) . (Dot, Period) // 현재의~ 디렉토리
Current Directory
# ./ENV.sh
# vi ./file.txt
(2) .. (Dot Dot) // 상위의 디렉토리
# cd ../
# cd ../dir2
(3) ~ (tilde) // 계정의 HOME 디렉토리
# cd ~user01
(4) * (0 or more) // 하나의 문자 이상의 모든 캐릭터
# mkdir /test
# cd /test
# touch file1 file2 file3
# ls -l file*
# touch file
# ls -l file*
(5) ? (Question Mark) //한글자의 모든? 캐릭터 ,
# ls -l file?
(6) [ ] (Square Bracket) // 선택적인 한글자
# ls -l file[123] // 1,2,3 중하나
# ls -l file[1-3] // "
■ man CMD
■ passwd CMD
man CMD
_____________
find and display reference manual pages
The man command displays information from the reference
manuals. It displays complete manual pages that you select
by name, or one-line summaries selected either by keyword
(-k), or by the name of an associated file (-f). If no
manual page is located, man prints an error message.
# man ls
# man -k calendar // keyword 에 의한 ~찾기
# man -l passwd // list 에 의한 찾기 , 메뉴얼 페이지의 리스트 보기
# man -s section_number CMD //section 정보로 찾기
[EX] man ls 형식 실습
# man ls
------------------------man ls 출력 결과-----------------------------
User Commands ls(1)
NAME
ls - list contents of directory
SYNOPSIS
/usr/bin/ls [-aAbcCdfFghilLmnopqrRstux1@] [file...]
/usr/xpg4/bin/ls [-aAbcCdfFghilLmnopqrRstux1@] [file...]
DESCRIPTION
For each file that is a directory, ls lists the contents of
the directory. For each file that is an ordinary file, ls
repeats its name and any other information requested. The
output is sorted alphabetically by default. When no argument
--More--(4%)
------------------------man ls 출력 결과-----------------------------
Enter -> 한개의 라인씩 이동
Space -> 한페이지 단위로 이동
/문자열 -> /-a
/OPTIONS
/EXAMPLE
h -> help
q -> 매뉴얼 종료
[EX] man -k calendar 형식 실습
(시나리오) 사용자가 cal 명령어를 모르는 상태에서 명령어나 파일을 검색하기 위해서 사용
windex (/usr/share/man/windex) - Table of contents and keyword database
# man -k calendar
/usr/share/man/windex: No such file or directory
/usr/man/windex: No such file or directory
/usr/openwin/share/man/windex: No such file or directory
// 처음 keyword에 대한 DB화 되어 있지 않아 검색에러가 난다.
# catman -w //DB 목록화
# man -k calendar
cal cal (1) - display a calendar
calendar calendar (1) - reminder service
difftime difftime (3c) - computes the difference between two calendar times
mktime mktime (3c) - converts a tm structure to a calendar time
cal cal (1) - display a calendar
calendar calendar (1) - reminder service
difftime difftime (3c) - computes the difference between two calendar times
mktime mktime (3c) - converts a tm structure to a calendar time
[EX] man -l passwd 형식 실습
# man -l passwd
passwd (1) -M /usr/share/man
passwd (4) -M /usr/share/man
passwd (1) -M /usr/man
passwd (4) -M /usr/man
매뉴얼 섹션 참고 사항
위의 예에서 passwd의 매뉴얼이 (1) 섹션과 (4) 섹션에 존재 한다는 것을 확인 할 수 있 다. man 명령어는 -s 옵션이 없다면 여러개의 섹션에 매뉴얼이 존재하는 경우 가장 먼저 검색이 되는 매뉴얼 페이지를 출력하게 된다. (1) 섹션의 passwd 명령어의 매뉴얼지가 아닌 (4) 섹션의 /etc/passwd 파일의 매뉴얼을 확인 하기 위해서는
-s 옵션이 필요하다
# man passwd
# man -l passwd
# man -s 1 passwd (/usr/bin/passwd)
# man -s 4 passwd (/etc/passwd)
[EX] man -s 1M passwd 형식 실습
# man find
..... (중략) .....
/SEE ALSO // 연관된 ~ 더 찾아보기
.....
SEE ALSO
chmod(1), cpio(1), ls(1B), sh(1), test(1), stat(2),
umask(2), attributes(5), environ(5), fsattr(5), large-
file(5), standards(5)
.....
# man -s 1B ls
# man -s 5 environ
[참고] man 명령어안에서의 하위(Sub) 명령어
Keys to Ctrl Scrolling in Man Pages.
_________________________________________________________________________________
Spacebar Displays the next screen of a man page.
Return Displays the next line of a man page.
b Moves back one full screen. // 전 페이지
f Moves forward one full screen. // 다음 페이지
:f Print current filename and line number.
/pattern Searches forward for a pattern.
n Finds the next occurrence of a pattern after you have used //다음 패턴
/pattern
h Provides a description of all scrolling capabilities. //도움말
q Quits the man command. //종료
_________________________________________________________________________________
# man man
.....
OPTIONS
.....
-k keyword ...
Prints out one-line summaries from the windex database
(table of contents) that contain any of the given key-
words. The windex database is created using
catman(1M).
-l Lists all manual pages found matching name within the
search path.
-s section ...
Specifies sections of the manual for man to search.
The directories searched for name are limited to those
specified by section. section can be a numerical
digit, perhaps followed by one or more letters to
match the desired section of the manual, for example,
"3libucb". Also, section can be a word, for example,
local, new, old, public. section can also be a letter.
To specify multiple sections, separate each section
with a comma. This option overrides the MANPATH
environment variable and the man.cf file. See Search
Path below for an explanation of how man conducts its
search.
# cd /usr/share/man
# ls
Unix Manual Section
________________________________________________
Section 1 Command
Section 2 Library for System Programming
Section 3 Library for C Programming
Section 4 System Configuration File Format
Section 5 Standard, Macro etc
Section 6 Games, Demo etc
Section 7 Device File
Sun 9 Reference Manual Collection
____________________________________
section 1: User Commands
section 1M: System Administration Commands //관리자용 명령어
section 2: System Calls
section 3: Library Interfaces and Headers
section 3: Basic Library Functions
section 3: Networking Library Functions
section 3: Threads and Realtime Library Functions
section 3: Extended Library Functions
section 3: Curses Library Functions
section 4: File Formats
section 5: Standards, Environments, and Macros
section 6: Demos
section 7: Device and Network Interfaces
section 9: DDI and DKI Driver Entry Points
section 9: DDI and DKI Kernel Functions
section 9: DDI and DKI Properties and Data Structures
[참고] DDI / DKI
DDI(Device Driver Interface)
DKI(Driver-Kernel Interface)
Section 1, 4 -> 관리자
Section 2, 3 -> 시스템 프로그램머
Section 7, 9 -> Device Driver 개발자
[참고] Manual Information Structure
- NAME
- SYNOPSIS
- DESCRITPION
- OPTIONS
- OPERANDS
- OUTPUT
- RETURN VALUES
- ERRORS
- USAGE
- EXAMPLES
- ENVIRONMENT VARIABLES
- EXIT STATUS
- FILES
- ATTRIBUTES
- SEE ALSO
- DIAGNOSTICS
- WARNINGS
- NOTES
- BUGS
[EX] Manual Information Structure 사용 예
# man ls
/문자열
-> /OPTIONS
-> /EXAMPLES
-> /SEE ALSO
[참고] 매뉴얼 페이지를 텍스트 파일로 변환
매뉴얼 페이지를 텍스트 파일로 저장하는 경우 다음과 같은 명령어를 사용하면 된다.
Manual.TXT File
# man find | col -b > find.txt
# man col
.....
reverse line-feeds filter // 하나의 문자에 두가지 이상의 문자가 표현 되었을때 제거하는것
.....
-b Assume that the output device in use is not capable of
backspacing. In this case, if two or more characters
are to appear in the same place, only the last one
read will be output.
.....
passwd CMD
_____________
change login password and password attributes
사용자 패스워드을 변경하거나 패스워드의 속성 정보를 변경하는 명령어이다.
The passwd command computes the hash of a password typed at
run-time or the hash of each password in a list. The
password list is taken from the named file for option -in
file, from stdin for option -stdin, or from the command
line, or from the terminal otherwise. The Unix standard
algorithm crypt and the MD5-based BSD password algorithm 1
and its Apache variant apr1 are available.
root 사용자가 일반사용자의 암호를 변경하는 경우 사용자의 암호를 물어 보지 않고
바로 변경이 가능하다. 하지만 일반사용자가 자신의 암호를 변경하는 경우에는 이전
암호를 반드시 맞추어야만 새로운 암호로 변경할수 있고, 이때 사용자 암호 변경 규
칙이 적용된다.
- root 사용자 : 모든 사용자의 암호를 변경가능
- 일반 사용자 : 자신의 암호만 변경 가능
root># passwd
root># passwd username
user01># passwd
user01># passwd user01
[EX] 사용자 암호 변경 실습
(root 사용자 암호 변경 실습)
# passwd
passwd: Changing password for root
New Password: <----- 새로운 암호 입력(암호: 123user)
Re-enter new Password: <----- 암호 재 입력(암호: 123user)
passwd: password successfully changed for root
# passwd root
New Password: <----- 새로운 암호 입력(암호: knit)
Re-enter new Password: <----- 암호 재 입력(암호: knit)
passwd: password successfully changed for root
(일반 사용자 암호 변경 실습)
# passwd user01
New Password: <----- 새로운 암호 입력(암호: solaris)
Re-enter new Password: <----- 암호 재 입력(암호: solaris)
passwd: password successfully changed for user01
# telnet localhost
Trying 127.0.0.1...
Connected to localhost.
Escape character is '^]'.
SunOS 5.9
login: user01
Password: <----- 사용자 암호 입력(암호: solaris)
Last login: Thu Jan 31 12:23:33 from localhost
Sun Microsystems Inc. SunOS 5.9 Generic January 2003
$ id
uid=100(user01) gid=1(other)
$ passwd
passwd: Changing password for user01
Enter existing login password: <----- 기존의 암호 입력(암호: solaris)
New Password: <----- 새로운 암호 입력(암호: 123user)
Re-enter new Password: <----- 암호 재 입력(암호: 123user)
passwd: password successfully changed for user01
[참고] 사용자 암호 변경 규칙
# man passwd
.....
Passwords must be constructed to meet the following require-ments:
o Each password must have PASSLENGTH characters, where
PASSLENGTH is defined in /etc/default/passwd and is
set to 6. Only the first eight characters are signifi-cant.
o Each password must contain at least two alphabetic
characters and at least one numeric or special charac-ter.
In this case, "alphabetic" refers to all upper or lower case
letters.
o Each password must differ from the user's login name
and any reverse or circular shift of that login name.
corresponding lower case letter are equivalent.
o New passwords must differ from the old by at least
three characters. For comparison purposes, an upper
case letter and its corresponding lower case letter
are equivalent.
.....
암호 변경 규칙
- 암호는 2개의 문자와 한개의 숫자 또는 특수 문자가 포함 되어야 한다.
- 사용자 이름과 암호는 틀려야 한다.
- 사용자 로그인 이름과 암호는 reverse, circular shift 형태는 안된다.
- 사용자의 암호는 이전 암호와는 3글자 이상 틀려야 한다.
[EX] 암호 변경 규칙 테스트
# telnet localhost
Trying 127.0.0.1...
Connected to localhost.
Escape character is '^]'.
SunOS 5.9
login: user01
Password: <----- 사용자 암호 입력(암호: 123user)
Last login: Thu Jan 31 18:51:20 from localhost
Sun Microsystems Inc. SunOS 5.9 Generic January 2003
$ id
$ passwd
passwd: Changing password for user01
Enter existing login password: <----- 기존의 암호 입력(암호: 123user)
New Password: <----- 짧은 암호 입력(암호: end01)
passwd: Password too short - must be at least 6 characters.
Please try again
New Password: <----- 기존의 암호와 같은 암호 입력(암호: 123user)
passwd: Old and new passwords must differ by at least 3 positions.
Please try again
New Password: <----- 새로운 암호 입력(암호: solaris1)
Re-enter new Password: <----- 암호 재 입력(암호: solaris1)
passwd: password successfully changed for user01
-> user01 사용자 복원
Chapter 4. Solaris 9 Installation
___________________________________
솔라리스 10버전에 대한 설치는 다음을 참고 하십시요
■ Solaris 10 설치 가이드
- 817-0544.pdf(Solaris10 Installation Guide Basic Installation)
- 817-5506.pdf(Solaris 10 Installation Guide Custom JumpStart and Advanced
Installation)
■ 솔라리스 8/9/10 버전 이미지를 다운로드는 다음사이트에서 받으시기 바랍니다.
Solaris 8/9/10 설치 이미지 제공
- http://www.vmware.com (VMWare Image)
1. 솔라리스 9 설치시 필요한 CD/DVD
- 설치 CD(Installation CD)
- 1번 CD (1 of 2 CD)
- 2번 CD (2 of 2 CD)
- 언어 CD(Language CD)
or
- DVD
[참고] 솔라리스 9 설치시 H/W 최소 사양
Hardware Requirements for Installation of the Solaris 9 OE(Operating Environment)
- A system based on an UltraSPARC/x86 processor
- 64 Mbytes of memory
- 2.3 Gbytes of disk space
- A keyboard and monitor
- CD-ROM / DVD-ROM or Installation Server
2. 솔라리스 설치 방법 종류
- Webstart Installation(Installation CD + 1 of 2 CD + 2 of 2 CD + Language CD)
- Interractive Installation(1 of 2 CD + 2 of 2 CD + Language CD)
- Custom Jumpstart Installation(Network Installation)
[참고] http://docs.sun.com Documentation
The Solaris 9 OE Installation and Upgrade Options
- Solaris suninstall Program
- Solaris Web Start Installation Software
- Custom JumpStart Procedure
- Solaris Web Start Flash Installation
- Standard Upgrade
- Solaris Live Upgrade Method
3. 솔라리스 설치 과정
솔라리스 9 설치과정을 다음과 같이 4가지 서비스로 구분한다.
솔라리스 9 설치 과정 구분(Solaris 9 Installation Process)
■ System Indentification Service // host , ip , netmask . 등등
■ System Configuration Service // filesystem layout , package 선택
■ Installation Servie
(1). Booting for Solaris Installation
(a). CD-ROM 부팅을 통해 설치하는 방법
- ok boot cdrom // 일조의 cmos mode와 같다.
or
- # init 0
- ok boot cdrom
(b). 네트워크 부팅을 통해 설치하는 방법
<STOP + A>
ok boot net - install
(2). Solaris 9 OE Installation Process // sparc 기준
1. Select a Language : 5.Korean
2. Select a Locale : 0.Korean EUC
3. 설치 안내 : F2_계속
4. 시스템 식별 : F2_계속
5. 네트워크 [X] 예 : F2_계속
6. DHCP 사용 : 아니오
7. 호스트 이름 : solarisXXX (범위:200 ~ 214, 예: solais200)
--------------------------------------------------------
solarisXXX(172.16.8.XXX)
--------------------------------------------------------
200 201 202 203 204 205
206 207 208 209 210 211
212 213 214 215 216 217
218 219 220 221 222 223
224 225 226 227 228 229
--------------------------------------------------------
8. IP : 172.16.8.XXX (예: 172.16.8.205)
9. 서브넷 : 255.255.0.0
10. IPv6 사용 : 아니오
11. 기본경로 : 지정
12. 라우터 IP : 172.16.0.1
13. 커버로스 : 아니오
14. 이름서비스 : none
15. 대륙 및 대양 : 아시아
16. 국가 및 지역 : 대한민국
17. 날짜 및 시간 : 시간확인(ROK)
18. F4_초기
19. F2_표준
20. 지역선택 : F2_계속
21. [X]64비트 지원 : F2_계속 // x86 플랫폼에는 없음
22. 소프트웨어 선택 : Entire Distribution plus OEM Support 64-bit
23. 디스크선택 [X]c0t0d0 : F2_계속
24. 데이터 보존 : F2_계속
25. 레이아웃 : F2_자동배열 (이 부분은 필요한 경우만)
26. 자동레이아웃 : [X]/ [X]swap : F2 (이 부분은 필요한 경우만)
27. 디스크레이아웃 : F4_사용자정의 (수동레이아웃을 선택한경우만)
28.
+------------------------------------------------------------+
|8G 기준) Sparc / Intel(VMWare) |
+------------------------------------------------------------+
|Slice Mount Pointer Size |
+------------------------------------------------------------+
| 0 / 5000 |
| 1 swap 512 |
| 2 overlap (Entire) |
| 3 /data1 500 |
| 4 /data2 500 |
| 5 /data3 500 |
| 6 /data4 500 |
| 7 /export/home (Free) |
+------------------------------------------------------------+
[참고] 실무에서 많이 사용되고 있는 파티션들 예제
/, /usr, /var, /tmp, /export/home(/user), /database, /oracle, /was
위와 같이 입력후 "F2_계속"
29. 원격파일시스템 : F2_계속
30. 프로파일 : F2_계속
31. [X]자동재부트 : F2_설치시작
32. root password 입력 : knit
33. 자동절전기능 사용여부 : n
34. 다음에 다시 질문여부 : n // x86 에는 없다.
35. 2번 CD 설치
36. 3번 CD(language) 설치
[참고] 인텔 플랫폼 설치 방식에 대해서는 http://cafe.daum.net/bscsolaris 참고
- Solaris 9 Installation on VMWare
- Solaris 10 Installation on VMWare
[참고] 자동절전기능
Sparc Platform Sun Solaris 설치시 자동절전기능을 설정한 경우(yes로 설정한 경우)
이 기능을 해제 시키 위해서는 다음과 같은 방법이 가능하다.
(1). Power Saving Function OFF
/noautoshutdown 파일 생성하는 방법
# touch /noautoshutdown
두번째 방법)
/etc/power.conf 파일을 편집하는 방법
# vi /etc/power.conf 편집
세번째 방법)
CDE 환경에서 "Desktop Control" 아이콘을 사용하는 방법
- CDE환경에서
- 패널에 있는 "Desktop Control" 아이콘을 클릭하고
- 전원관리(Power Management) 아이콘을 클릭한다.(Yellow Icon)
- 자동 절전 기능을 OFF 한다.
4. 파티션 정책과 파티션 용량
다음 예는 실무에 바로 적용할수 있는 예는 아니다. 하지만 파티션 정책과 파티션 용량
을 결정할때 한가지 참고 사항으로만 사용할수는 있다.
시스템 자원 사항
- Total Disk : 8G
- Total Mem : 256MB
(1). 파티션 정책 (Partition Policy) 수립시 고려사항
- 소스(추가패키지)가 있는 위치를 나누어야 하는가? 예: /var/apache/htdocs
- 추가적인 패키지 설치 위치를 나누어야 하는가? 예: /oracle
- 데이터가 있는 위치를 나누어야 하는가? 예: /data1, /data2
- 로그 기록을 남기는 위치를 나누어야 하는가? 예: /data1/logs
- 기본적인 프로그램이 위치한곳을 나눌것인가? 예: /usr, /opt, /usr/local
- 운영체제의 /tmp, /var, /export/home을 나눌것인가? 예: /tmp, /var, /export/home
- 스토리지는 붙일것인가?
- NAS의 일부 파일시스템을 사용할것인가?
- RAID 구성을 할것인가?
일반적인 파티션 방법과 용량
/ 200 - 500M // / 와 swap는 기본!!
swap Mem * 2 // 실 메모리용량의 두배
/usr 3G - 4G // 대두분의 prog 가 설치됨
/var 200 - 500M
/tmp 200 - 300M
서버의 목적에 맞는 파티션 정책 // optional
/oracle
/data1
/data2
/was
/log
(2). 파티션 정책과 용량 예제
다음은 파티션 정책에 대한 하나의 예이다. 실무에 바로 적용할 수 있는 예는 아니다. 각
각의 서버의 목적에 맞는 사용자 정의가 필요하다.
[Web Server]
________________________________________________
0 / 1000
1 swap 512
2 overlap 8692 (전체용량)
3 /usr 2000
4 /tmp 500
5
6 /WAS 2000
7 /www *
________________________________________________
[Anonymous FTP Server]
________________________________________________
0 / 1000
1 swap 512
2 overlap 8692 (전체용량)
3 /usr 2000
4 /tmp 500
5
6
7 /export/ftp *
________________________________________________
[Mail Server]
________________________________________________
0 / 1000
1 swap 512
2 overlap 8692 (전체용량)
3 /usr 2000
4 /tmp 500
5
6
7 /var *
________________________________________________
5. 수업전에 알아 두어야 하는 사항들 또는 환경 설정 사항
(1). 유닉스의 디렉토리 구조
/
|
+-------+------+-----+------+---------+-----------+--------+------
| | | | | | | | ....
etc usr tmp var home export work work2
|
home
|
+---+---+
| |
user01 user02
[그림] 유닉스 디렉토리 구조
(2). 기본 디렉토리의 역할
모든 파일시스템의 마운트 포인터가 존재한다.
/usr - 프로그램이 설치되는 디렉토리이다.(Bundle Packages, 정식적인~)
/opt - 프로그램이 설치되는 디렉토리이다.(Unbundle Packages, 부가적인~)
/etc - 시스템 설정 파일이나 관리상에 필요한 파일이 존재하는 디렉토리이다.
(사용자/그룹관리정보, 패스워드, 서비스 설정 파일, 시작스크립트등 일종의 제어판!!)
/dev - 디바이스 디렉토리이다.
/export/home - 사용자의 홈디렉토리이다.
(3). 시스템 관리자의 역할
- 프로그램 관리(Software Administration)
- 패치 관리(Patch Managing)
- 백업과 복구(Backup & Recovery)
- 하드웨어 관리(H/W Administration)
- 성능과 장애처리(Performance & System Fault Administration)
- 시스템 보안 관리(System Security)
- 관리자 지식 업데이트(Education)
(4). 솔라리스 GUI 환경 종류
- CDE(Common Desktop Environment)
- Openwindow
- GNOME(Including solaris9)
- Java Desktop Environment(Including solaris10)
[참고] CDE?
CDE는 Open Group에서 제정된 개방형시스템의 GUI 표준이다. Motif에 기반을 두고, HP,
IBM, 그리고 다른 회사들에서 나온 요소들을 가미하였으며, 원래는 COSE에 의해 관리되
었다. 대부분의 주요 유닉스 공급자들이 CDE를 지원한다. CDE는 또한 원격 프로그램 실
행과 자신의 작업공간에 있는 응용프로그램을 일시적으로 중지하거나 재개하는 등의 능
력을 제공한다. CDE라는 상표는 X/Open, 즉 Open Group에 의해 관리되어진다.
[참고] GNOME?
GNOME[그놈]은 유닉스 기반의 운영체계 사용자들을 위한 그래픽 사용자 인터페이스와 일
련의 컴퓨터 데스크탑 애플리케이션들이다. GNOME은 유닉스 기반의 운영체계를 프로그래
머가 아닌 사람들도 쉽게 사용할 수 있고, 일반적으로 윈도우 데스크탑 인터페이스와 그
것의 대부분의 보편적인 애플리케이션 들에 상응하도록 만드는데 목적이 있다. 실제로,
GNOME은 사용자들이 여러 개의 데스크탑 외관 중 하나를 선택할 수 있게 해주는데, 예를
들면 사용자 인터페이스를 윈도우나 맥OS처럼 보이도록 만들 수 있다. 게다가, GNOME은
워드프로세서, 스프레드시트, 데이터베이스 관리자, 프레젠테이션 개발도구, 웹브라우저
및 전자우편 프로그램 등, 윈도우의 오피스97 제품에 있는 것들과 같은 형태의 애플리케
이션들을 포함한다.
GNOME은 리처드 스톨먼에 의해 설립된 조직인 FSF의 후원 아래, 자원자들의 장시간에 걸
친 노력의 산물이다. 스톨먼과 FSF의 동료 회원들은 소프트웨어의 소스코드가 다른 사람
들에 의해 계속적으로 개선될 수 있도록 항상 공개되어야 한다고 여기고 있다. GNOME은
데스크탑 운영체계 시장이 어떤 한 회사에 의해 통제되지 않도록, 리눅스와 다른 유닉스
시스템들을 윈도우에 대한 존립 가능한 대안으로 만들기 위한 노력의 일부이다. GNU는
FSF의 운영체계와 일련의 응용프로그램들이다 (리눅스는, 리누스 토발즈가 GNU로부터 나
온 부가적인 운영체계 요소에 커널을 추가함으로써 개발된 운영체계이다).
GNOME은 GNOME 프로그램들과 다른 운영체계 플랫폼 프로그램들이 상호운용성을 가질 수
있도록 CORBA를 지원하는 ORB와 함께 나온다. GNOME은 또한 프로그래머들이 GNOME 사용
자 인터페이스를 사용하는 응용프로그램들을 개발하는데 사용할 수 있도록 위짓 라이브
러리를 포함한다. GNOME은 데스크탑 버전 외에도, 포켓용 PalmPilot 등을 위한 사용자
인터페이스와 일련의 응용프로그램도 나온다.
(5). 윈도우 클라이언트에서 유닉스 서버로 터미널 접속
[ Window XP ] -----> [ Solairs Server ]
시작 > 실행 > cmd > telnet 172.16.8.254 > 사용자ID/패스워드
(6) 참고 웹사이트(URL)
(6.1) 솔라리스에 관련한 썬 사이트 모음
Sun Site
- http://www.sunfreeware.com (GNU Package Site)
- http://sunsolve.sun.com (Patch Site)
- http://docs.sun.com (Sun Manual Site)
(6.2) 솔라리스에 관련한 한국사이트 모음
Solaris Reference Site
- http://cafe.daum.net/bscsolaris
- http://cafe.daum.net/solagoing
- http://solaris.superuser.co.kr
- http://www.solarisschool.co.kr
- http://www.howtosolaris.com
- http://www.unix.co.kr
- http://stone.backrush.com
- http://cafe.naver.com/solatech
- http://cafe.naver.com/backupkorea
- http://www.unixsun.co.kr/
- http://cafe.naver.com/sunschool.cafe
- http://cafe.daum.net/osschool
- http://ndocs.com/
- http://ksun.co.kr
(7) 수업 전 환경 설정 사항
수업전에 환경에 관련한 사항들을 자동으로 설정해 주는 ENV_main.sh 스크립트를 실행 한다.
솔라리스 환경 설정(Solaris Environment Setting)
■ 콘쉘로 변경 (/sbin/sh -> /bin/ksh)
■ ENV_main.sh 스크립트 실행
ENV_main.sh 스크립트는 다음과 같은 역할을 갖는다.
● ~/.profile 파일생성 및 설정
● ~/.kshrc 파일생성 및 설정
● ~/.exrc 파일생성 및 설정
● ~/.rhosts 파일생성 및 설정
● /etc/default/login 설정 변경
● /etc/ftpd/ftpusers 설정 변경
● /etc/sshd/sshd_config 파일 설정 변경
(a). ENV_main.sh 스크립트 실행
# dfshares 172.16.8.254
# mkdir /mnt/server
# mount 172.16.8.254:/root/shell /mnt/server
# cd /mnt/server
# ls
# ./ENV_main.sh
(b). root 사용자의 쉘을 ksh로 변경
# passwd -e // 쉘 변경
Old shell: /sbin/sh
New shell: /bin/ksh <----- "/bin/ksh" 입력
(c). 로그아웃/로그인
CDE 환경 패널(Pannel) > EXIT 아이콘 클릭 -> 로그아웃 -> 로그인
[참고] 현재 적용
# . /.profile
# . /.kshrc
[/]# <----- 쉘 프롬프트 변경 확인
[참고] Intel Platform on VMWare
(a). http://www.daum.net/bscsolaris 에서 ENV.zip 파일 다운로드(MS Windows)
(b). 알FTP 프로그램을 사용하여 솔라리스 서버에 파일을 업로드 한다.
(c). ENV.zip 압축 해제 후 실행
# unzip ENV.zip
# chmod 755 ENV_main.sh
# ./ENV_main.sh
(8). 제어 문자
썬 솔라리스에서 다음과 같은 제어문자(Control Charaters)들을 사용할수 있다.
Control Charaters
Ctrl + C Terminates the command currently running.
Ctrl + D Indicates end-of-file or exit.
Ctrl + U Erases all characters on the current command line.
Ctrl + W Erase the last word on the command line.
Ctrl + S Stops output to the screen
Ctrl + Q Restarts output to the screen after you have pressed Control-S
----------------------------------------------------------------------------------------
TIP .
ctrl + space // 한영 전환
[실습1] <Ctrl + C>
# man ls
<Ctrl + C>
# find / -name core -type f
<Ctrl + C>
[실습2] <Ctrl + D>
1. 파일의 끝의 의미를 갖는다.
# mkdir /test
# cd /test
# cat > file1
Hello, Solaris
<Ctrl + D>
# cat file1
2. 현재 쉘을 종료하는 의미를 갖는다.
# telnet 172.16.8.254
Trying 172.16.8.254...
Connected to 172.16.8.254.
Escape character is '^]'.
SunOS 5.9
login: root <----- ID : root
Password: <----- PASS:
Last login: Tue Mar 11 11:04:50 from solaris215
Sun Microsystems Inc. SunOS 5.9 Generic January 2003
# hostname
# <Ctrl + D>
[실습3] <Ctrl + U>
명령어 라인 전체를 지워 주는 역할을 갖는다.
# find / -name core -type f <Ctrl + U>
[실습4] <Ctrl + W>
명령어 라인상에 마지막 단어를 지워주는 역할을 갖는다.
# find / -name core -type f <Ctrl + W> <Ctrl + W> <Ctrl + W>
[실습5] <Ctrl + S>, <Ctrl + Q> // ctrl + s : 화면 출력 정지 , ctrl + q : 화면정지 복귀
# du /
<Ctrl + S>
<Ctrl + Q>
<Ctrl + S>
<Ctrl + C>
(9). 수업에 사용되는 사용자
수업을 위한 사용자 추가
# admintool &
-------------------------------------
User Name : user01
Login Shell : /bin/ksh
Password : Normal Password
Home Dir. : /export/home/user01
-------------------------------------
(10). CDE 환경 사용에 대한 설명
(a) 터미널 사용시 설명
- 한개의 터미널을 띄운다.
- 터미널의 (ㄱ)왼쪽 상단 "Exit" 아이콘,
(ㄴ)오른쪽 상단 "Minimize/Maximize" 아이콘,
(ㄷ)오른쪽 상단 "Icon Coversion" 아이콘
(b) CDE 환경에서 사용되는 아이콘 설명
CDE 환경의 패널 부분에 존재하는 아이콘
- Netscape Icon
- Calendar Icon
- Homedirectory Icon
- Text Node Icon
- MailBox Icon
- Screen Lock Icon
- Workspace Icon
- Exit Icon
- Printer Icon
- Application Icon(Desktop Control Icon)
- CPU_DISK Icon
- Help Icon
- Trash Icon
(11). 사용자의 쉘프롬프트
root 사용자 : #
일반 사용자 : $
출처 : http://cafe.daum.net/bscsolaris
Chapter 3. Solaris Introducing
_________________________________
솔라리스 환경은 SunOS(5.x)와 ONC+(Open Network Computing) 제품, CDE GUI
(Graphical User Interface)로 구성이 된다. SunOS는 시스템 자원(System Resources)과 시
스템 동작을 위한 스케줄 프로그램등으로 구성이 된다. ONC+ 프로그램은 네트워크 서비스
즉 NIS(Network Information Services), NIS+(Network Information Service Plus),
NFS(Network Filesystem)와 같이 네트워크 상에서 자원을 공유하고 정보를 전달하는 서비
스 제품으로 구성된다. CDE 환경은 GUI 방식으로 되어 있으며 로그인 스크린이나 운영체제
의 거의 모든 기능을 접근하는데 사용한다.
솔라리스 이전 버전
- Solaris 1.x & Solaris 2.x
- SunOS 4.x & SunOS 5.x
(1). Solaris 9 버전이란?
■ 솔라리스 버전간의 상관관계
Solaris 2.6 = SunOS 5.6
Solaris 2.7 = SunOS 5.7 = Solaris 7
Solaris 2.8 = SunOS 5.8 = Solaris 8
Solaris 2.9 = SunOS 5.9 = Solaris 9
Solaris 2.10 = SunOS 5.10 = Solaris 10
(2). 솔라리스 플랫폼(Platform)
■ Sparc Platform
■ Intel Platform(x86 용)
(3). 대표적인 UNIX
■ Sun Solaris
■ HP HP-UX
■ IBM AIX
■ Compaq Tru64 (Include HP)
■ SGI IRIX
[참고] 인텔 호환 PC에서 동작하는 유닉스
Solaris(X86), OpenServer, Unixware, NextStep, Minix
FreeBSD, NetBSD, OpenBSD
Linux(RedHat RHEL, SuSE Linux, Tubo Linux, Debian Linux 등)
(4). UNIX 시스템의 사용
KT : 80 %
HanJun : 50 %
KTF : 33 %
COSCO : 80 %
철도청 : 제어용 시스템
반도체 : 반도체 기기 테스트용 장비
CAD 서버: 디자인 프로그램 애뮬레이션 용도
(5). 최근 유닉스 시장
■ Unix 서버 시장(한국기준, 매출액 기준, 2007년 8월기준)
(a). IBM
(b). HP
(c). SUN
■ X64 서버 시장(한국기준, 매출액 기준, 2007년 8월 기준)
(a). HP
(b). IBM
(c). 삼성전자
(d). DELL
(e). SUN
(6). 솔라리스 9의 새로운 기능
솔라리스의 새로운 기능에 대해서는 다음 사이트를 참고하였다.
- http://docs.sun.com/app/docs/doc/816-3925/6ma624fq7?a=view
(6.1). 솔라리스 9 버전 릴리즈
- 2002년 09월(http://docs.sun.com/app/docs/coll/768.6)
- 2002년 12월(http://docs.sun.com/app/docs/coll/768.7)
- 2003년 04월(http://docs.sun.com/app/docs/coll/768.8)
- 2003년 08월(http://docs.sun.com/app/docs/coll/768.9)
- 2003년 12월(http://docs.sun.com/app/docs/coll/768.10)
- 2004년 04월(http://docs.sun.com/app/docs/coll/768.11)
- 2004년 09월(http://docs.sun.com/app/docs/coll/768.12)
- 2005년 09월
(6.2). 중요 기능 추가 / 업데이트
■ Solaris 9 Resource Manager을 통한 시스템 자원 자원 개선
■ Linux와의 호환성 개선함(리눅스의 프로그램을 아무런 변경없이 실행 가능하게 됨)
■ 개선된 보안성
- Internet Key Exchange(많은 보안 네트워크 관리 가능)
- Solaris Secure Shell(SSH) 내장
- 안전한 LDAP 클라이언트(SSL/TLS 및 CRAM-MD5 암호화 기법 제공)
- 강력한 암호화(최대 128비트 강력한 암호화 가능)
■ iPlanet Directory Server 5.1 내장
■ Solaris Volume Manager(RAID 구성 강화)
■ 파일 시스템 개선(파일 시스템 입출력 기능 향상)
■ Solaris Live Upgrade 2.0 포함
■ Web Start Flash(플래쉬 설치 방식 제공)
■ 최소 설치(필요한 패키지만 설치 가능)
■ Multiple Page Size Support
■ 향상된 다중 스레드 라이브러리
■ Solaris 운영 환경을 위한 NetscapeTM 6.2.1 포함
■ Solaris 운영 환경을 위한 GNOME 2.0 Desktop 포함
[참고] SUN/IBM/HP 서버의 종류와 Linux 지원가능 시스템
/root/docs/Reference/UnixServerType.txt
출처 : http://cafe.daum.net/bscsolaris
Chapter 2. OS Overview
_________________________
1. 운영체제(OS)란?
운영체제(OS)는 사용자 H/W 에 대한 사용자 인터페이스 역할을 가진다. 운영체제의 핵심
(core)은 kernel이고 실제적인 H/W을 제어 하는 역할을 가진다. Shell은 명령어 해석기의
역할을 가지고 나머지 파일과 디렉토리 구조로 구성이 되어 있다.
2. 운영체제의 구조
-------------------------------------
USER
-------------------------------------
Application(웹브라우저,편집기) => ls, find, .. (명령어)
OS Shell(sh,csh,ksh,tcsh,zsh,bash) => ksh (명령어해석기)
Kernel(unix, genunix) => unix (커널)
-------------------------------------
H/W => disk, monitor(디바이스)
-------------------------------------
컴퓨터의 구성은 하드웨어와 소프트웨어로 나눌수 있다. 하드웨어는 CPU, RAM, Disk 등이고
소프트웨어는 컴퓨터안에서 실행할 수 있는 프로그램을 말한다. 운영체제는 이런 하드웨어
와 소프트웨어를 직접 제어 가능하도록 하는 프로그램이다.
(1). 하드웨어(H/w)
■ CPU(Central Processing Unit)
중앙처리장치는 컴퓨터 하드웨어의 핵심으로서 기억장치로부터 기계어 코드(컴퓨터가 이해
할수 있는 기게어 코드)를 읽어 들여 실행하는 역할을 한다. 다시말하면 컴퓨터내의 모든
제어와 연산을 담당한다. 명령어의 해석과 자료의 연산, 비교 등의 처리를 제어하는 컴퓨
터 시스템의 핵심적인 장치이다. 중앙처리장치의 성능은 컴퓨터의 성능과 직결되며 CPU
내부의 구성에 따라 컴퓨터의 계열이 다양하게 구분된다. 컴퓨터 시스템 전체를 제어하는
장치로서, 다양한 입력장치로부터 자료를 받아서 처리한 후 그 결과를 출력장치로 보내는
일련의 과정을 제어하고 조정하는 일을 수행한다. 모든 컴퓨터의 작동과정이 중앙처리장치
의 제어를 받기 때문에 컴퓨터의 두뇌에 해당한다.
중대형 컴퓨터에서는 이를 중앙처리장치(central processing unit:CPU)라 하지만, 소형 컴
퓨터에서는 때로 마이크로프로세서(micro processor) 또는 줄여서 그냥 프로세서라 부르기
도 하는데, 명칭만 다를 뿐 기본적으로 동일한 기능을 수행한다.
■ RAM(Ramdom Access Memory)
램(RAM)은 일반적으로 메모리 혹은 주기억장치라고 부르는데 중앙처리장치에 의해 접근되
는 기계어 코드와 자료(혹은 데이터)를 저장한다. 주기억장치로 널리 사용되고있는 메
모리로로, Random Access Memory 의 약어이다. 플립플롭으로 만들어진 기억소자를 사용
한다. 기록과 해독의 두 회로가 있어서 정보의 기록, 해독이 가능하고 컴퓨터나 주변 단말
기기의 기억장치에 널리 쓰인다. 종류로는 전원이 연결된 상태에서 일정한 주기마다 리프
레시(refresh) 조작을 해주어야만 정보가 지워지지 않는 DRAM과 전원만 연결되어 있으면
정보가 지워지지 않는 SRAM이 있으며 고밀도 집적회로를 사용하여 소형, 대용량화되고 있
다.
SunOS 5.X은 가상 메모리 운영체제이다. RAM의 사용공간 보다 더 많은 메모리 공간을 사용
하는 프로그램을 실행시켰을 때 사용되는 것이 가상 메모리이다. 가상 메모리는 하드 디스
크에 있는 메모리 공간이며 실제 메모리의 연장 공간처럼 쓰이게 된다.
프로그램은 하드디스크에 저장되며 프로그램이 실행되면 메모리에 복사가 되고 활성화 된
프로그램 동안 프로그램의 일부분이 RAM에 복사횓된다. 작업이 끝날 때 까지 가상 메모리
에 남아 있게 된다.
프로그램이 종료 되면 가상 메모리공간을 다른 프로그램 실행시 덮어 쓰게 되고 이것의
관리를 운영체제가 한다. 만약 전원이 꺼지면 저장하고 있는 모든 가상 메모리의 내용은
없어지게 된다.
■ Hard Disk
하드 디스크는 자기적 매체 장치로서 파일, 디렉토리, 프로그램들등을 저장하는 장치이다.
자성체로 코팅된 원판형 알루미늄 기판에 프로그램이나 데이터를 영구 보관하기 위한 외부
기억장치 자료를 저장할 수 있도록 만든 보조기억장치이다. 디스크가 레코드판처럼 겹
쳐져 있는 것으로, 디스크 위에는 트랙이라고 하는 동심원이 그려져 있다. 이 동심원 안에
데이터를 전자적으로 기록하게 된다. 헤드는 트랙에 정보를 기록하거나 읽어 내는 역할을
한다.
자기디스크 장치가 처음 나타났을 때는 디스크를 사용자가 컴퓨터에 장착하여 사용하게
했다. 그러나 먼지에 오염되거나 사용자의 조작 실수로 자료가 파손되는 일이 잦아서 현
재와 같이 밀봉하는 형태로 바뀌었다. 하드디스크라는 말은 PC가 출현되었을 때 플로피디
스크(FDD)만 사용할 수 있었는데, 점차 용량이 큰 현재의 디스크가 사용되면서 플로피에
상대되는 말로 하드라는 수식어가 붙게 되었다.
■ I/O 장치
입력장치는 컴퓨터에 자료를 입력하기 위한 장치를 말하며, 인풋시스템(Input System)이라
고도 한다. 인간이 정보를 해석하고 기억하는 방식과는 달리 컴퓨터는 0과 1로 정보를 표
시하게 되어 있다. 사람들이 사용하는 문자, 도형, 목소리, 숫자 등의 자료를 읽어 들여
0과 1의 이진수 형태로 바꾸어 컴퓨터가 처리를 할 수 있도록 해주는 역할을 하는 것이 입
력장치이다. 입력장치로는 키보드, 마우스, 조이스틱, 터치스크린, 이미지 스캐너, 디지털
카메라, 광학 마크 판독기(OMR), 바코드 판독기(Bar Code Reader), 자기잉크문자판독기
(MICR)등이 있다.
출력장치는 컴퓨터에서 정보를 처리한 결과를 기계로부터 인간이 알 수 있는 언어(言語)로
변환해서 꺼내는 장치이다. 출력장치는 모니터, 프린터, 종이테이프, 카드천공기, 라인프
린터, 자기테이프등이 있다.
(2). 운영체제
SunOS 운영체제는 다음과 같은 3가지로 구성이 된다.
■ 커널(Kernel)
■ 쉘(Shell)
■ 디렉토리 구조(Directory Structure)
① 커널
커널은 SunOS 운영체제의 핵심 부분으로 컴퓨터의 물리적인 자원을 관리해 주는 역할을 가
지고 다음과 같은 기능등을 가진다.
■ CPU 기능 관리(CPU 스케줄링)
■ 메모리 관리 및 가상메모리 관리
■ 프로세스 관리
■ 파일시스템과 구조 관리
■ 디바이스 관리(주변 장치, 입출력 장치)
■ 기타
커널은 솔라리스가 부팅될 때 가장 먼저 읽혀진다. 솔라리스 커널은 unix, genunix로 구성
되어 있으며 커널을 제외한 다른 특성이 있는 모든 기능들을 모듈(Module) 형태로 제공하
고 있다.
② 쉘(Shell)
쉘은 명령어를 해석하는 부분으로서 사용자와 솔라리스 시스템을 연결시켜 주는 인터페이
스 역할을 한다. 즉 사용자가 입력한 명령어를 해석하여 커널이 이해할 수 있는 명령으로
번역하여 커널에게 넘겨 준다. 그러면 커널이 그것을 수행하고 수행된 결과 값을 쉘에게
다시 넘겨주게된다. 그러면 쉘은 사용자에게 명령어의 결과 값을 돌려 준다. 결국 사용자
의 명령을 해석하는 역할을 한다. 쉘은 이렇게 ㉮명령어를 해석하는 역할외에도 ㉯프로그
램을 할수 있는 특징을 가지고 있다. 쉘의 특성을 이용한 프로그램을 쉘프로그램 또는 쉘
스크립트라고 한다.
솔라리스에서는 6가지 쉘을 제공해 주고 있다. 기본 쉘(Basic Shell)과 추가적인 쉘이다.
솔라리스 9에서의 기본 쉘
■ Bourne Shell
■ C Shell
■ Korn Shell
솔라리스 9에서의 추가적인 쉘
■ Bash
■ Z Shell
■ TC Shell
솔라리스의 추가적인 쉘은 솔라리스 8에서 처음 내장이 되었으며 그 전까지는 기본 쉘 3가
지만 제공하고 있었다. 실제적으로 다른 디렉토리 안에서 많은 쉘의 이름이 존재하지만 실
제 이 기본 쉘과 추가적인 쉘에 링크 되어진 상태이다.
쉘의 역할을 정리하여 보면 다음과 같다.
① 입력을 읽고 해당 명령행을 분석한다.
② 특수 문자들을 평가한다.
③ 파이프, 리다이렉션, 백그라운드 프로세스를 설정한다.
④ 시그널을 처리한다.
⑤ 프로그램을 올바르게 실행시킨다.
다음은 쉘의 발전 과정에 대한 그림이다.
sh --------------> ksh --------------> zsh
csh ------------------------> tcsh
bash(sh + csh + ksh)
[그림] 쉘의 발전 과정
출처 : http://cafe.daum.net/bscsolaris
Chapter 1. UNIX History
_________________________
Mutics => UNIX(AT&T, 1969년)
(1). System V 계열
(2). BSD(Berkeley Software Distribution)
(3). SVR4(System V Release 4)
[참고] 유닉스 역사 / 유닉스 소개
[유닉스의 역사]
1960년대 AT&T 벨연구소에서 개발한 Multics 라는 운영체제가 너무 복잡하여
운영체제의 필요성이 생기게 되었다. 1969년 AT&T Bell 연구소의 Ken Thompson과
C언어를 만든 Dennis Rithie에 의해 PDP-7를 사용하여 어셈블리로 개발 되었다.
초기의 유닉스 운영체제는 어셈블리(Assembly) 언어로 작성되어 Dennis Ritchie가
B언어를 개선한 C언어를 개발한 뒤 1973년에 C언어를 사용하여 유닉스를 다시 만
들것을 제한하였고 그리하여 유닉스의 90% 이상이 C로 다시 작성이 되고 나머지는
어셈블리 언어 및 스크립트로 작성되었다. 이로인해 다른 시스템에도 아주 쉽게
이식하여 사용할수 있게 되었다.
1976년도 AT&T는 외부의 여러 대학에 소스 코드와 매뉴얼을 배포하였으며 유닉스의
소스 코드를 받은 여러 연구소는 개량 판을 발표하였는데 그 중에서 가장 유명하고
활발한 활동을 하였던 것이 BSD(Berkely Software Distribution)이다.
1978년 UNIX V6(Version 6)라는 이름으로 일반인에게 공개되면서 IBM 370 컴퓨터에
이식하여 시험하였고 다른 많은 회사에서도 자사의 중대형 컴퓨터에 유닉스를 이식
하기 시작하였다.
BSD는 1978년도 버클리 대학의 빌 조이가 발표하여 1979년 가상 메모리 개념을 최초
로 도입했으며, 1980년에는 TCP/IP를 구현한 최초의 운영체제가 되었다.
AT&T의 벨 연구소도 유닉스를 꾸준히 개량하여 1983년 UNIX System V라는 이름으로
새 버전을 발표하였다.
썬은 BSD를 만든 빌 조이를 영입하여 1984년 BSD를 바탕으로 많은 독자적인 기능을
추가한 SunOS를 발표하였고 많은 유닉스 계열의 기술적인 공헌과 개선을 하였다.
유닉스의 원조이자 UNIX System V 계열의 대표인 AT&T와 BSD 계열의 선두 주자인 썬
은 UNIX System V와 SunOS를 근간으로 SVR4(System V Release 4)를 발표하였다.
SVR4는 1991년도 썬이 Solaris 2.X라는 상표명으로 발표를 한 이후에 많은 유닉스
제조회사들이 채택하여 유닉스의 기본이 되었다.
[유닉스의 소개]
유닉스는 1969년에 벨연구소에서 인터랙티브 시분할 시스템으로서 만든 것이 그 시초
가 된 운영체계이다. 켄 톰슨과 데니스 리치가 유닉스의 창시자로 알려져 있다. 유닉
스라는 이름은 그 이전의 시스템인 멀틱스에 기반을 두고 지은 일종의 말장난이었다.
1974년에 유닉스는 C 언어로 쓰여진 최초의 운영체계가 되었다. 유닉스는 여러 회사
들이나 대학 및 개인들에 의해 많은 확장판과 새로운 아이디어들이 다양한 버전의 유
닉스에 추가됨으로써, 대형 프리웨어 제품의 한 종류로 진화하였다. 유닉스는 앞서가
는 특정 컴퓨터 회사들에 의해 소유된 독점적인 운영체계가 아니었다는 것과, 또 그
것이 표준 프로그래밍 언어로 작성되고, 대중적인 많은 아이디어를 받아들였다는 이
유 때문에,누구에 의해서도 개선되고 강화될 수 있는 최초의 개방형 표준 운영체계가
되었다. 다양한 버전의 유닉스로부터 나온 C 언어와 쉘 인터페이스의 복합체는 IEEE의
찬조 하에서 POSIX로 표준화되었다. POSIX 인터페이스들은 번갈아 가며, X/Open 프로
그래밍 가이드 4.2 ("단일 유닉스 규격"과 "유닉스95"로 알려져있다)에 명기되었다.
단일 유닉스 규격의 버전2는 유닉스98로도 알려져 있다. 유닉스의 공식적인 등록상표
는 현재 산업표준기구인 오픈그룹이 소유하고 있으며, 유닉스 관련 제품들의 인증과
상표부여 등을 관장하고 있다.
유닉스 운영체계는 널리 판매된 썬마이크로시스템즈, 실리콘그래픽스, IBM, 그리고
그외 많은 회사들의 워크스테이션 제품들에서 사용된다. 유닉스 환경과 클라이언트/
서버 프로그램 모델은 인터넷 개발과 네트웍 중심의 컴퓨팅 국면을 새로이 하기 위한
중요한 요소였다. 유닉스에서 파생하여, 현재 무료 소프트웨어와 상용버전이 모두 존
재하는 리눅스는 독점 운영체계의 대안으로서 명성을 더해가고 있다.
출처 : http://cafe.daum.net/bscsolaris
solaris 폴더내 모든 자료는
http://cafe.daum.net/bscsolaris
에서 퍼온 자료이며 개인적인 자료 정리용으로 쓰였습니다
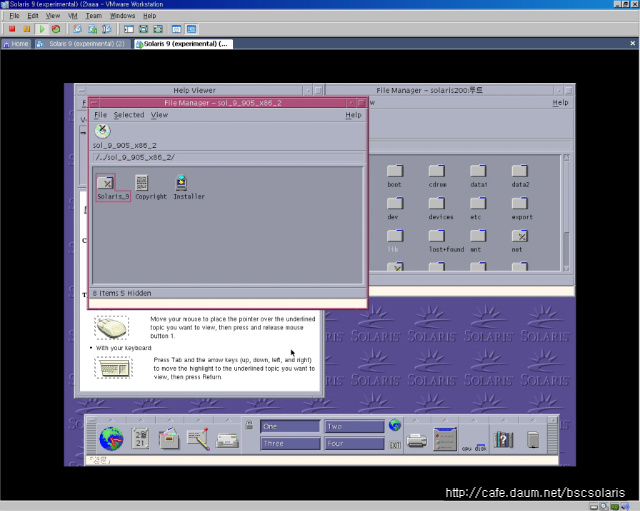
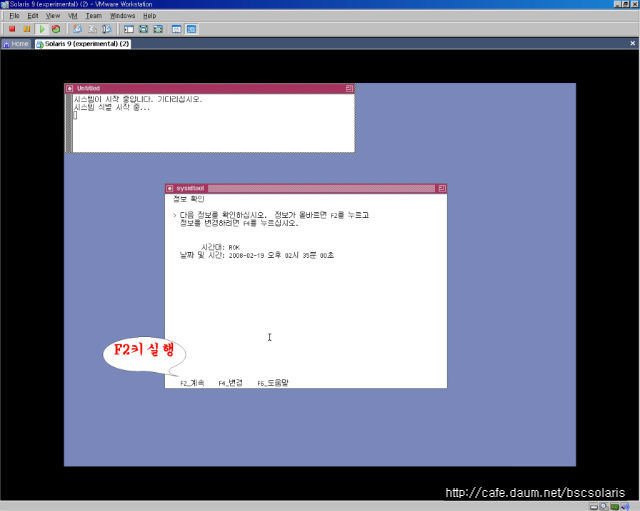
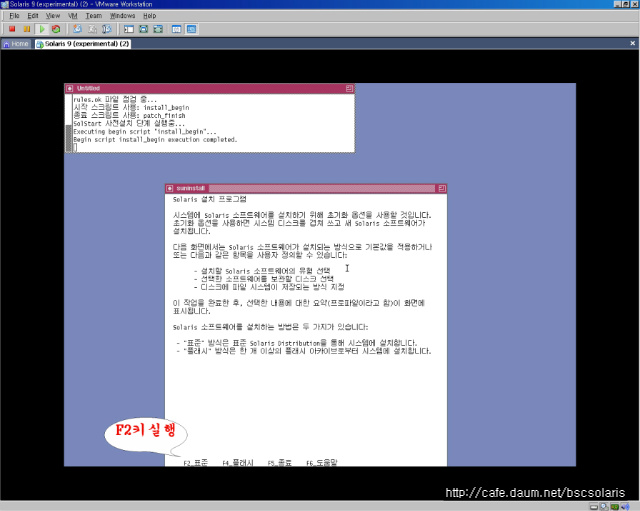
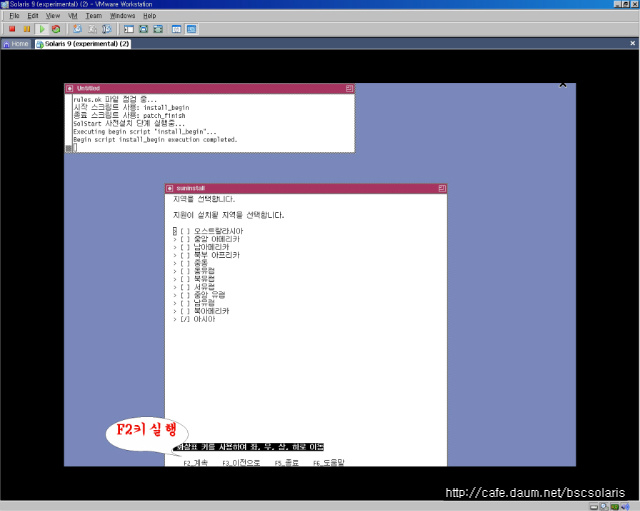
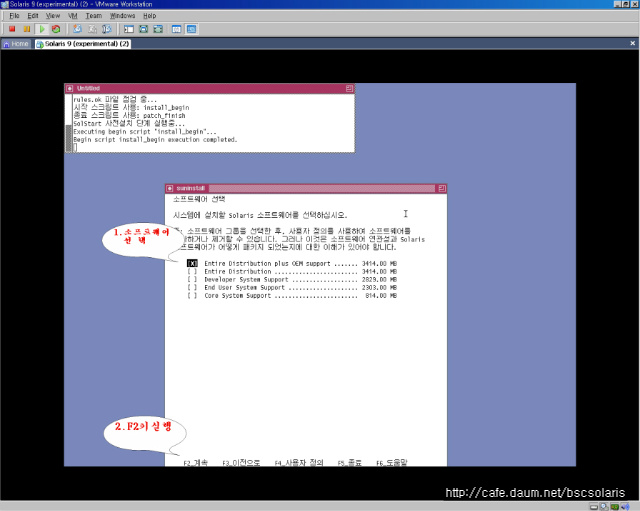
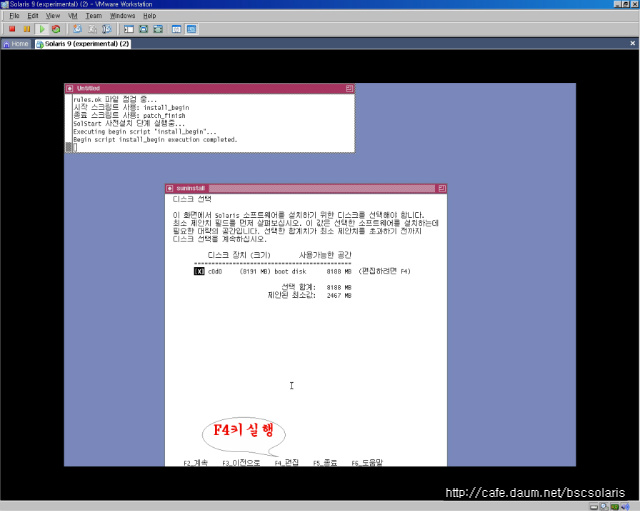


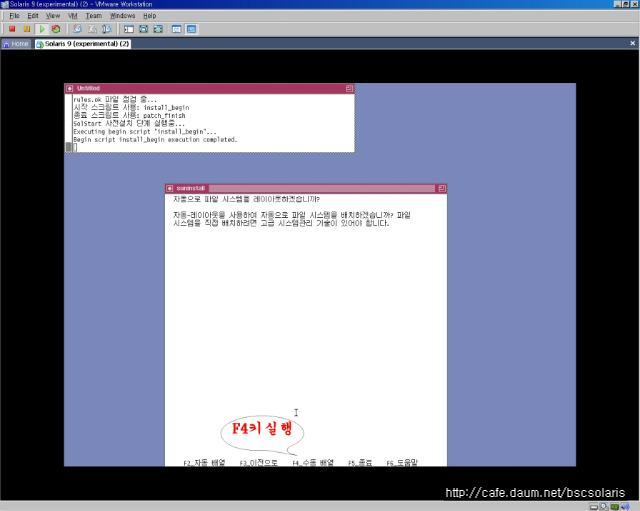
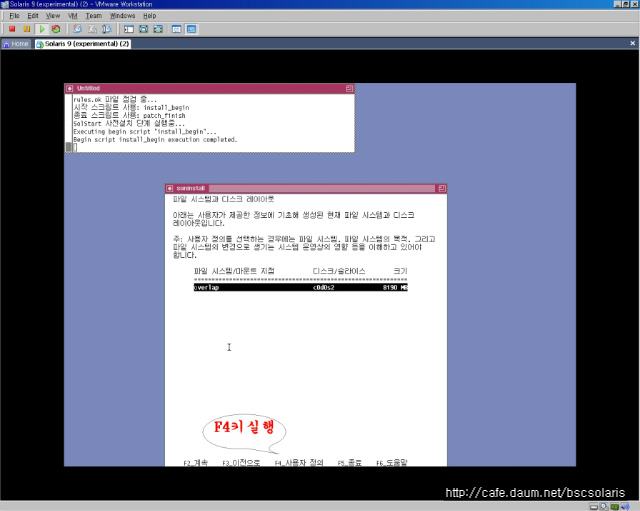
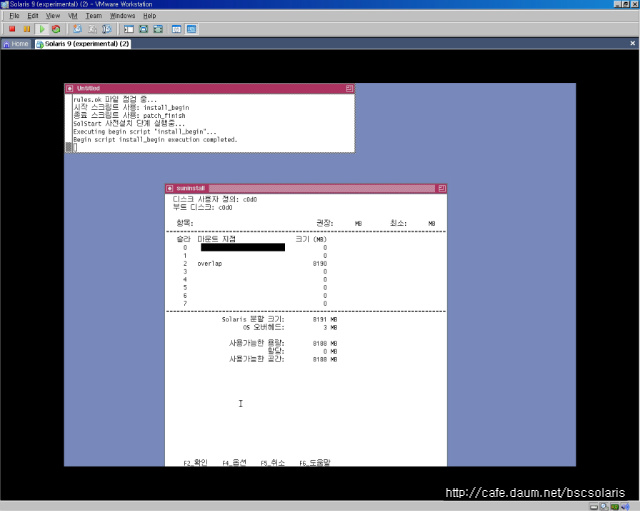
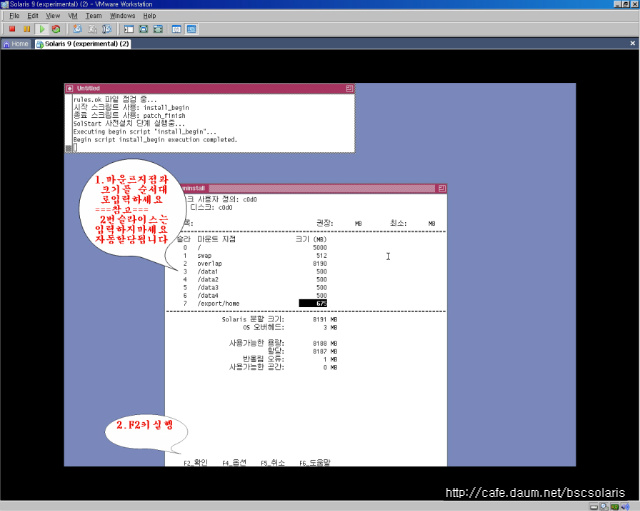
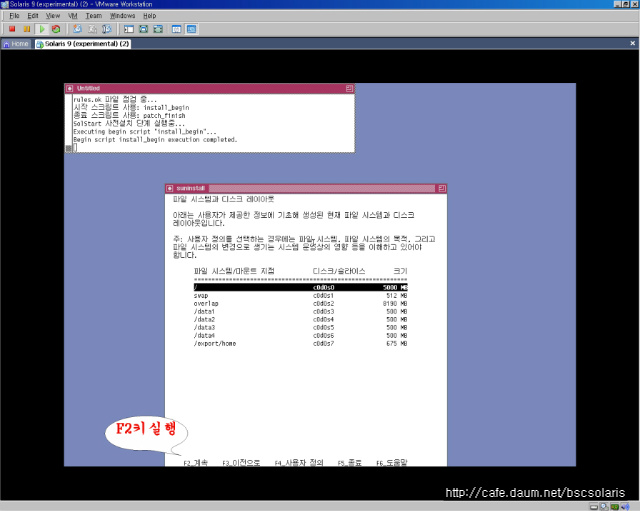
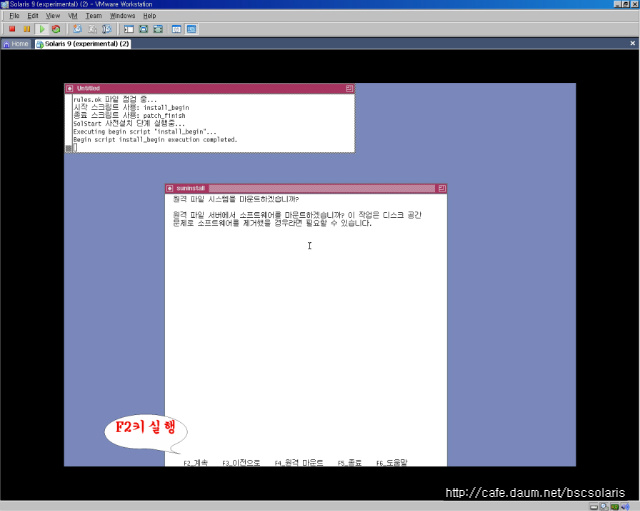


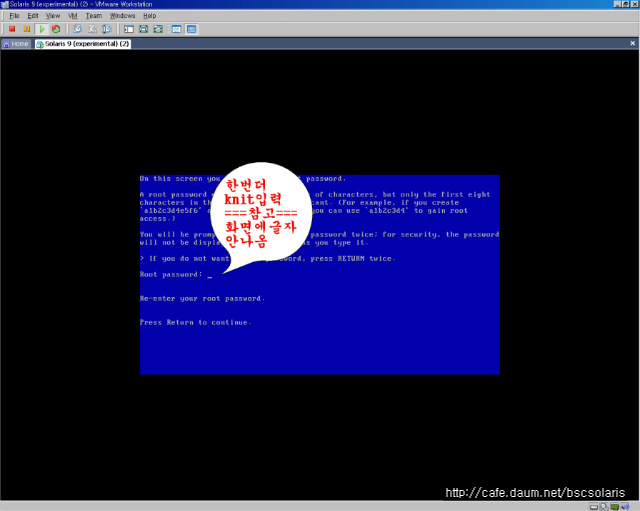
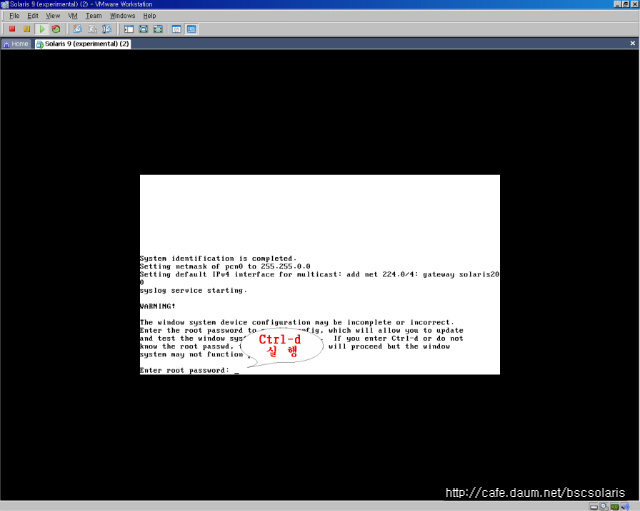
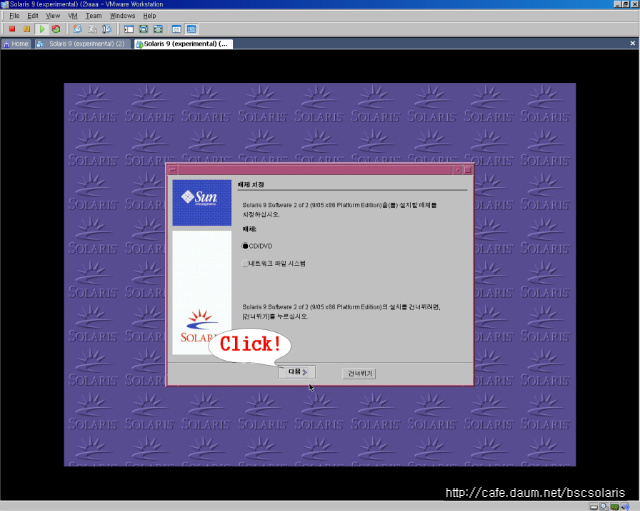
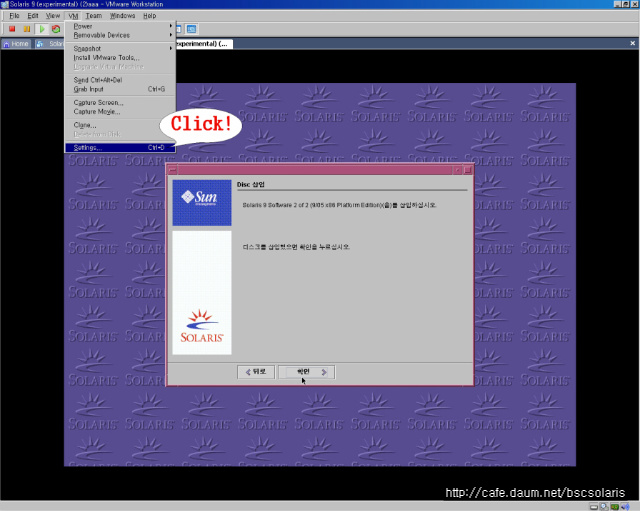
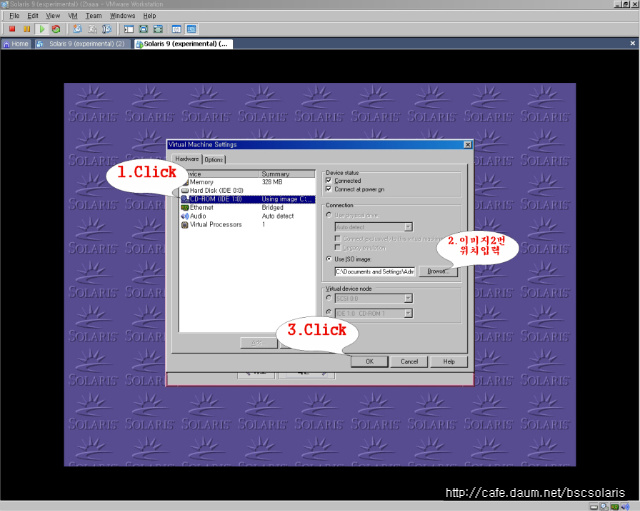

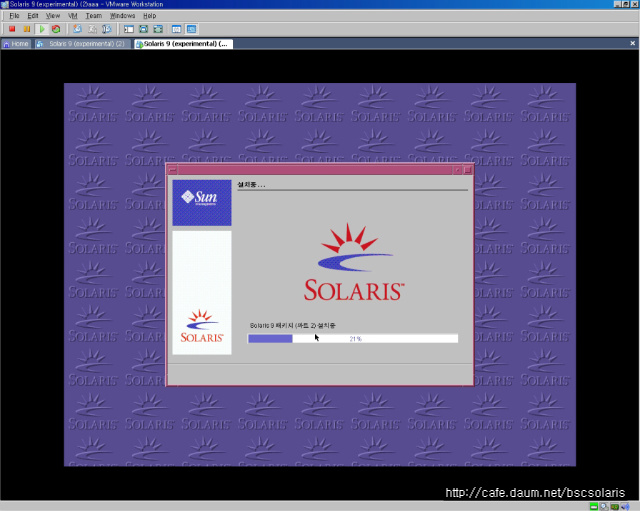
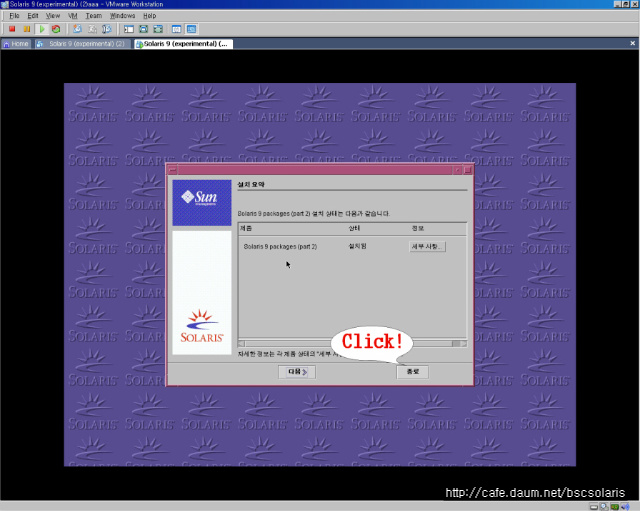
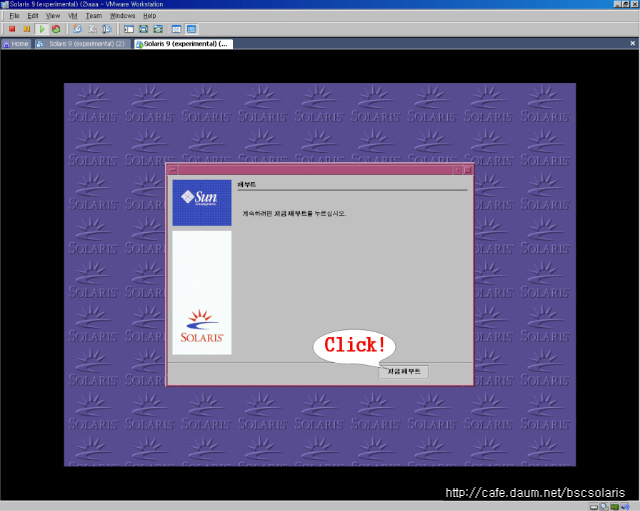

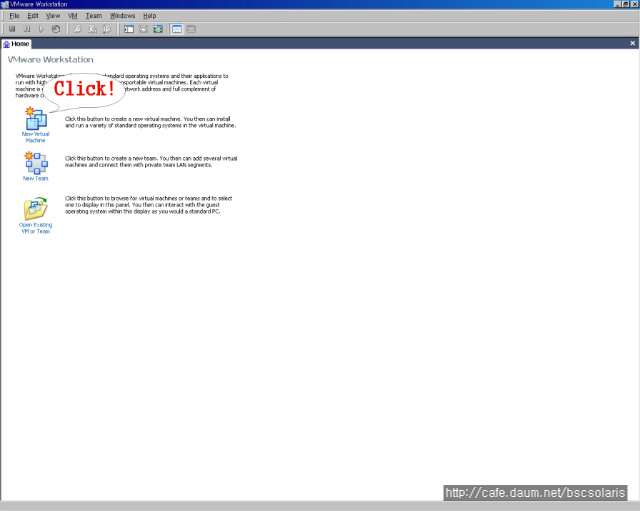
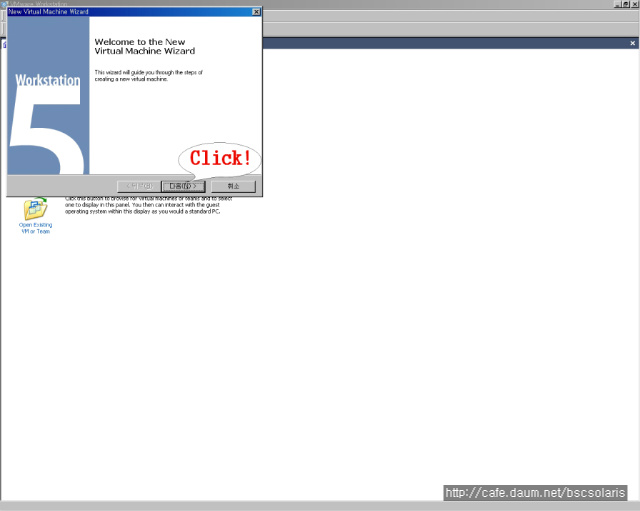
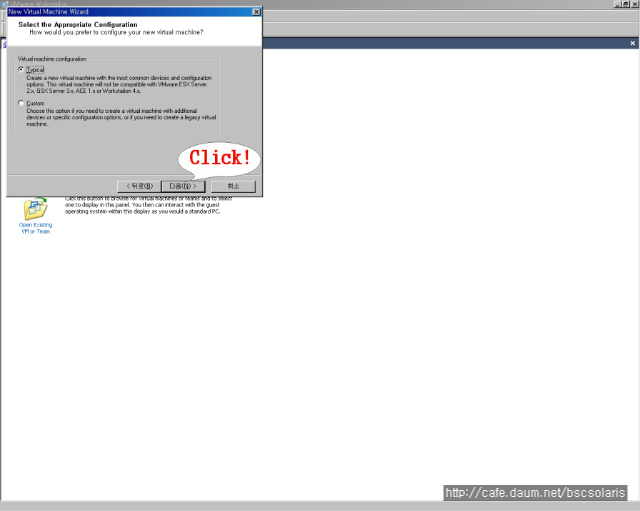
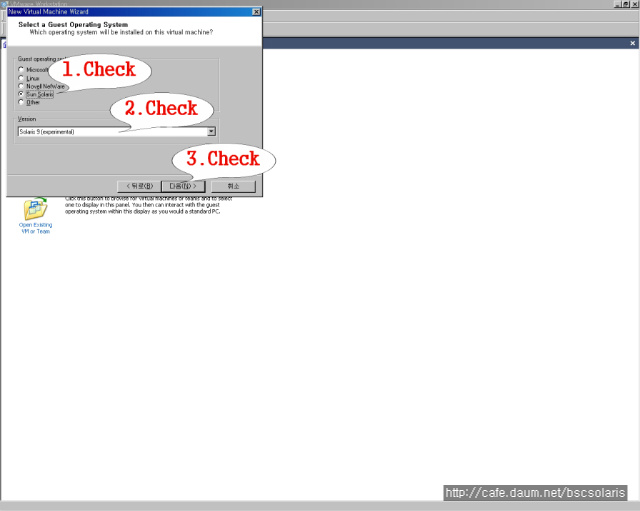
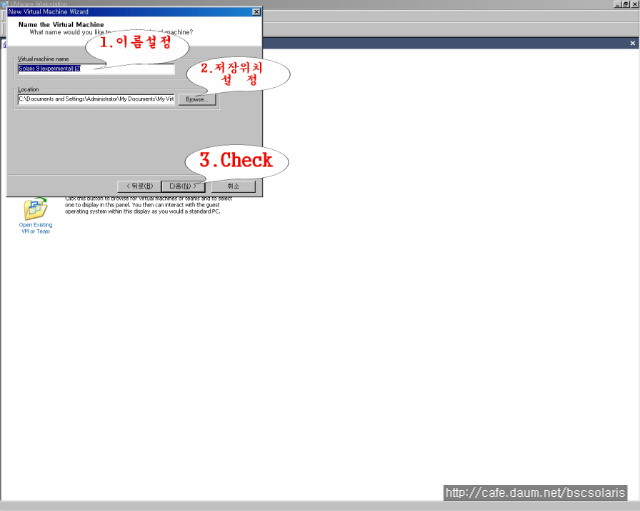
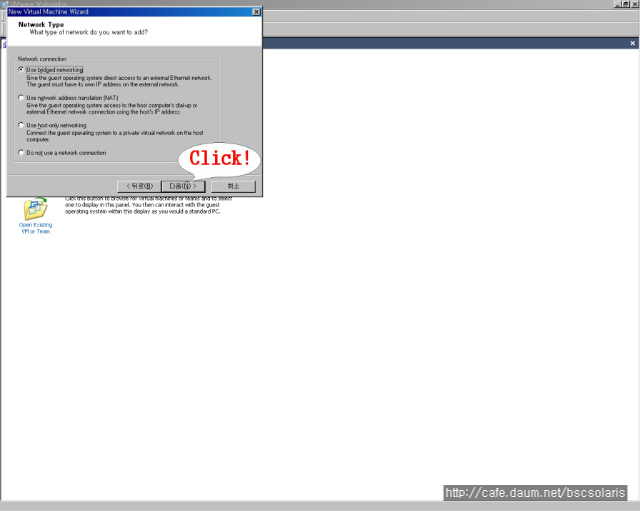
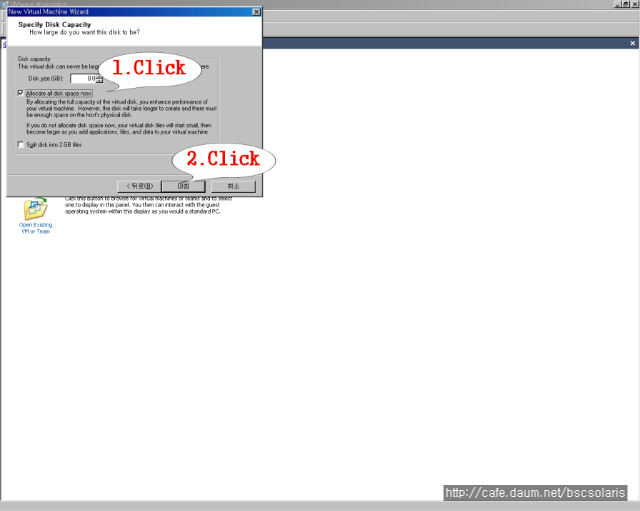
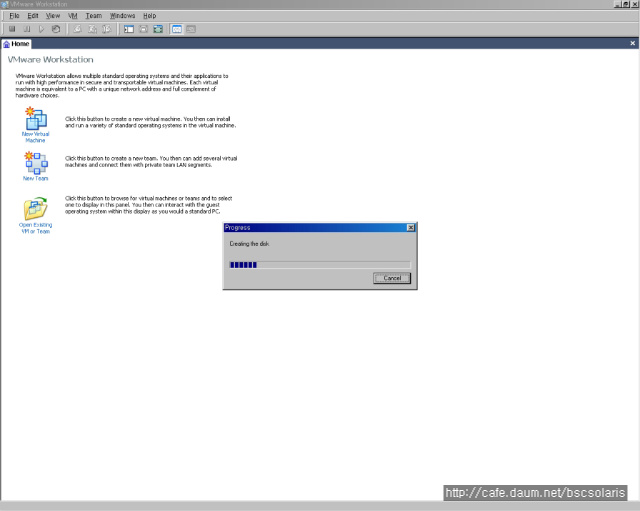
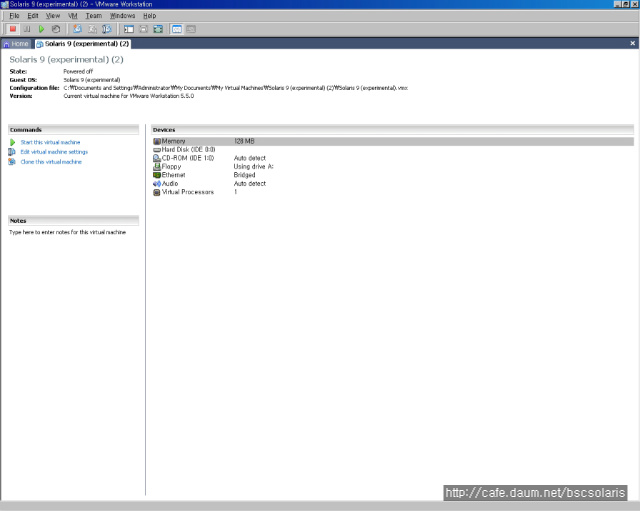
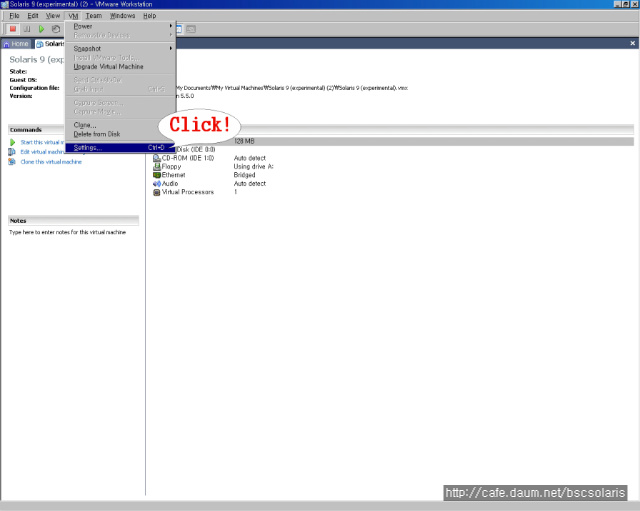
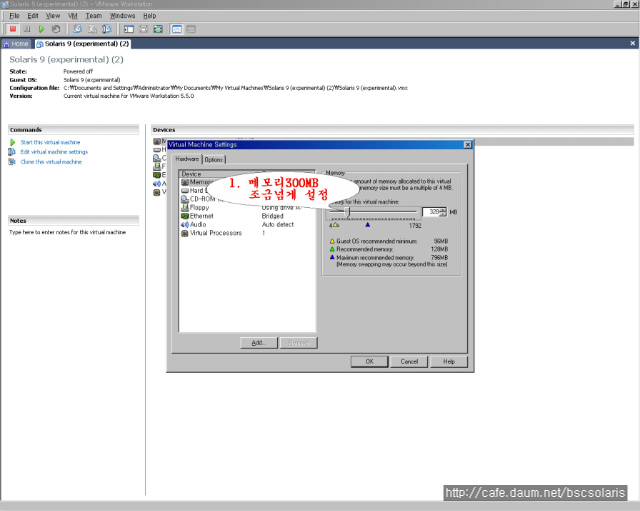
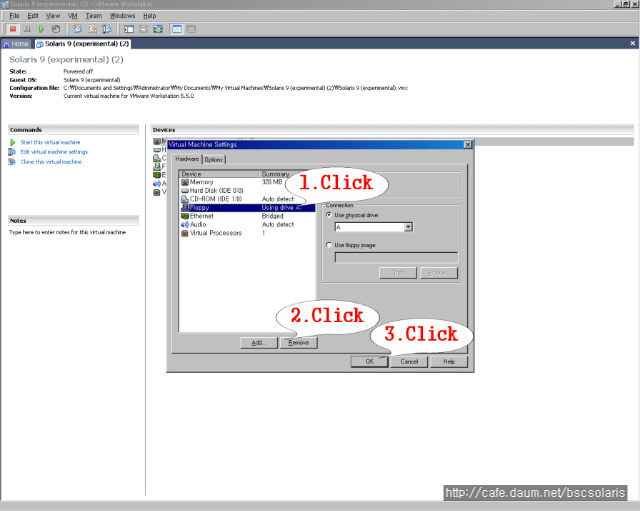
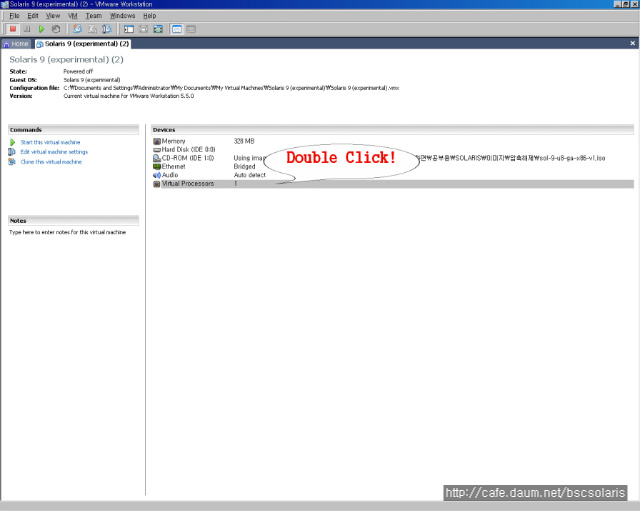
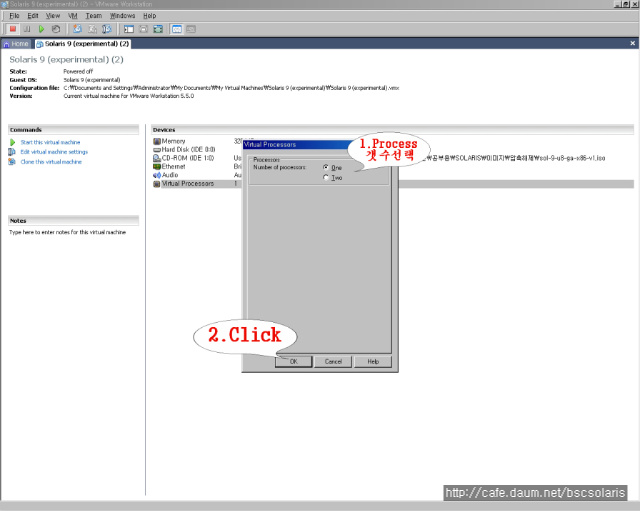
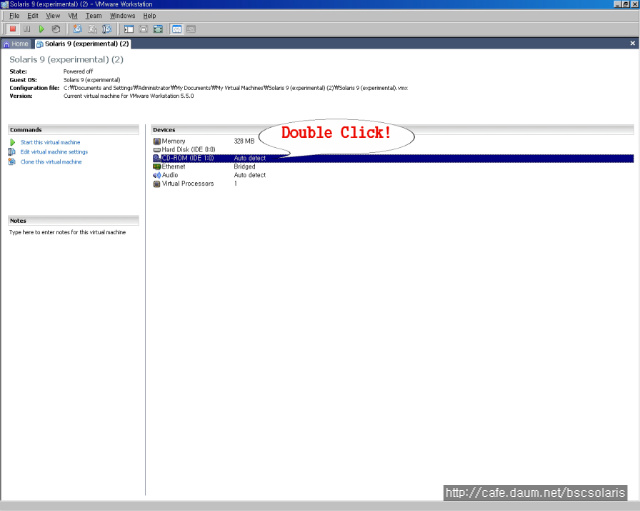
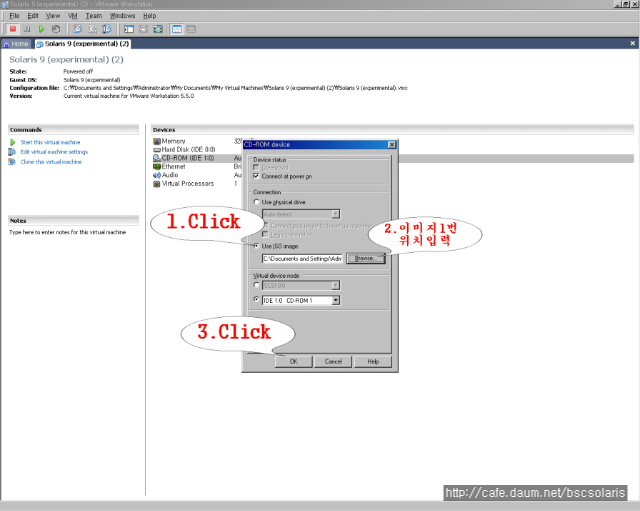
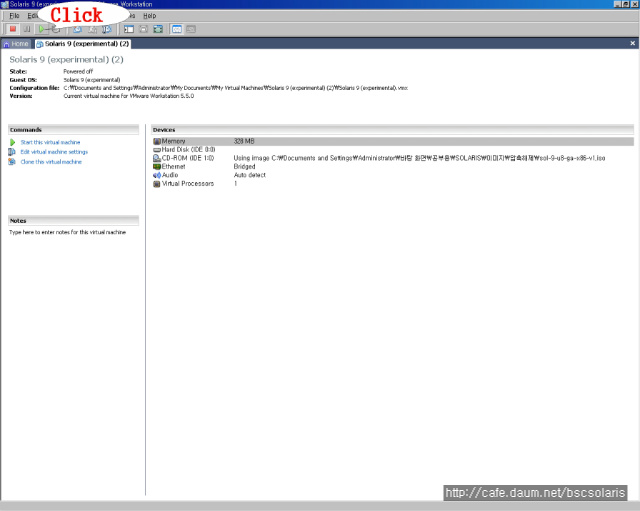

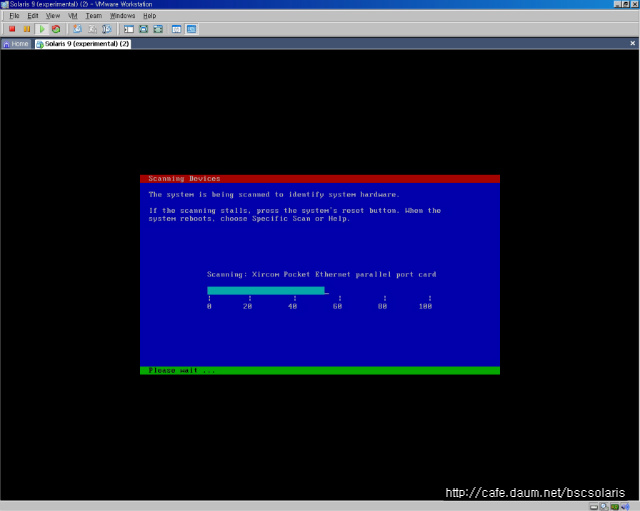
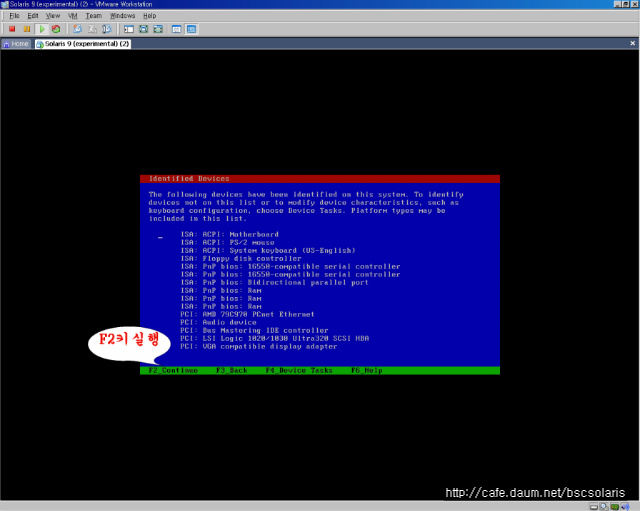
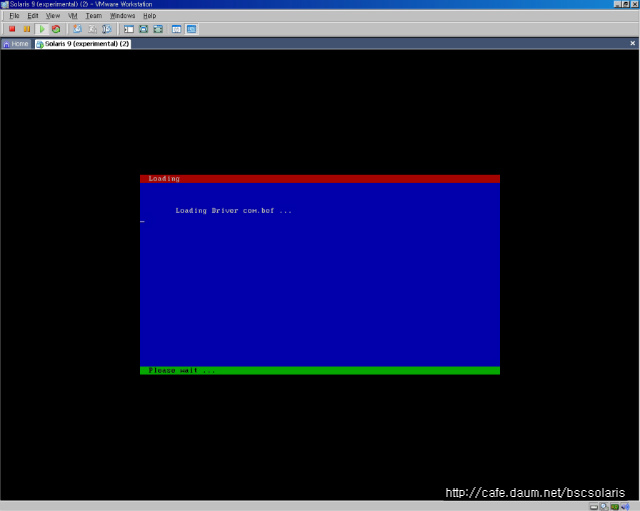
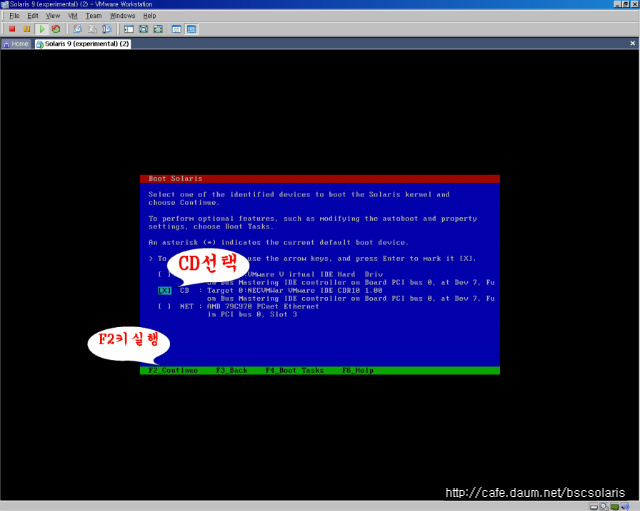
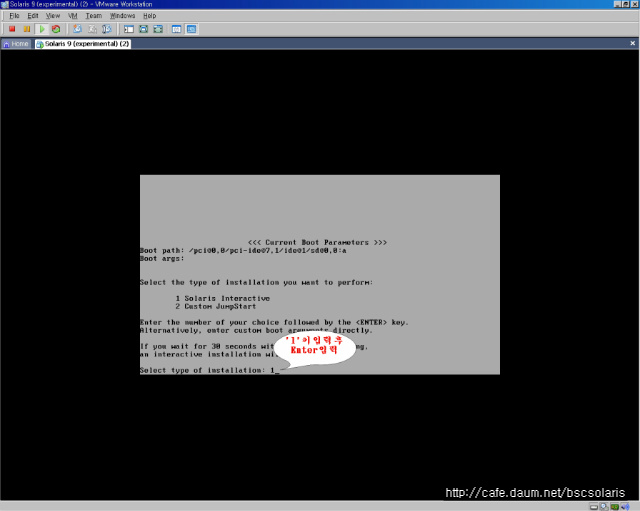
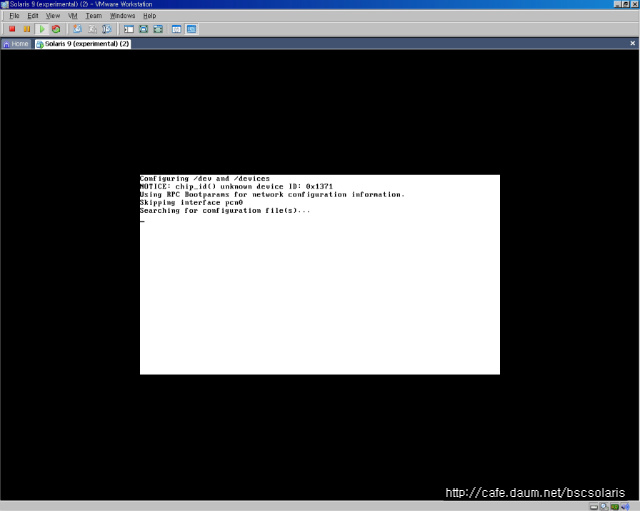
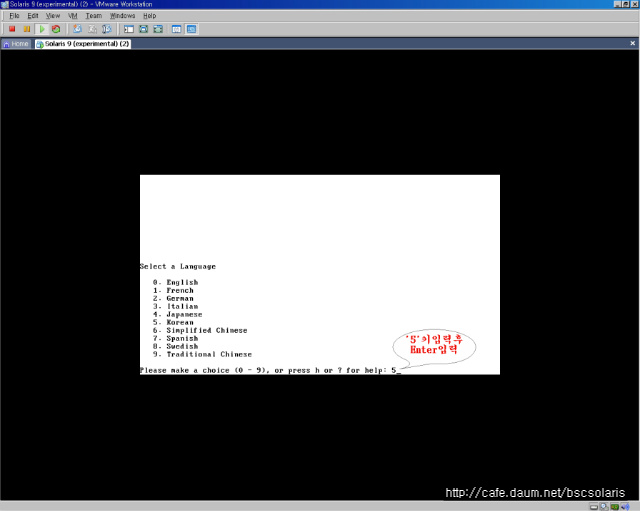
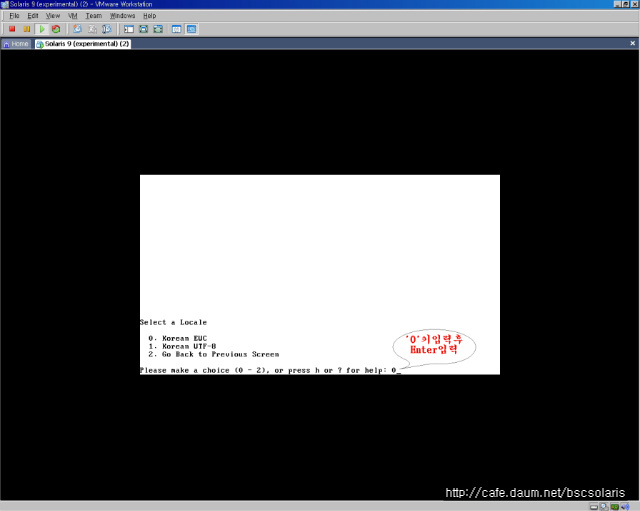
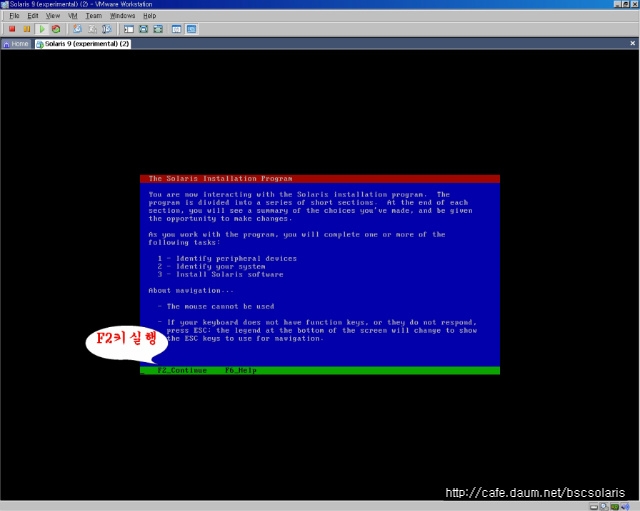
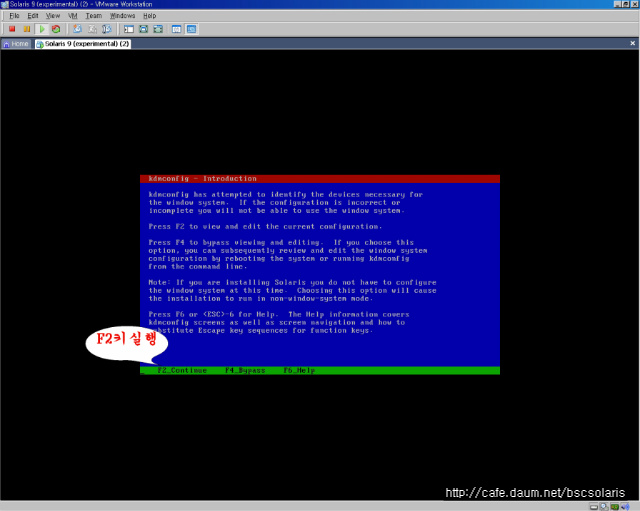

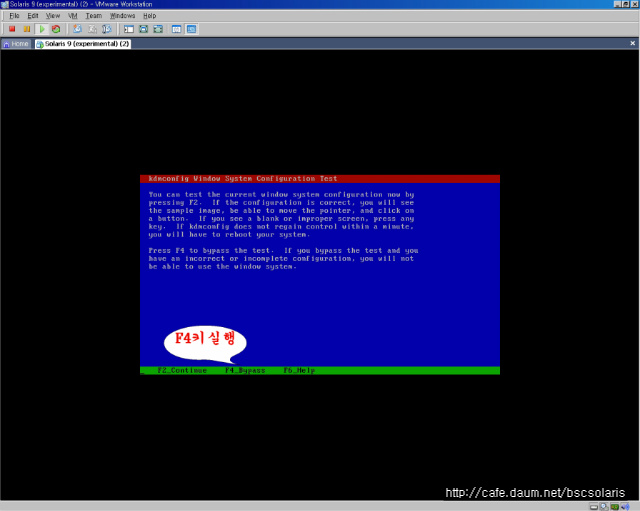

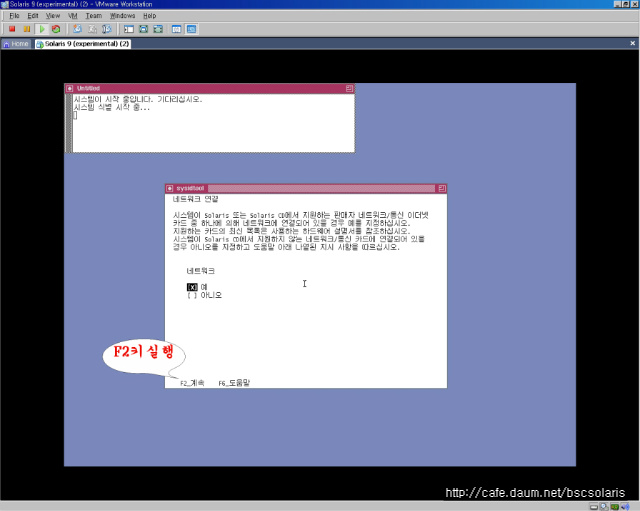

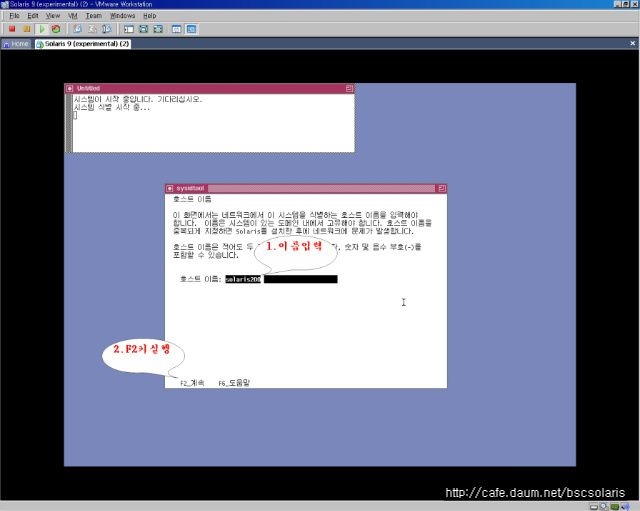


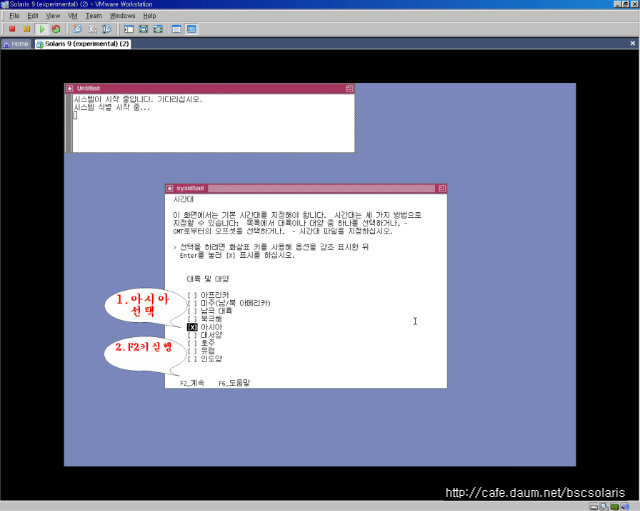
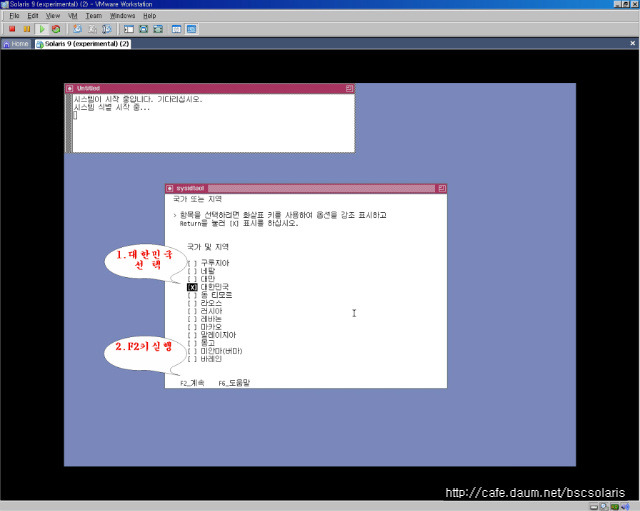
 Prev
Prev
 Rss Feed